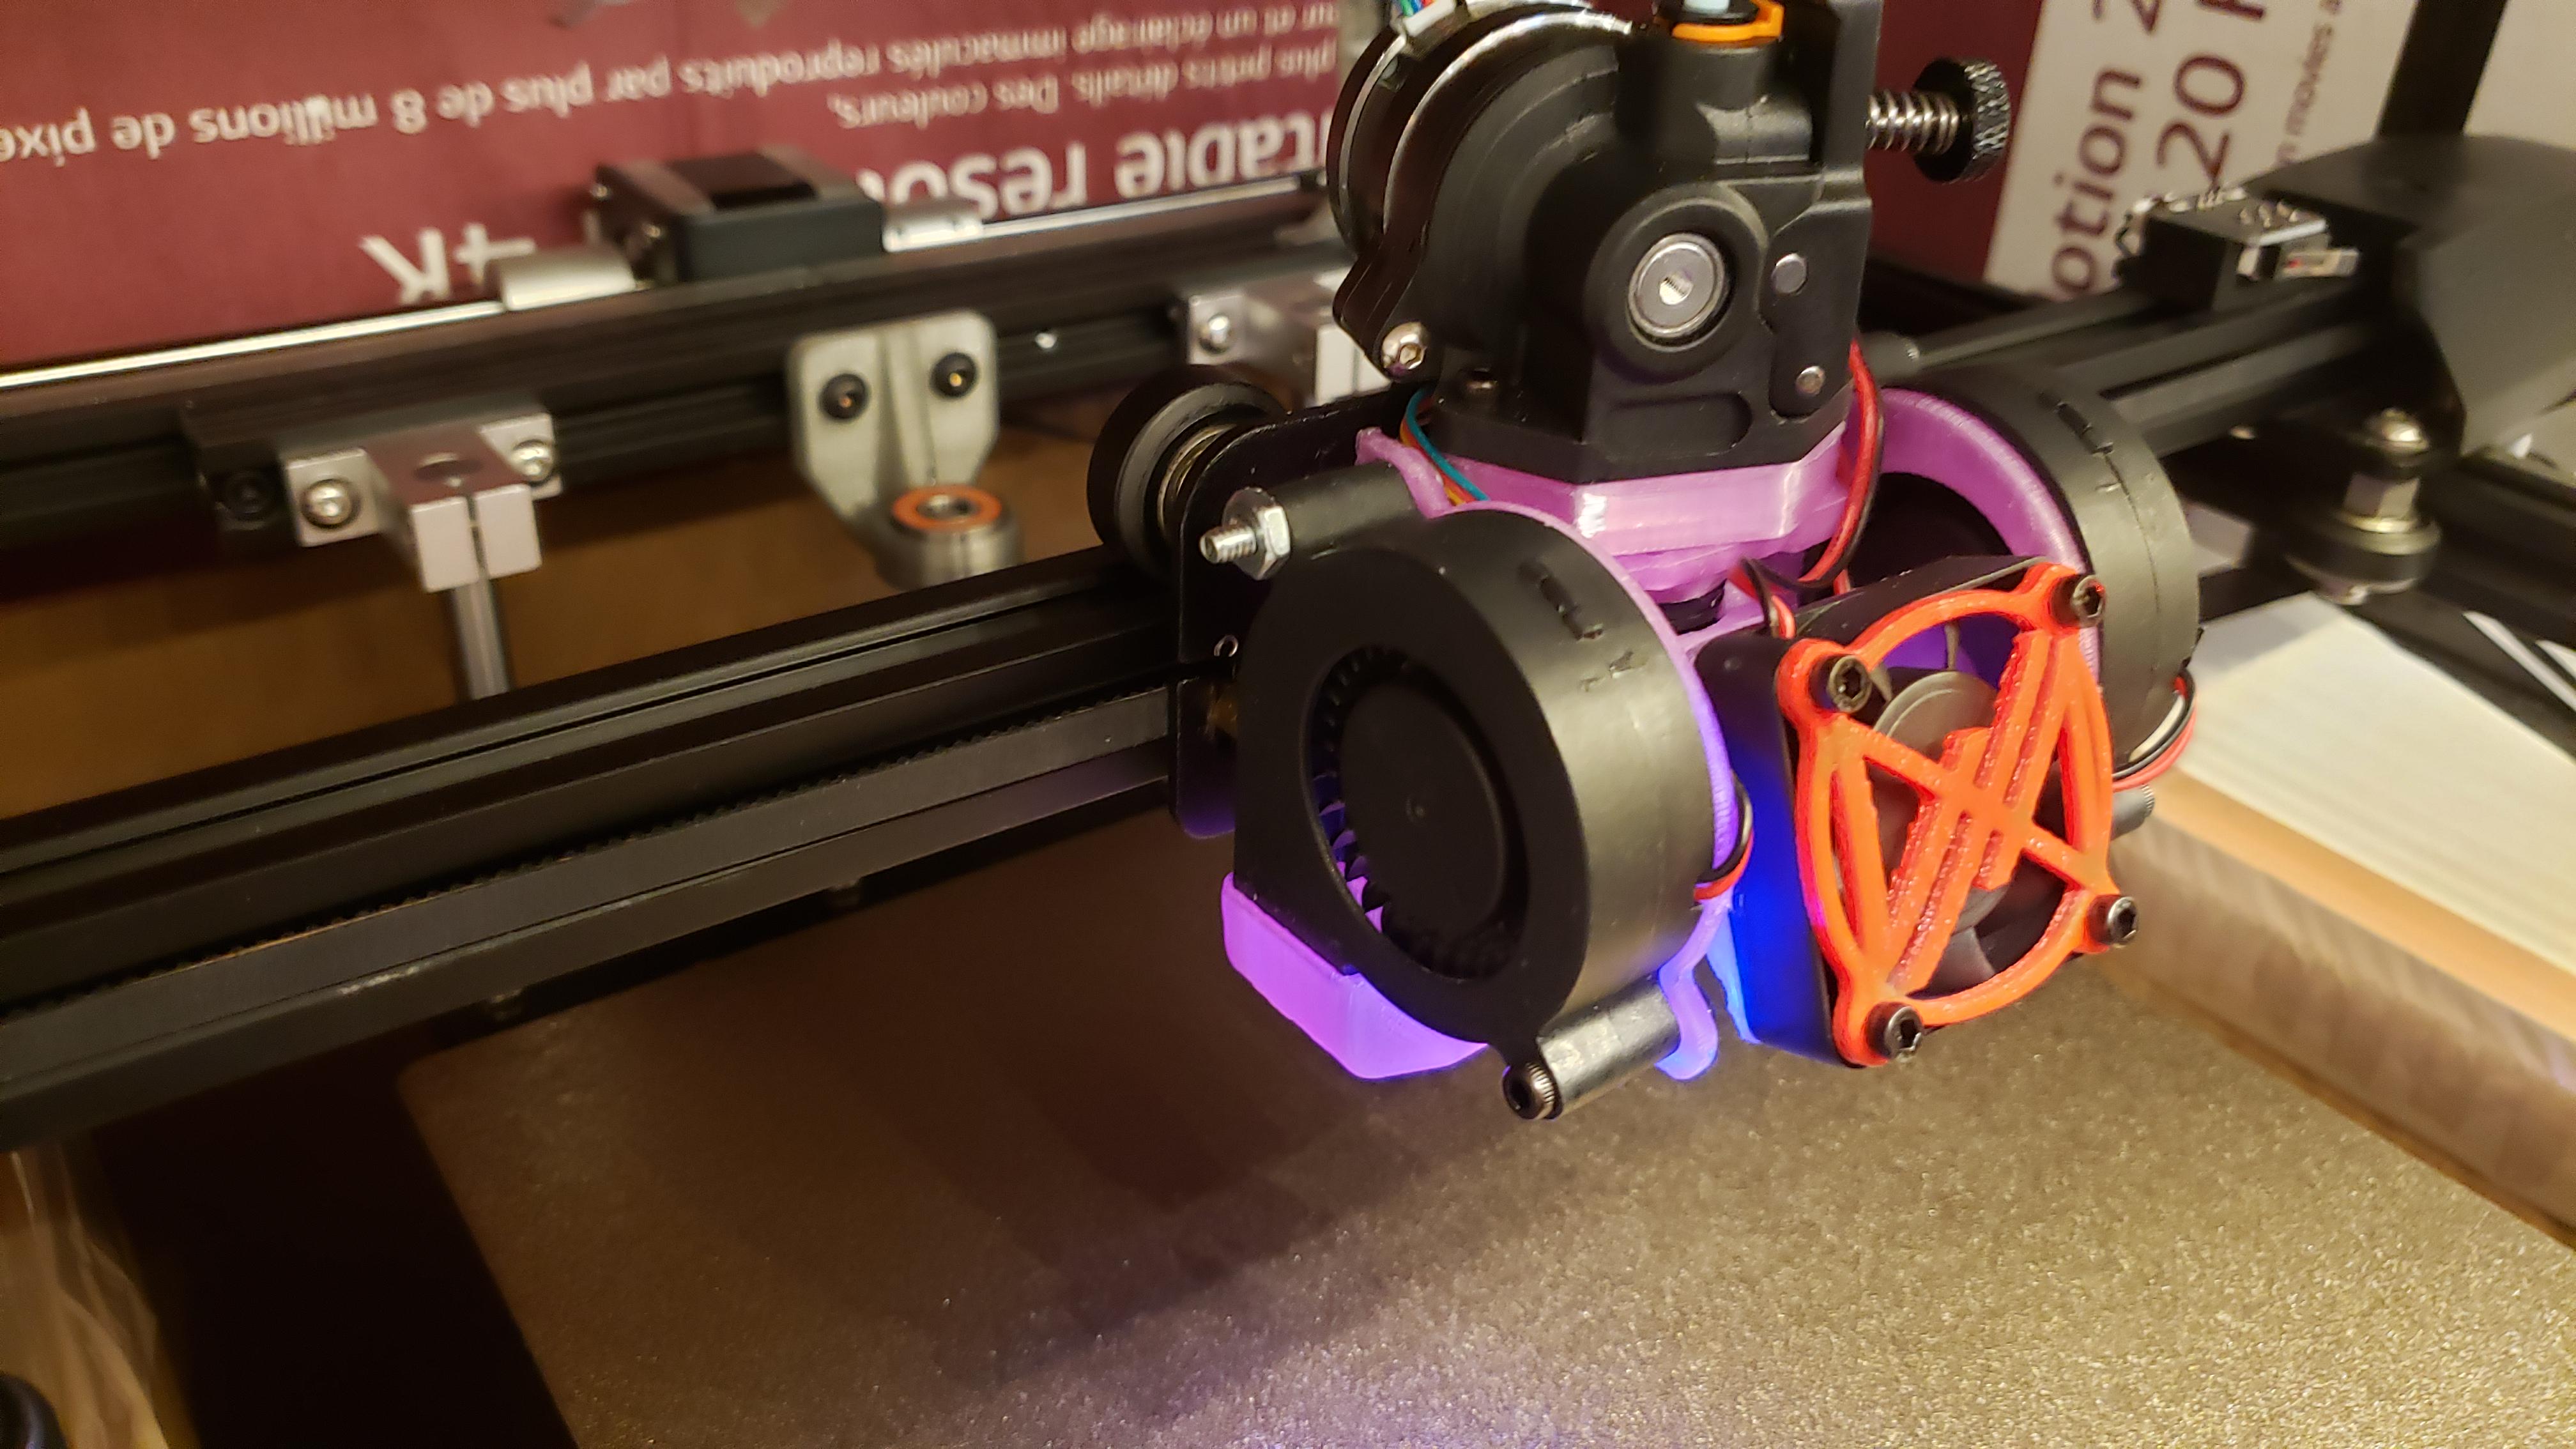
Ender 5 Pro Lightweight DD Overhaul - Phaetus Rapido & Orbiter 2 (Remix)
prusaprinters
<p>Would like to thank Okef256 for the original model. It doesn't seem to get much attention, but it is great.</p><p><strong>Modifications:</strong></p><ul><li>Modified mount to attach to Ender 5 mount plate instead of linear rails.</li><li>Added hex holes to allow install with 3mm nuts instead of heat insets. No soldering iron required.</li><li>Moved the ABL sensor location to the inside of the fan, preventing collision with X axis carriage and reducing distance from hotend (gaining ~5mm lost on X originally and to improve range of bed mesh).</li><li>Extended and tilted 40mm hotend fan duct to allow clearance with ABL sensor.</li><li>Slightly widened mount plate to assist with clearances and access. Added mount holes to mount Orbiter with motor facing the front or the rear.</li><li>Created a spacer to lift the Orbiter and allow rear mounting the motor and providing clearance over the Ender 5 mount plate. Added v2, which is 2mm taller and grips mount plate, providing stiffer platform for motor. Only needed because I am printing in heated chamber, which caused a bit of flex on the normal bracket.</li><li>Modded L and R Ducts again. I am printing ABS in a 50C chamber and the thin ducts kept melting, even when printed in ABS (transparent). So, v2, I thickened the top of the vent by 1.5mm, then added a grill to hold up the bottom. Previous started sagging within hours, these have gone days and still look nearly new. Pics of melty ducts above.</li></ul><p><strong>Why?</strong></p><p>Of all the Rapido hotend setups I saw, this one seemed the lightest, and also used the Orbiter. I had a Hero Me setup I was happy with, but it was in PLA. I had to reprint everything in ABS or PETG to print in a heated chamber. I also wanted something that didn't require complete removal of mount plate, belts and such to maintain and modify. Two rear screws secure the mount to the gantry plate. The two posts used for the MK8 can be used as well. The one rear right screw from behind can be left off if you don't want to remove the plate. The MK8s and top left screw should be sufficient. Especially if you use the v2 Orbiter mount. It will provide a stable grip across the entire top of the mount plate. I think this is important on the Ender 5 and you have Y movement also, so any flex would be bad. The original for Ender 3 didn't have to worry about Y movement. My version is not as light, but is sturdy and quick/easy to maintain. </p><p><strong>Print</strong></p><p>Printed using Voron settings. 40% infill, 4 walls, .2 layer height. For Open air printing, PLA is good. Heated chamber, you will need ABS or better. Recommend printing ducts with supports. I have printed them without support, and they worked, but they come out cleaner with supports painted on the middle section of the ring and propping up the duct. The inside of the duct area does not require supports. I included a photo to show how that turns out.</p><p><strong>Hardware</strong></p><p>The printer is running for the next 8 hours or so. I will post lengths to the best of my memory, until I can verify.</p><p>2x - 5015 blower fans</p><p>1x - 4010 radial fan (original build includes a 25mm fan, which should work as well)</p><p>1x - Orbiter 2.0 extruder</p><p>1x - Phaetus Rapido HF</p><p>1x - BL Touch or clone</p><p>2x - M3 8mm bolts and 2x nuts (top rear , right rear bolt and nut)</p><p>8x - M3 4mm bolts and 4x nuts (4 to attach ducts, 2 for ABL and 2 for MK8 mount location)</p><p>4x - M3 20mm bolts and 4x nuts (attach 5015 fans to ducts.)</p><p>4x - M2.5 8mm bolts (for rapido, included with hotend)</p><p>2x - M3 12mm bolts and 2x nuts for Orbiter mount</p><p><strong>My thoughts:</strong></p><p>I have tried quite a few hotend setups. Some are convenient, some are sturdy, few are both. The Hero Me is great, but takes a lot of work to put together, install and then it has to be disassembled to get to the hotend, not fun on the Ender 5. I used several other setups that were convenient, but either heavier or less sturdy. This setup is small, easy to install and maintain, and sturdy. The only thing I don't like on this setup is the fan. It likely was more sturdy in the original setup, but sits too loose, in a heated chamber anyway. I will likely design a better hotend fan solution, this was quick and dirty. I would also like some higher sitting ducts. I was spoiled with the visibility from the Hero Me. This one isn't bad compared to most others I have used, but not as good as the HeroMe. I did lose Z height with the Hero Me. This setup is actually higher than stock one by a few mm, so gained a little z-height. It also clears the X axis belt clips. That is rare for most of the ducts I have tried. I do need to move or change the adxl mount. I made a temporary one that goes around the orbiter, but need to tweak STL. It wasn't quite right, and required filing. Will post if anyone is interested. </p>
With this file you will be able to print Ender 5 Pro Lightweight DD Overhaul - Phaetus Rapido & Orbiter 2 (Remix) with your 3D printer. Click on the button and save the file on your computer to work, edit or customize your design. You can also find more 3D designs for printers on Ender 5 Pro Lightweight DD Overhaul - Phaetus Rapido & Orbiter 2 (Remix).
