Ender 5 Plus Linear Rail Mods
prusaprinters
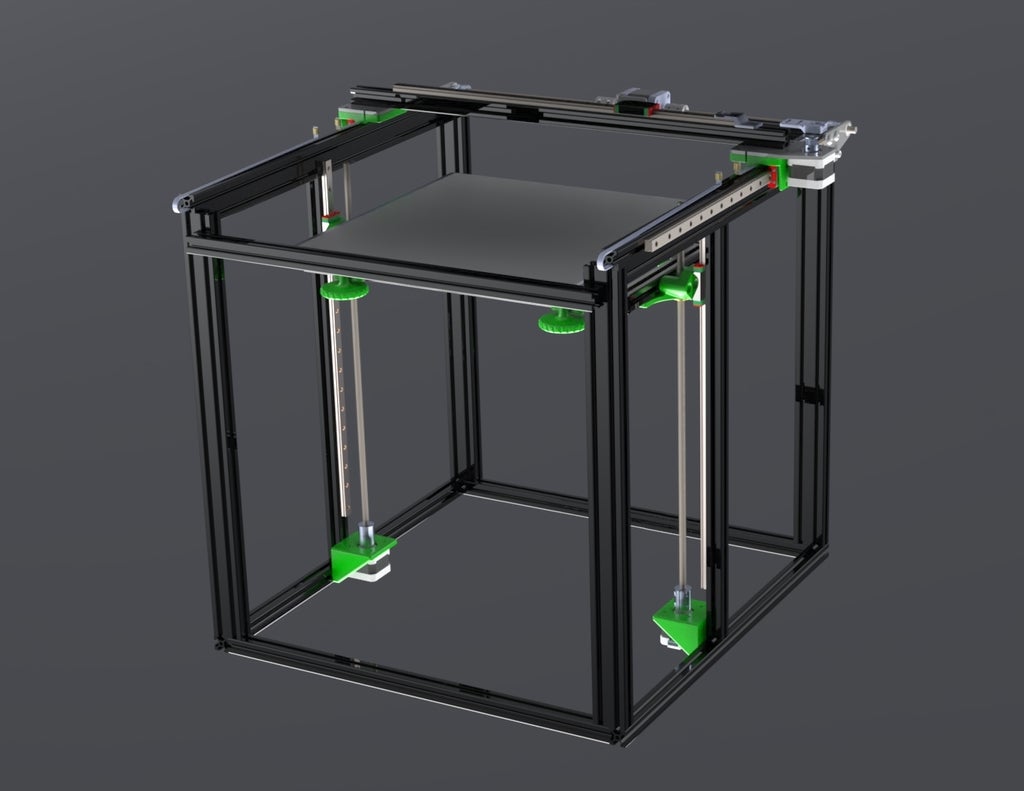
<p>This is a linear rail mod for the Ender 5 Plus. It encompasses the XY&Z axis. I designed these parts because I was unhappy with most other mod variations of them.</p><p>Z Axis - The Z axis part were designed using the BLV MGN Cube as a starting point. I can't find it to tag it as a remix though. I made this mod primarily because I kept having binding issues with the stock rods. Overall I believe it to be a much better setup and it has fixed all the issues I was having with Z axis lines. This mod can be used entirely on it's own or in combination with the XY mod. The knobs for the bed are designed for use with M4 heat inserts. But I will add another for M4 nut eventually.</p><p>G34 - This mod can be used in combination with G34 Z Stepper Auto-Align if you ever change to an SKR or equivalent to make the motors independent.</p><p>Materials needed to purchase:</p><p>2x 450mm Linear Rails with MGN12H Bearing - I used these https://www.amazon.com/gp/product/B077MFSF5F?ie=UTF8&psc=1&linkCode=sl1&tag=jacobelliott-20&linkId=97ef77c324068a07ed3c5c585c676641&language=en\_US&ref\_=as\_li\_ss\_tl</p><p>2x 193mm 2020 Aluminum Extrusion - I used https://www.amazon.com/gp/product/B077MFSF5F?ie=UTF8&psc=1&linkCode=sl1&tag=jacobelliott-20&linkId=97ef77c324068a07ed3c5c585c676641&language=en\_US&ref\_=as\_li\_ss\_tl<br/>2x 407mm 2020 Aluminum Extrusion<br/>2x 409mm 2020 Aluminum Extrusion</p><p>You will also need various M3 and M5 hardware and corner brackets to mount the vertical extrusions and bed.</p><p>Y Axis - This mod was designed to still use the mounting plates on the X axis extrusion. The design not only allows for use of linear rails, but it also helps to lower the belts to a much better path for the pulling force.</p><p>Materials needed to purchase:</p><p>2x 450mm Linear Rails with MGN12H Bearing - I used these https://www.amazon.com/gp/product/B077MFSF5F?ie=UTF8&psc=1&linkCode=sl1&tag=jacobelliott-20&linkId=97ef77c324068a07ed3c5c585c676641&language=en\_US&ref\_=as\_li\_ss\_tl</p><p>You will also need various M3 and M5 hardware.</p><p>X Axis - All you have to do is add a linear rail to the extrusion. There are plenty of hotend mods out there that will be compatible with this. I highly recommend the EVA Modular system. <a href="https://main.eva-3d.page/#contact">https://main.eva-3d.page/#contact</a></p><p>1x 450mm Linear Rails with MGN12H Bearing - I used these https://www.amazon.com/gp/product/B077MFSF5F?ie=UTF8&psc=1&linkCode=sl1&tag=jacobelliott-20&linkId=97ef77c324068a07ed3c5c585c676641&language=en\_US&ref\_=as\_li\_ss\_tl</p><p>This project is still a bit of a work in progress. I need people to test the parts and make any recommendations on improvements they may have. I'll continue to update this as much as I can.</p><p> </p><p>UPDATE 08/16/2021: I changed the Z axis lead screw mount by cutting M3 nut slots in the top for easier assembly. This change also allows an anti-backlash spring on the top half instead of the bottom which will help save Z axis travel. Also made some minor cosmetic changes to the Z motor mounts for better prints. I also added a bed leveling knob that accepts an M4 nut. So now you have the option of using heat inserts or nuts.</p><p> </p><p> </p><h3>Print Settings</h3><p><strong>Printer Brand:</strong></p><p>Creality</p><p><strong>Printer:</strong></p><p>Ender 5</p><p><strong>Rafts:</strong></p><p>No</p><p><strong>Supports:</strong></p><p>No</p><p><strong>Resolution:</strong></p><p>200</p><p><strong>Infill:</strong></p><p>30</p><p><strong>Filament:</strong> Any PETG any<br/><strong>Notes:</strong></p><p>Print with a strong material such as PETG or better. Use 3 walls and 30% infill at least.</p><p>Category: 3D Printer Parts</p>
With this file you will be able to print Ender 5 Plus Linear Rail Mods with your 3D printer. Click on the button and save the file on your computer to work, edit or customize your design. You can also find more 3D designs for printers on Ender 5 Plus Linear Rail Mods.
