Ender 5 Carriage Strut
thingiverse
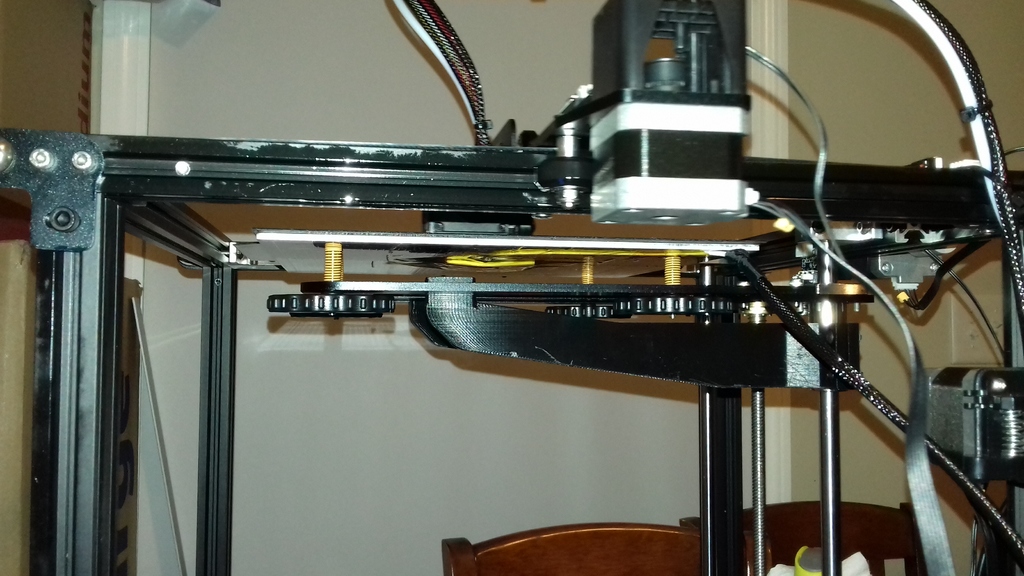
Got the Ender 5 along with my CR10S5, really like the simple drive system they came up with, so I figured I'd give it a try even though it's brand new. One thing I noticed when doing the first prints was that the carriage had a little springboard effect to it, otherwise this printer is really nice, hope they scale it up bigger. So to fix the carriage I designed up this strut. It might be a little bit of overkill, I had my 14-year-old son stand on the first test version and it didn't phase it. It clamps to the outside z-axis bearings using 4 6-32x.500 Button Head screws and 4 hex nuts per strut. Leave it loosely clamped and then snap it onto the inside of the carriage cutouts and then tighten the screws. Level the bed and you're good to go. After I calibrated the printer, it's producing amazing surface finish and accuracy. I printed them laying down unlike the STL view that shows them standing up. Updates 12-17-2018: Added Strut files that are modified to use M4 Screws and Hex Nuts. Updates 1-8-2019: Added the Clamp plates in both Metric and Inches to the STL files as just separate files so if they're needed, they can be printed separately.
With this file you will be able to print Ender 5 Carriage Strut with your 3D printer. Click on the button and save the file on your computer to work, edit or customize your design. You can also find more 3D designs for printers on Ender 5 Carriage Strut.