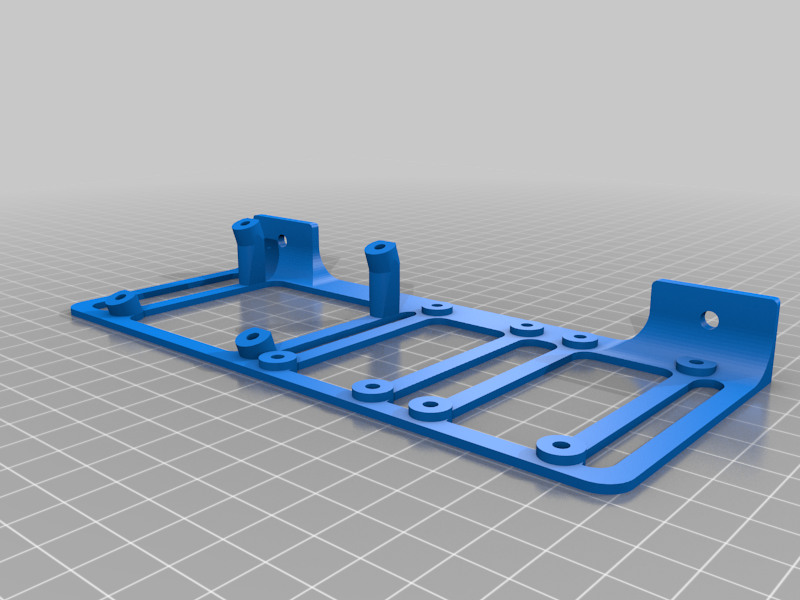
Ender 5 - Additional electronics plate - with Raspberry Pi
prusaprinters
<p>A buck-converter mounting plate that screws to the PSU of the Ender 5, and catches behind the power-switch for stability.</p> <p>I designed it to mount 2 of the LM2596 modules with voltage display (see image) and a Raspberry Pi.</p> <p>Hardware requirements; some nuts and screws, nothing special. You could use a tap for and screw in m4 bolts, but for something electrical, I prefer to use a nut to make sure the screws stay fixed :)</p> <p>The bolts that fix the plate to the PSU should be M4x8, no longer. The plate is 3mm thick at that point on purpose; the PSU has 5mm thread (as described in the spec sheet), so M4x8 will be safe. There MIGHT be more room inside, but I have not opened my PSU to check. Leave a comment if you know more than I do ;)</p> <p>The Raspberry Pi mounts under an angle. This is not harmful at all, but if you are not careful, you might accidentally short the GPIO pins on the case. I strategically stuck a bit of electrical tape on the case to prevent shorts.</p> <p>One could, of course, design and print a GPIO cover that would insulate it ... New project idea :P</p> <h3>Hardware list</h3> <p>2x M4x8 for mounting the plate to the PSU<br/> 12x M3 nut<br/> 12x M3x5 for mounting the buck converters and RasPi to the mount.</p> <h3> Warning!</h3> <p>The raspi has M2.5 holes, just ease (and I do mean EASE) the M3 bolt in one turn in, half-a-turn back, then undo and repeat 2 more times.<br/> This will slowly widen the mount holes. It's fine, just do it really, really carefully.</p> <h3> final note</h3> <p>If you like it, click the like (heart)<br/> If you print it; post a make<br/> If you have suggestions for improvements, questions, any kind of remarks; leave a comment</p> <p>Looking at the download statistics, you guys and gals out there really like this thing :) so, leave a like, a make, a comment.<br/> Much appreciated!</p> <h3> Print Settings</h3> <p><strong>Printer Brand:</strong></p> <p>Creality</p> <p><p class="detail-setting printer"><strong>Printer: </strong> <div><p>Ender 5</p></div><strong>Rafts:</strong></p> <p>No</p> <p><p class="detail-setting supports"><strong>Supports: </strong> <div><p>Yes</p></div><strong>Resolution:</strong></p> <p>.1</p> <p><p class="detail-setting infill"><strong>Infill: </strong> <div><p>40%</p></div><br/> <strong>Filament:</strong><br/> [</p> <h3> REAL PLA ](http://www.amazon.com/s?url=search-alias&field-keywords=REAL+PLA&tag=thingiverse09-20) Orange Buck Converter</h3> <h3> My Ender-5 build so far</h3> <p><a href="/make:890134">https://www.thingiverse.com/make:890134</a></p> </p></p></p> Category: 3D Printer Parts
With this file you will be able to print Ender 5 - Additional electronics plate - with Raspberry Pi with your 3D printer. Click on the button and save the file on your computer to work, edit or customize your design. You can also find more 3D designs for printers on Ender 5 - Additional electronics plate - with Raspberry Pi.
