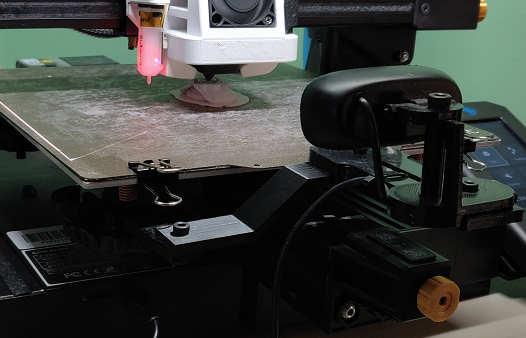
Ender 3v2 Bed Level Locks (w/ Handle)
prusaprinters
<p>This combines a bed handle with the bed level knob locks.</p> <p>Bed Locks are labeled for easier install...</p> <p>LF = Left Front</p> <p>RF = Right Front</p> <p>LR = Left Rear</p> <p>RR = Right Rear</p> <p>Tested on Ender 3v2 but might work for Ender3/3Pro and possibly CR series.</p> <p>If you only what the bed locks, you can print 2 sets of the Rear bed locks and use them as follows...</p> <p>Right Rear goes on Right Rear and Left Front</p> <p>Left Rear goes on Left Rear and Right Front</p> <p>Next Component will include a camera mount for the bed handle.</p> <h3>Print Settings</h3> <p><strong>Printer Brand:</strong></p> <p>Creality</p> <p class="detail-setting printer"><strong>Printer: </strong> <div><p>Ender 3 Pro</p></div> <p><strong>Rafts:</strong></p> <p>No</p> <p class="detail-setting supports"><strong>Supports: </strong> <div><p>Yes</p></div> <p><strong>Resolution:</strong></p> <p>.16</p> <p class="detail-setting infill"><strong>Infill: </strong> <div><p>50%</p></div> <p><strong>Filament:</strong> Overture PETG Black</p> <p><br/> <p class="detail-setting notes"><strong>Notes: </strong></p> </p><div><p>I used PETG for heat tolerance when printing in an enclosure.</p></div> Post-Printing ============= <p><strong>Assembly</strong></p> <div><p>To Install Bed Locks...</p> 1. Remove Bed Level Knobs 2. Fit Level Lock onto Level Bolt 3. Screw on Bed Level Knob and relevel. <p>To Attach Bed Handle...</p> <ol> <li>Using M4 Bolts and Nuts, Mount the bed handle on top of the front bed level locks.</li> </ol> </div></p></p></p> Category: 3D Printer Accessories
With this file you will be able to print Ender 3v2 Bed Level Locks (w/ Handle) with your 3D printer. Click on the button and save the file on your computer to work, edit or customize your design. You can also find more 3D designs for printers on Ender 3v2 Bed Level Locks (w/ Handle).
