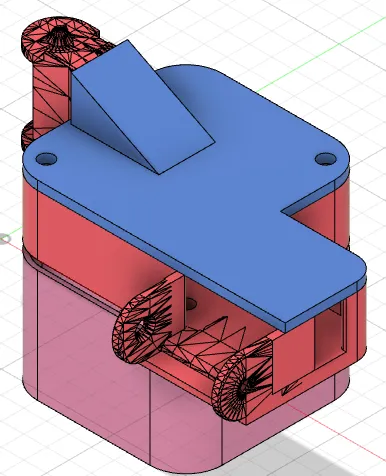
Ender 3 Z-axis Cable Chain Routing Cup
prusaprinters
This assembly is intended to be used with johnniewhiskey's cable chains. The Design of those (including the mount points on RoutingTray.stl) are attributed entirely to them.After converting my printer to direct drive, I started printing these cable chains. I realized I wanted to have a cable chain for the z axis and for the x axis, meaning I needed some kind of joint between them. With the newly freed spot where my extruder motor once was, I had the idea of mounting it there. Then I realized I had a lot of slack in the NMEA motor wire extension I bought for the direct drive setup. Which made me realize I could stuff away the slack in a cup through the hole the motor used to go through. That is where this design came from.To assemble, place cup.stl under the bracket (where the stock motor would go), place RoutingTray.stl on top of the bracket. Align the screw stems of the cup to the corners of the tray which does not have screw stems and use #6 (3.3mm diameter) screws to attach both components. Assemble your cable chains, connecting up to the tray. Stuff any excess cable in the cup. Once all cables are routed, use more #6 screws to attach lid.stl to the tray. This assembly process is outlined in the attached photosThis design is just a first revision, but I figured I would put it out there for anyone in the incredibly niche situation.
With this file you will be able to print Ender 3 Z-axis Cable Chain Routing Cup with your 3D printer. Click on the button and save the file on your computer to work, edit or customize your design. You can also find more 3D designs for printers on Ender 3 Z-axis Cable Chain Routing Cup.
