Ender 3 - Z-Axis Bearing Stabilizer
thingiverse
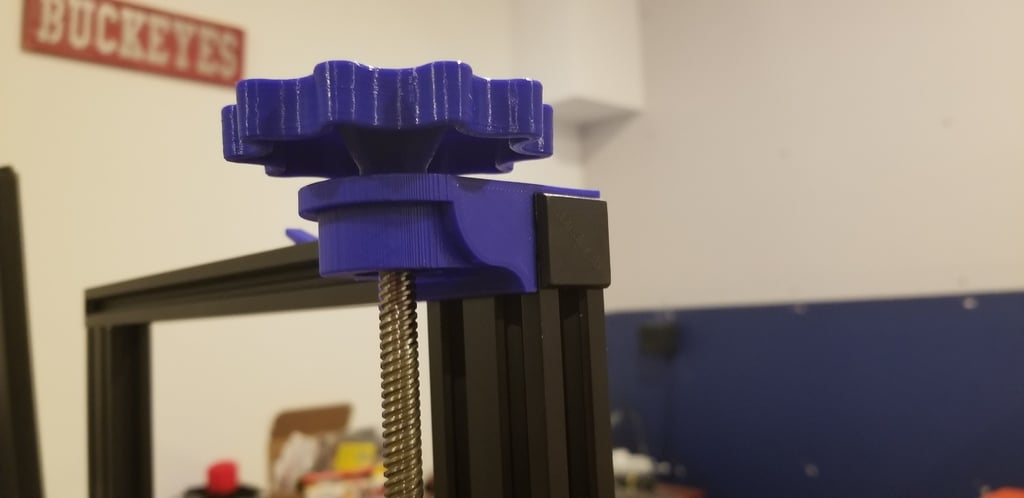
This is a z-axis stabilizer, designed to work seamlessly with the bearings found in retired fidget spinners... 22mm x 8mm x 7mm. I basically required this to provide rock-solid support for the Z-Axis Manual Adjustment Knob I had added previously. Enjoy! **Updates** * v3 - 2019.03.23 - enhanced ability to print without supports & increased depth by 2mm. * v2 - 2019.02.03 - added 0.3mm between crossbar and z-axis lead screw. **Installation Instructions** 1. Insert bearings into the printed stabilizer. 2. Remove the 4 screws holding the top crossbar in place. 3. Slide the Z-Axis Stabilizer onto the left end of the crossbar. 4. Reattach the top bar without fully tightening screws yet. 5. Turn the z-axis lead screw until the assembly is close to the top. 6. Tighten down the 4 top bar screws. You can now download and print baschz's Z-Axis Manual Adjustment Knob from Thingiverse.
With this file you will be able to print Ender 3 - Z-Axis Bearing Stabilizer with your 3D printer. Click on the button and save the file on your computer to work, edit or customize your design. You can also find more 3D designs for printers on Ender 3 - Z-Axis Bearing Stabilizer.