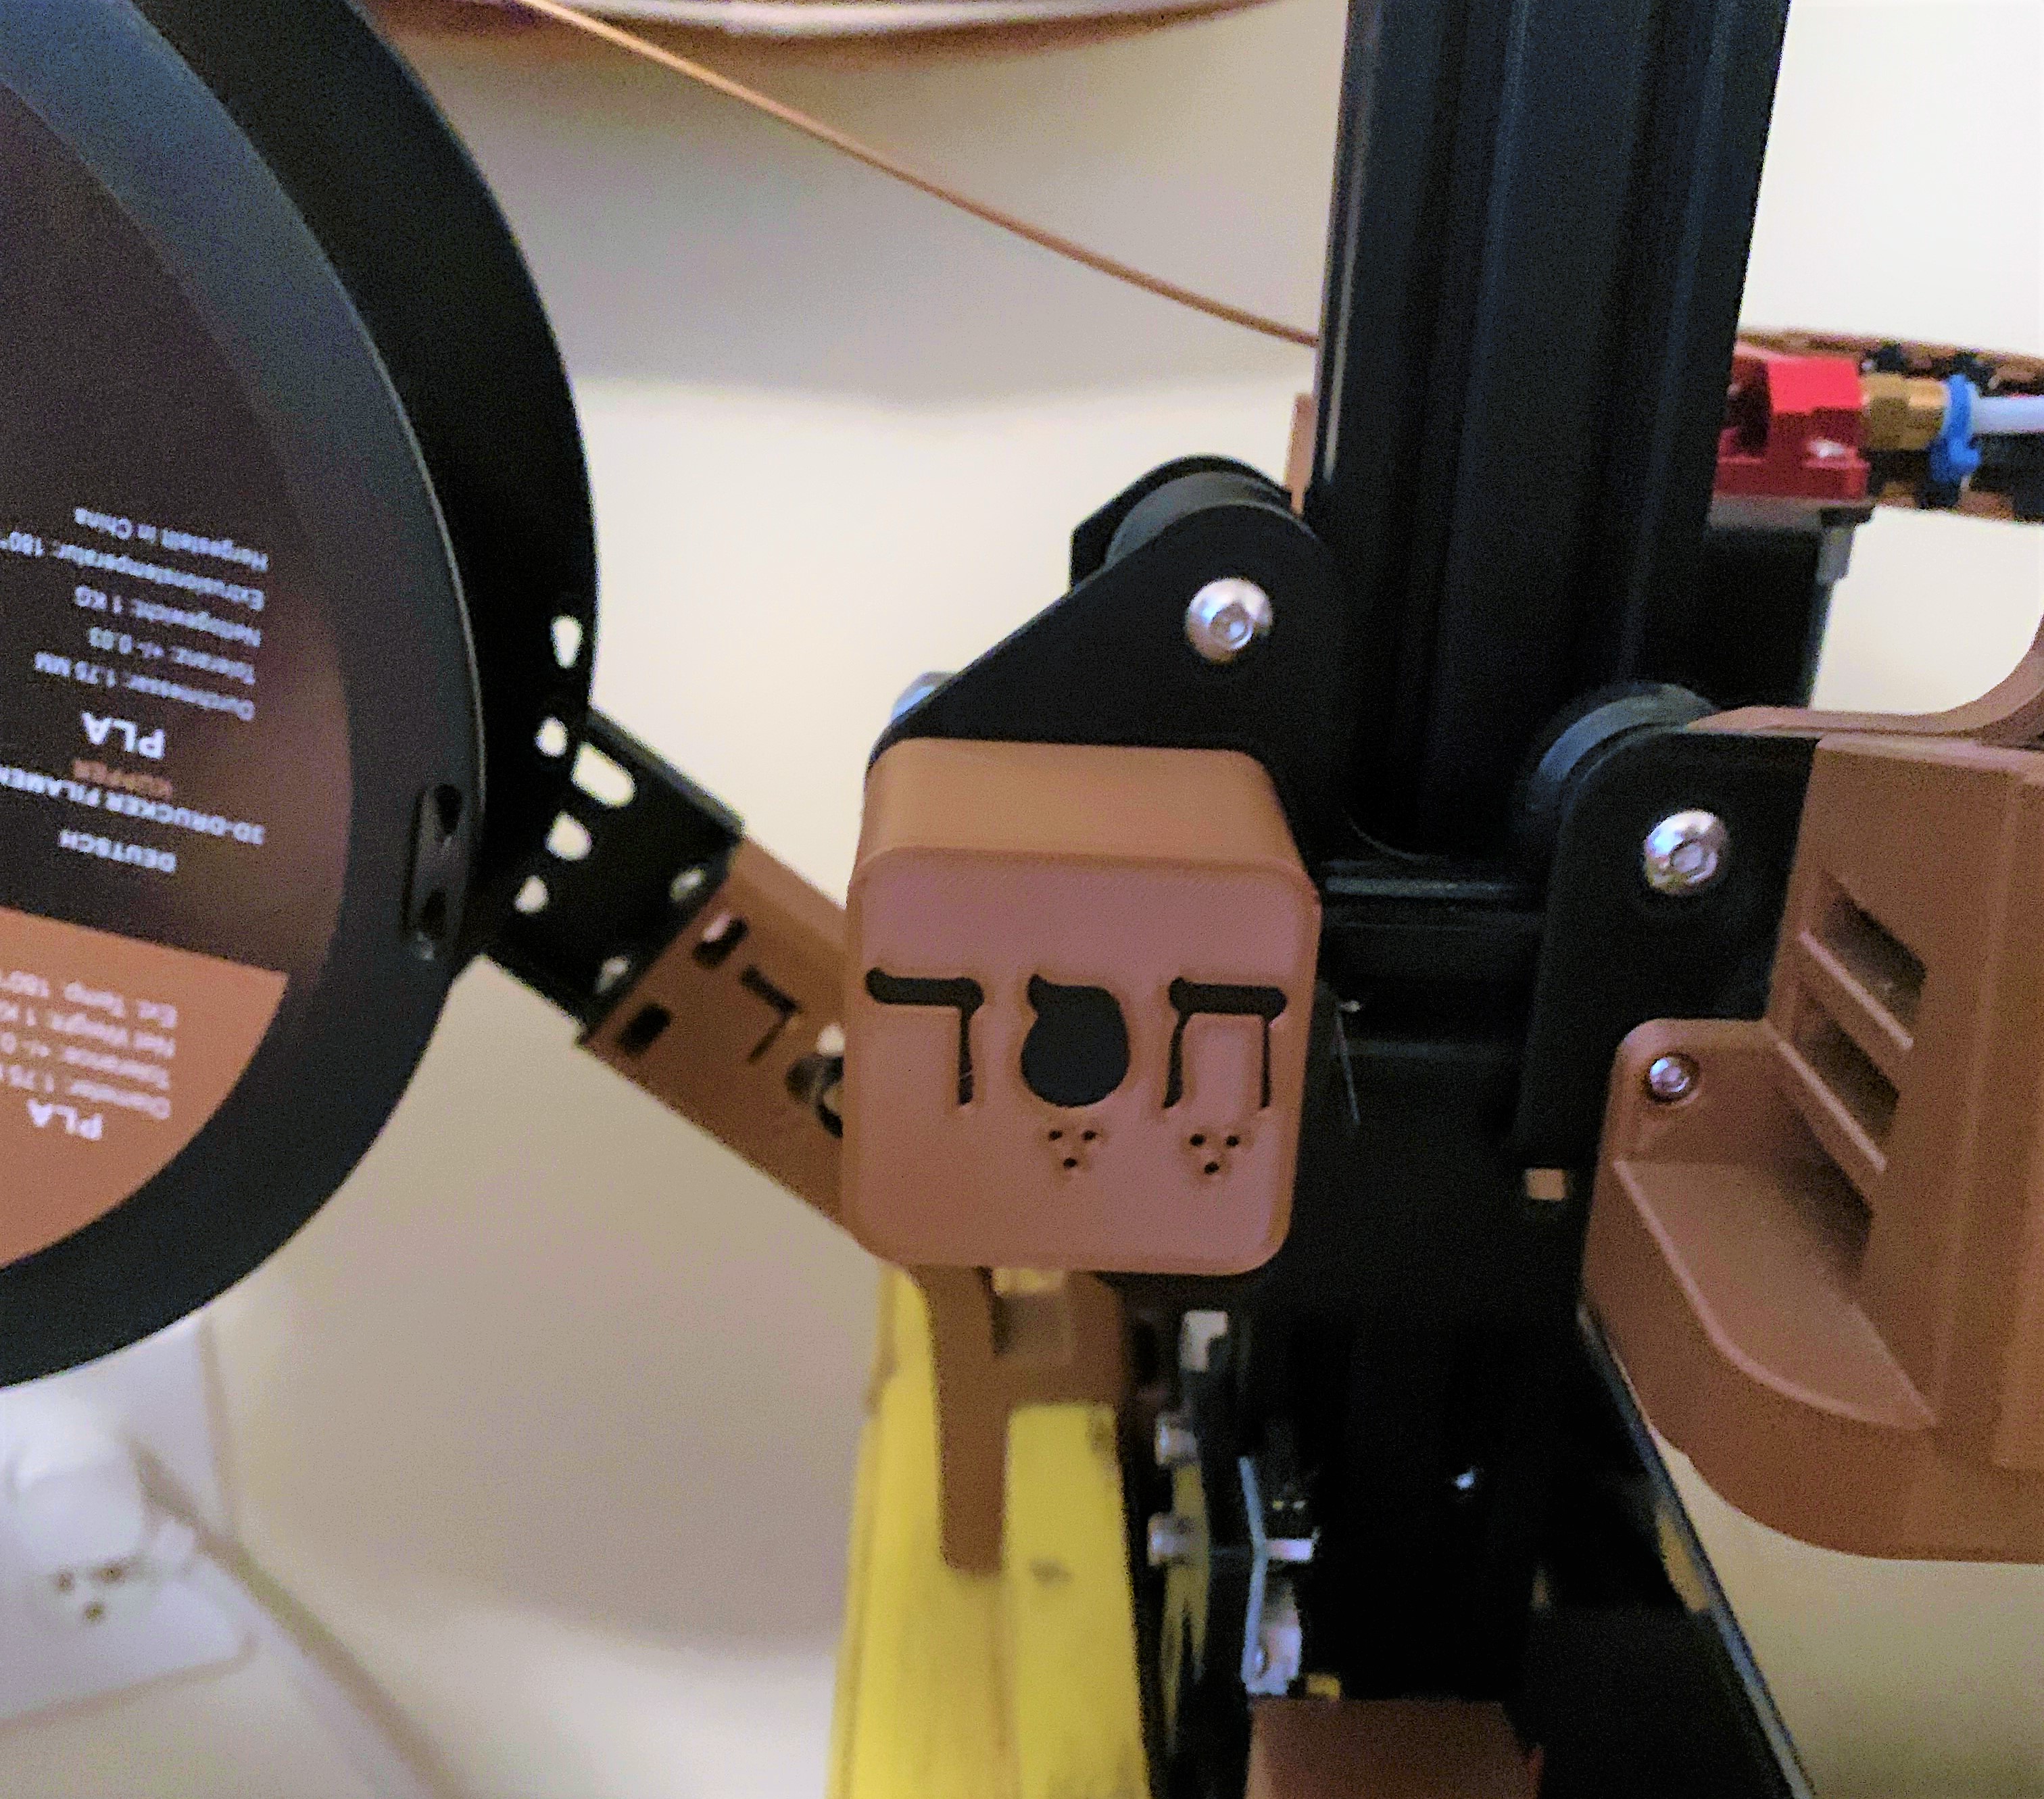
Ender 3 X Motor Cap (Customizable Logo)
prusaprinters
<p>This Cap is placed on the X Motor cover. This is so that you can in a way change the color of the cover or put your logo. There are two versions uploaded, a Hesed one and a non logo one. This is a remix of Svechinskaya's version, I made the holes match the holes of the actual X motor cover.</p><p><strong>Hesed Version:</strong> “Hesed” is a very meaningful Hebrew word. Feel free to go to my page and see my bio to find out what it means. <strong>Two versions: One with holes to access the screws with the cap on, and one without the holes.</strong></p><p><strong>Non-Hesed Version: </strong>Simple cap with no color. This will be useful to change the color of the X motor cap if you want. <strong>Two versions: One with holes to access the screws with the cap on, and one without the holes.</strong></p><p> </p><p><strong>Instructions to make your own design:</strong></p><p>1 . Make your design on whatever modeling software (or download your design). Export as stl.</p><figure class="image image-style-align-center image_resized" style="width:40.37%;"><img src="https://media.prusaprinters.org/media/prints/67252/rich_content/835df31f-7b3f-4581-b974-3d07dc9764bd/image.png#%7B%22uuid%22%3A%22e521f36c-e420-497e-ba11-30b32907a6cd%22%2C%22w%22%3A964%2C%22h%22%3A754%7D"></figure><p>2. Place the <i><strong>X-Motor Design Cap(Blank).stl</strong></i> or <i><strong>X-Motor Design Cap(Blank WithHoles).stl</strong></i> file in your slicer.</p><p>3. Follow instruction in picture below (#1 Right Clip part, #2 Add Modifier, #3-4 Load your stl file)</p><figure class="image image_resized" style="width:77.24%;"><img src="https://media.prusaprinters.org/media/prints/67252/rich_content/b05214a7-430e-4a8c-b07d-e463809f9aee/image.png#%7B%22uuid%22%3A%226cfdc373-7ef5-4a89-9f9e-f436dd4ad606%22%2C%22w%22%3A896%2C%22h%22%3A613%7D"></figure><p>4. Position and rotate the design as needed using the parameters to the right. At the end press “Drop to bed” located at the right of the Position parameters</p><figure class="image image_resized" style="width:72%;"><img src="https://media.prusaprinters.org/media/prints/67252/rich_content/c2caa645-b538-4176-bcd2-7a7375a5f694/image.png#%7B%22uuid%22%3A%222f719ad9-67d5-47f9-bed2-5d1aa446ad78%22%2C%22w%22%3A687%2C%22h%22%3A538%7D"></figure><p>5. Press the number <i><strong>2</strong></i> on your keyboard (this will take you to the bottom view). This will show you the final design you will see once printed (It will be upside down).</p><figure class="image image_resized" style="width:53.77%;"><img src="https://media.prusaprinters.org/media/prints/67252/rich_content/6b3bb9ed-8a5e-4956-9737-9b5a48fe98b2/image.png#%7B%22uuid%22%3A%224c5018de-b2d9-4bd0-957f-192b6e9e1135%22%2C%22w%22%3A661%2C%22h%22%3A470%7D"></figure><p>5a. If needed pull your design down to see it clearly</p><figure class="image image_resized" style="width:57.93%;"><img src="https://media.prusaprinters.org/media/prints/67252/rich_content/b93dd927-9702-4323-80fc-16853ea32d88/image.png#%7B%22uuid%22%3A%22269d43f1-b5f1-4627-bfe9-fbcea35c3b5e%22%2C%22w%22%3A544%2C%22h%22%3A530%7D"></figure><p>6. Rotate the screen 180 (using the left mouse click) and you will see the final result to ensure you are printing your design in the correct orientation. </p><figure class="image image_resized" style="width:51.46%;"><img src="https://media.prusaprinters.org/media/prints/67252/rich_content/67194981-3bbc-4a99-8b0b-8b3ee9a7748d/image.png#%7B%22uuid%22%3A%22f6d83756-07a2-4270-bac7-bf64b001cb46%22%2C%22w%22%3A582%2C%22h%22%3A394%7D"></figure><p>7. Right Click the modifier/Design and insert both <i><strong>Infill</strong></i>, and <i><strong>Layers and Perimeters</strong></i> modifiers.</p><figure class="image"><img src="https://media.prusaprinters.org/media/prints/67252/rich_content/2b4d1441-064e-4970-9593-ae1fb6642d6f/image.png#%7B%22uuid%22%3A%2219d1369f-3c25-4441-91b0-494429f8cde1%22%2C%22w%22%3A422%2C%22h%22%3A461%7D"></figure><p>8. Zero Out all values. Slice and then <strong>DONE!!</strong></p><figure class="image"><img src="https://media.prusaprinters.org/media/prints/67252/rich_content/d2bdf421-6a84-436b-b079-809d3ec93af8/image.png#%7B%22uuid%22%3A%227fdd7492-2b38-477f-bbc3-6dcbd2c8af13%22%2C%22w%22%3A860%2C%22h%22%3A396%7D"></figure>
With this file you will be able to print Ender 3 X Motor Cap (Customizable Logo) with your 3D printer. Click on the button and save the file on your computer to work, edit or customize your design. You can also find more 3D designs for printers on Ender 3 X Motor Cap (Customizable Logo).
