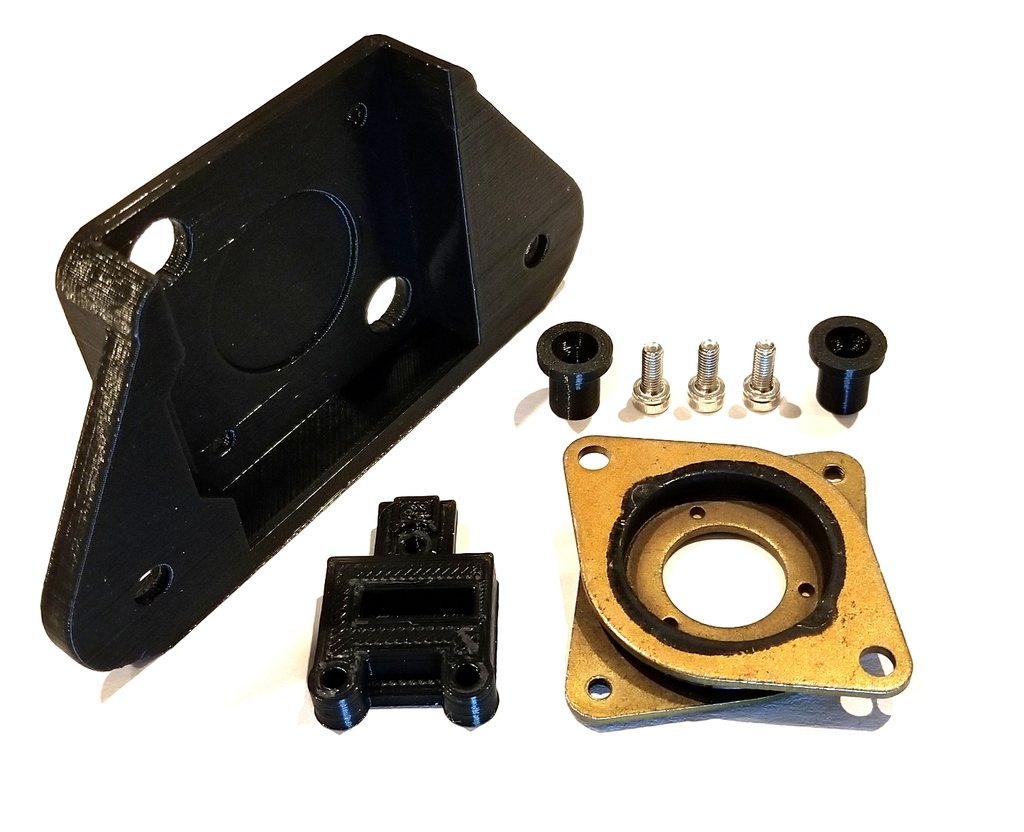
Ender 3 - X-Axis Stepper Damper Adapter
prusaprinters
<p>I had been searching for a simple way to add a damper to my x-axis stepper motor, but I couldn't find any that I was excited about. This adapter is as simple as I can make it.</p><p>Benefits compared to other options</p><ul><li>Simple to install</li><li>No firmware changes required</li><li>No structural compromises (it's attaches to the original metal assembly)</li></ul><p>The only downside is that it requires 3 x M3*8mm screws.</p><p>The up side is that your printer will be much quieter!</p><p>Also, check out these other mods that dramatically reduce the sound of your Ender 3</p><ul><li><a href="https://www.printables.com/model/187667-ender-3-y-axis-stepper-damper-v2">Y-Axis Stepper Damper</a></li><li><a href="https://www.printables.com/model/187664-ender-3-z-axis-stepper-damper-adapter">Z-Axis Stepper Damper</a></li><li><a href="https://www.printables.com/model/187670-ender-3-low-profile-feet">Low Profile Feet</a></li></ul><p>Enjoy the silence...</p><p><strong>Updates:</strong></p><p>2019.04.28 - I updated the stepper adapter to accommodate placing a heat sink on the side of the motor. I have needed one, but I wanted to help those of you who do. see (Stepper_Adapter_v2)</p><p>2019.04.07 - I added pegs to hold the original x-axis pulley cover. These also seem to be sturdy enough to replace the endstop adapter I created. (see bottom of post for pictures)</p><h3>Print Settings</h3><p><strong>Supports:</strong></p><p>No</p><p><strong>Resolution:</strong></p><p>0.2</p><p><strong>Infill:</strong></p><p>40%</p><h3>Post-Printing</h3><p><strong>Required:</strong></p><ul><li>1 x NEMA 17 Stepper motor damper</li><li>3 x M3*8mm screws</li></ul><p><strong>Steps (Part 1):</strong></p><ol><li>Power down printer</li><li>Remove wires from x-axis stepper and endstop switch</li><li>Loosen the belt tension bolts on the right side of the x-axis assembly</li></ol><p>(these do not need removed, we just need some slack here) 4. Remove the 4 screws holding the belt cover / endstop assembly</p><p>(save 2 of these 40mm screws for later) 5. Slide the new endstop mount onto the left side of the x-axis track 6. Insert and tighten an M3*8mm screw into the center hole of the mount to lock the endstop into place 7. Remove the endstop switch board from the x-axis cover 8. Using the original screws, attach the switch board to the new endstop mount</p><p>Your endstop should now look something like this... (we will connect the wires at the end)</p><p><strong>Steps (Part 2):</strong></p><ol><li>Attach the damper to the printed adapter plate with 2 x M3*8mm screws</li><li>Remove and discard the top-left and bottom-right screws from the back of the x-axis stepper motor</li><li>Remove the 2 lock nuts, closest to the stepper motor, from the back plate of the x-axis assembly</li><li>Press these 2 nuts into the damper plate</li><li>Fit the damper plate over the back plate of the x-axis assembly and tighten the screws back into the lock nuts</li><li>Slide 2 of the saved 40mm screws into the two printed spacers</li></ol><p>(they should appear recessed in the spacer) 7. Tighten these screws through the damper adapter, into the back of the stepper motor</p><p>(these should replace the screws you removed from the back of the stepper previously)</p><p><strong>Depending on your damper, there should be some wiggle room to perfectly center your stepper in the front mount plate. Notice the small gap around the inner ring.</strong></p><p><strong>Steps (Part 3):</strong></p><ol><li>Tighten the belt tension as desired</li><li>Check the tension by moving the hot end assembly back and forth</li><li>If you hear funny vibration noises, the belt might be too tight, causing the belt teeth to rubbing the pulley, and it might need loosened</li><li>Reconnect wires to the x-axis stepper and endstop switch</li></ol><p><strong>Pulley shifted 1mm but still works perfectly!</strong></p><p><strong>Optional Steps (Part 4):</strong></p><ol><li>Print 4 cover pegs</li><li>Slide small end of pegs into x-axis pulley cover</li><li>Push cover onto x-axis assembly upside-down</li></ol><p>(The end stop mount will interfere with the cover if attached right-side-up)</p><p><strong>Example using pegs to hold cover with endstop attached to cover... Everything seems tight, so this might be the best way to go if you want everything to look stock,</strong></p><p>Category: 3D Printer Parts</p>
With this file you will be able to print Ender 3 - X-Axis Stepper Damper Adapter with your 3D printer. Click on the button and save the file on your computer to work, edit or customize your design. You can also find more 3D designs for printers on Ender 3 - X-Axis Stepper Damper Adapter.
