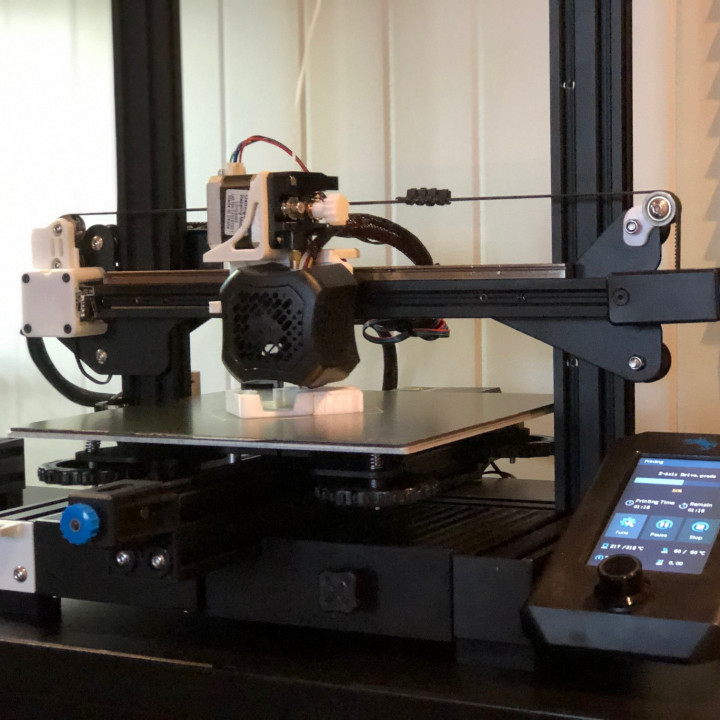
Ender 3 X-Axis Linear Rail Direct Drive Conversion V1
myminifactory
Ender 3 X-Axis Linear Rail Direct Drive Conversion Kit V1 Note: Linear Rail Mount must be printed in PETG, ASA or a high temp material Required Hardware: 1. Direct Drive RE BLTouch - Linear Rail mount v3 Linear Rail Carriage: M3x8 (x4) Hot End: M3x20 (x2) + M3 Nut (x4) +M3 Washer (x4) Fan Shroud: M3x12 (x1) BLTouch: M3x6 (x2) Extruder: All OEM hardware Belt: 2mm Pitch 6mm Width Material: PETG/ASA or high temp material recommended 2. X-Axis Stepper Pulley Cover v3 Idler Pulleys: Creality idler pulleys (x2) OR (5mm bore x 10mm width idlers) (x2) Idler Pulley Mounting: M5x20 (x2) + M5 Nut (x2) + M5 Washer (x2) + **Bearing Sleeve v0** (x2) X-Axis Cover: OEM Hardware End Stop Switch: OEM Hardware 3. Linear Rail Belt Guide v4 - Idler Pulley: Creality idler pulleys (x1) OR (5mm bore x 10mm width idlers) (x1) - Idler Pulley Mounting: M5x20 (x1) + M5 Nut (x1) + M5 Washer (x1) + Bearing Sleeve v0 (x1) - Belt Guide Mounting: OEM Hardware 4. 300mm MGN12H Mini Linear Rail with MGN12H Carriage Block - MGN12H Rail: M3x8 (x4) + M3 T-Slot Nuts (x4) Installation: 1. Remove all track rollers, belt tensioner and guide belt. Set aside print head. 2. Install linear rail, on top of x-axis extrusion, with at least four M3x8 screws and M3 T-slot nuts. Be sure to mount within 5mm of x-axis stepper cover on left side of printer. 3. Install **Linear Rail Belt Guide v4** idler pulley with M5 hardware and mount assembly to upper track roller hardware above belt tensioner. 4. Prep 3D Printed Linear Rail Carriage: Remove fan shroud and hot end from OEM carriage. Install (2x) M3x20 screws from back to front of linear rail carriage. These will act as studs to mount the hot end on the front. Moving to the front of the linear rail carriage, secure (2x) M3 Nuts and (4x) M3 Washers on your M3x20 studs in the following order: Carriage -> M3 Washer - > M3 Nut -> M3 Washer -> Hot End -> M3 Nut (This can be seen in the above image of the hot end with fan shroud removed) Before installing the OEM fan shroud, you will need to trim off a locating tab on the left side of the shroud. This locating tab is on the side closest to the X-Axis Stepper, near the BLTouch mount. Using (1x) M3x12 install OEM fan shroud from the backside of carriage. Use the existing locating tab to orient the fan shroud correctly, tighten down shroud from the back of the carriage with the upper hole on tensioner side. 5. Install Belts Trim the crimped ends off two OEM creality x-axis belts and slot the remaining crimped ends into either side of the linear rail carriage. Once belts are attached you can go ahead and install the carriage to the linear rail block. You will be routing the belt through both the X-Axis Stepper Pulley Cover v3 and belt tensioner as you install each. Join the belts in the center above the rail. Alternatively, you can purchase a 5m roll of 6mm wide 2mm pitch belt and trim to size. If using this method you must install the X-Axis Stepper Pulley Cover v3 and belt tensioner first, then route the belt from top down through both sides and secure to the linear rail carriage. 6. Install Linear Rail mount v3 (If using two belt method) - Using (4x) M3x8 mount the prepped linear rail carriage to the linear rail carriage block 7. Install X-Axis Stepper Pulley Cover v3 Install the (2x) idler pulleys to the cover using M5x20, M5 Nut, M5 Washer and Bearing Sleeve v0 Remove OEM x-axis stepper cover and move end stop limit switch to new linear rail x-axis cover. Mount linear rail x-axis cover to stepper with OEM hardware. Route belt through x-axis idler pulleys and stepper gear before mounting the screws for the cover. 8. Install Belt Tensioner Install belt tensioner with belt coming straight out of the hole in the top, wrapping around Linear Rail Belt Guide v4 idler pulley. 9. Finish Belts a. Two Belts If using two OEM creality belts you can now join the belt in the center of the x-axis above rail. Center to avoid belt joint/seam going over idler pulley on either end of rail during operation. b. Single Belt (5m) Once belt is routed through both side of the printer start the belts through the bottom of the carriage. Secure carriage to linear rail block with M3x8 (x4) Crimp belts and tension See Ender 3 V2 Direct Drive Mount for extruder install info
With this file you will be able to print Ender 3 X-Axis Linear Rail Direct Drive Conversion V1 with your 3D printer. Click on the button and save the file on your computer to work, edit or customize your design. You can also find more 3D designs for printers on Ender 3 X-Axis Linear Rail Direct Drive Conversion V1.
