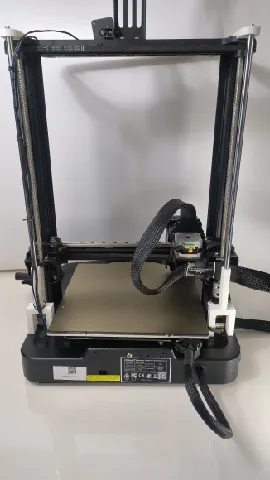
Ender 3 V3 SE Z-Axis Support With Y-Axis Rods
prusaprinters
This is a simple build I came up with for those who have upgraded their Y-axis. It's not pretty, it's not as stable as other builds, but:Recycle the Y-axis rods to brace the Z-axis.Only 4 parts.No drilling, no funky heat inserts.Only needs a few extra screws… and mounting tape.Feel free to remix and come up with “beefier versions”. Parts you need and should already have:2 X Y-Axis Rods (Diameter 8mm, Length 34cm)2 X M3-12 Hex Screws4 X M3-8 Hex ScrewsDouble-sided Mounting Tape There is a total of 4 parts you need to print for this:1 X Bottom Left Base1 X Bottom Right Base1 X Top Left Plate 1 X Top Right Plate* There are 2 versions of the top plates. Use the "LED version" if you have installed LED lights on top.* EXTRA - If you want even more stability, also print this 90 degree stabilizer. Printed with:PETG (Tough PLA should work too).20% infill works well enough.Supports not required.0.28mm layer height.
With this file you will be able to print Ender 3 V3 SE Z-Axis Support With Y-Axis Rods with your 3D printer. Click on the button and save the file on your computer to work, edit or customize your design. You can also find more 3D designs for printers on Ender 3 V3 SE Z-Axis Support With Y-Axis Rods.
