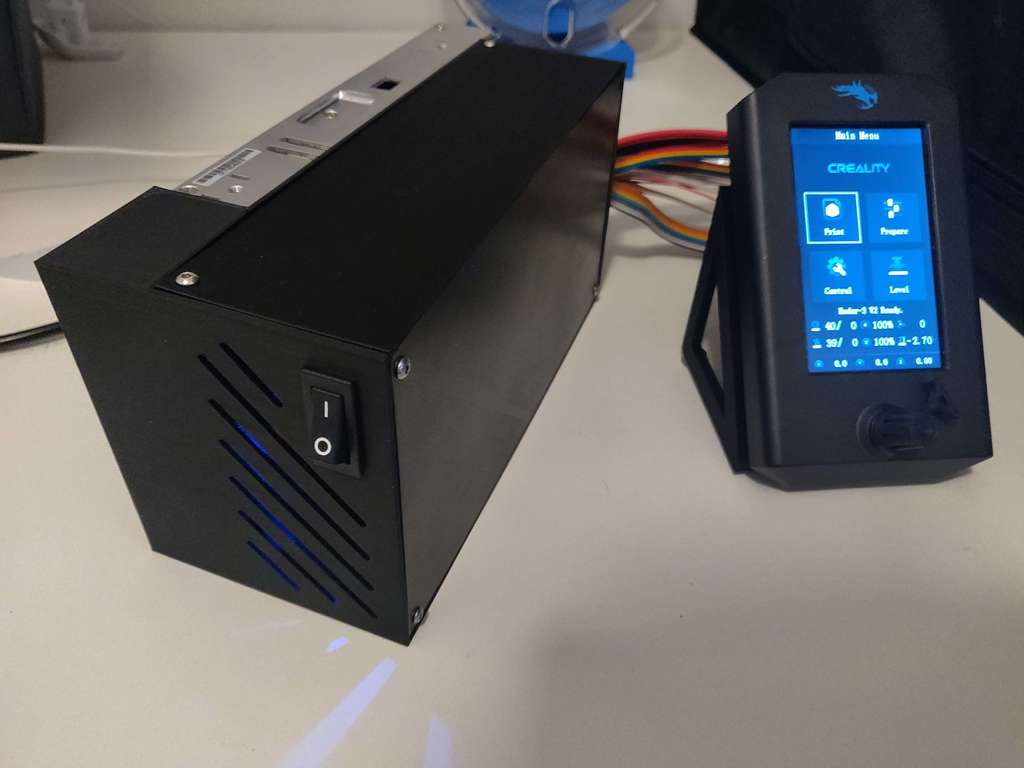
Ender 3 V2 External Electronics box (MeanWell PSU and Motherboard)
prusaprinters
<p>Updated version can be found here: https://www.printables.com/model/201359-ender-3-v2-external-electronics-box-meanwell-psu-a<br><br>Created electronics box for the MeanWell PSU and Ender 3 V2 motherboard so I could keep it outside of my enclosure.</p><h3>Print Settings</h3><p><strong>Printer Brand:</strong></p><p>Creality</p><p><strong>Printer: </strong></p><p>Ender 3</p><p><strong>Rafts:</strong></p><p>No</p><p><strong>Supports: </strong></p><p>No</p><p><strong>Infill:</strong></p><p>20</p><p><strong>Filament:</strong></p><p>Priline PLA</p><p>Black Post-Printing =============</p><p>Repurposed the powerswitch fan and power connection, and screws from Ender 3 v2 for this box.</p><p>Replaced wiring to be able to move away from printer.</p><p>Used this stand for the screen: <a href="https://www.thingiverse.com/thing:4590024">https://www.thingiverse.com/thing:4590024</a></p><p>Added fan cover as well (will probably remove later)</p><p>Since making this I realized there we some changes I would make if i were to try it again. But it works great for me now so it'll be awhile before I make those changes. So anyone looking to remix this, here are my recomendations or ideas. Use them or ignore them as you please:</p><ol><li>Move the motherboard screw holes higher so that the wire connections on the bottom are easier to access.</li><li>Add screw hole to firmly attach the psu to the box (I just manually drilled one in mine)</li><li>The lids upper side screw holes aren't necessary. It holds just fine with out them. (maybe make a groove ar something to hold in place if wanted instead. Or even better make a lid on a hinge that doesn't need screws. Opening and closing the lid gets a little annoying if you are making a lot of changes.</li><li>Maybe make it a little longer (if there is room on your build plate) so the box reaches the full length of the psu. Right now it is just a little shorter than the PSU so it hangs off the back a little.</li><li>Add screw holes for a Raspberry Pi. There is just barely room for it (I hot glued a rpi case to the inside of the lid for the time being. Works fine but would prefer more permanent option).</li><li>Add a lid for the psu side (leaving holes for the air flow) so that the color matches the rest.</li><li>Make the middle hole on the back (the one for wires) a circle rather than a rectangle just to look a little nicer.</li></ol><p><img src="https://cdn.thingiverse.com/assets/7b/61/d4/6a/bf/IMG_20210527_233113.jpg"></p><p><img src="https://cdn.thingiverse.com/assets/85/21/47/97/8f/IMG_20210527_232324.jpg"></p><p><img src="https://cdn.thingiverse.com/assets/4c/fd/db/9b/bd/IMG_20210527_232327.jpg"></p><p><img src="https://cdn.thingiverse.com/assets/75/d7/50/d1/13/IMG_20210527_233127.jpg"></p><p> </p><p> </p><p>Category: 3D Printer Accessories</p>
With this file you will be able to print Ender 3 V2 External Electronics box (MeanWell PSU and Motherboard) with your 3D printer. Click on the button and save the file on your computer to work, edit or customize your design. You can also find more 3D designs for printers on Ender 3 V2 External Electronics box (MeanWell PSU and Motherboard).
