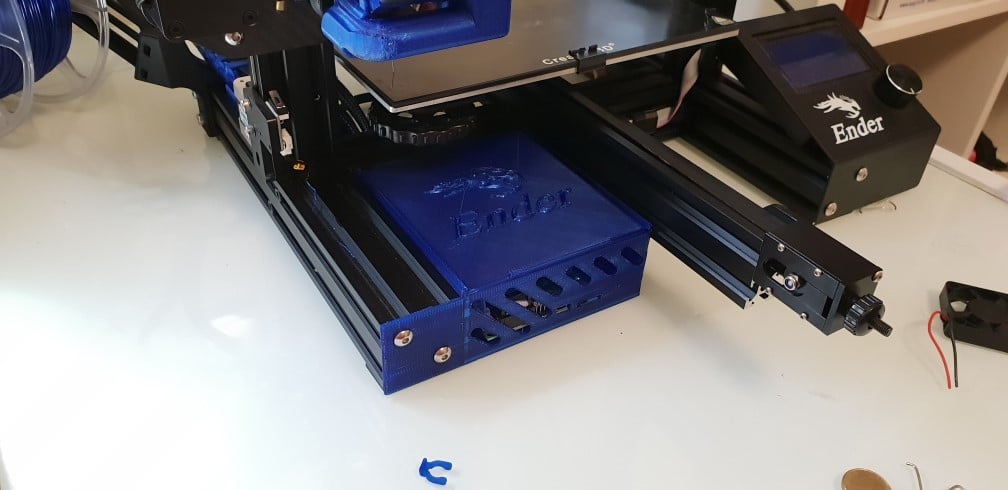
Ender 3 Upgraded Control Case
thingiverse
I didn't inspect the factory control box so I designed a new one. It includes extra slots for airflow and relocates the fan from the lid to the side, blowing directly over the stepper drivers. The lid now slides in and out easily, eliminating the need to wrestle with cap heads under the bed. The front panel is slightly thicker, making it slightly more awkward to remove the SD card, but still manageable. This modification requires that your printer has at least 3mm rubber feet, and I'm not aware of any other printers that won't work with this upgrade except for the Ender Pro. **Required Hardware:** - 2x M3x12 (minimum thread) or preferably M3x16 screws per fan - 3x M5x8 bolts/washers/channel nuts Ignore the poor prints on my device, as I'm dealing with a faulty push-lock fitting on my extruder. **Instructions:** - Print the control box and lid using any desired layer heights. Ideally, use supports if you have them dialed in (so you can easily remove them from the lid slots). - Cut threads into the 4 mounting points for the control board and fan bases - simply pushing a M3 bolt into it and turning should do the trick. - Install one or two 4010 fans. - Remove the LCD ribbon cable from the hot glue, and pull the plug off the board. - Undo the 4 bolts holding the case onto the board. - Remove the pressed steel case (one bolt on the bottom, 2 on the front extrusion) and slide it off from the printer, lifting the board up gently as you go. - Move the ribbon cable from running along the righthand side of the board to underneath the main loom and around the left. - Install internal M5 bolts/washers, thread the side channel nuts on and put the rear channel nut directly in the extrusion. - Slide new control box in, using the installed channel nuts as a guide. Be gentle moving the board around. - Slide channel nut to position behind rear mounting tab and tighten, install front M5 cap head screws onto the extrusion and tighten, finally tighten side cap head screws - Mount control board - Plug in LCD screen ribbon and fan connector
With this file you will be able to print Ender 3 Upgraded Control Case with your 3D printer. Click on the button and save the file on your computer to work, edit or customize your design. You can also find more 3D designs for printers on Ender 3 Upgraded Control Case.
