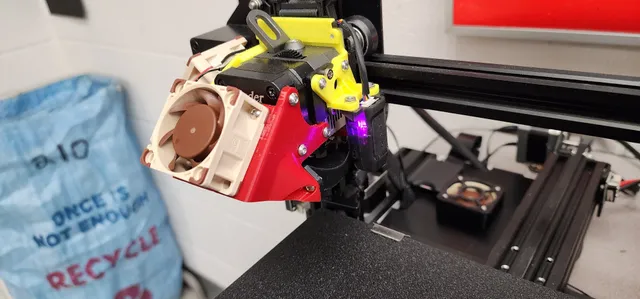
Ender 3 Sprite Pro - Better CR Touch Mount
prusaprinters
I wanted to move my probe to the right side of my hotend to make room for the noctua fan mount I'm designing for the left side. I also wanted it to sit in line with the Y-Axis of the printer nozzle.Offsets for the prove are X: 39 and Y: -1 (Z offset should be the same as the stock mount location)I'll link my Noctua 40x40 fan mounts as I finish them as well.UPDATE: https://cults3d.com/en/3d-model/various/ender-3-sprite-pro-noctua-fan-mountsAdditional Hardware:2 x m3 nuts4 x m3x8 boltsPrint:I printed this in Amazon basics PETG, but PLA should be fine for this mount. I would suggest printing in the orientation in the picture, since it will reduce overhangs.I made the file with some built in tolerance for the bolts. If the two mounting holes are too small for the bolts, adjust the hole offset in your slicer so it prints the files appropriately (you can calibrate to find your needed offset by printing a tolerance test).No supports needed.Setup:You'll need to splice the stock probe wiring with the wiring from the sprite pro (see the image).Connect the probe to the mount using 2 of the m3x8 bolts (if the original ones are too short, it's close).Fit the mount onto your hot-end, with the other three bolts still in place (it will be a snug fit, mine clicks into place between the 3).Use remaining 2 m3x8 bolts to attach the mount to the hot-end.Set probe offsets (X:39 , Y:-1)Tipping:If my model was helpful to you, consider tipping me for a drink.https://www.paypal.com/paypalme/ESiders
With this file you will be able to print Ender 3 Sprite Pro - Better CR Touch Mount with your 3D printer. Click on the button and save the file on your computer to work, edit or customize your design. You can also find more 3D designs for printers on Ender 3 Sprite Pro - Better CR Touch Mount.
