Ender 3 S1 - Z-Stop Mount for Camera Trigger
prusaprinters
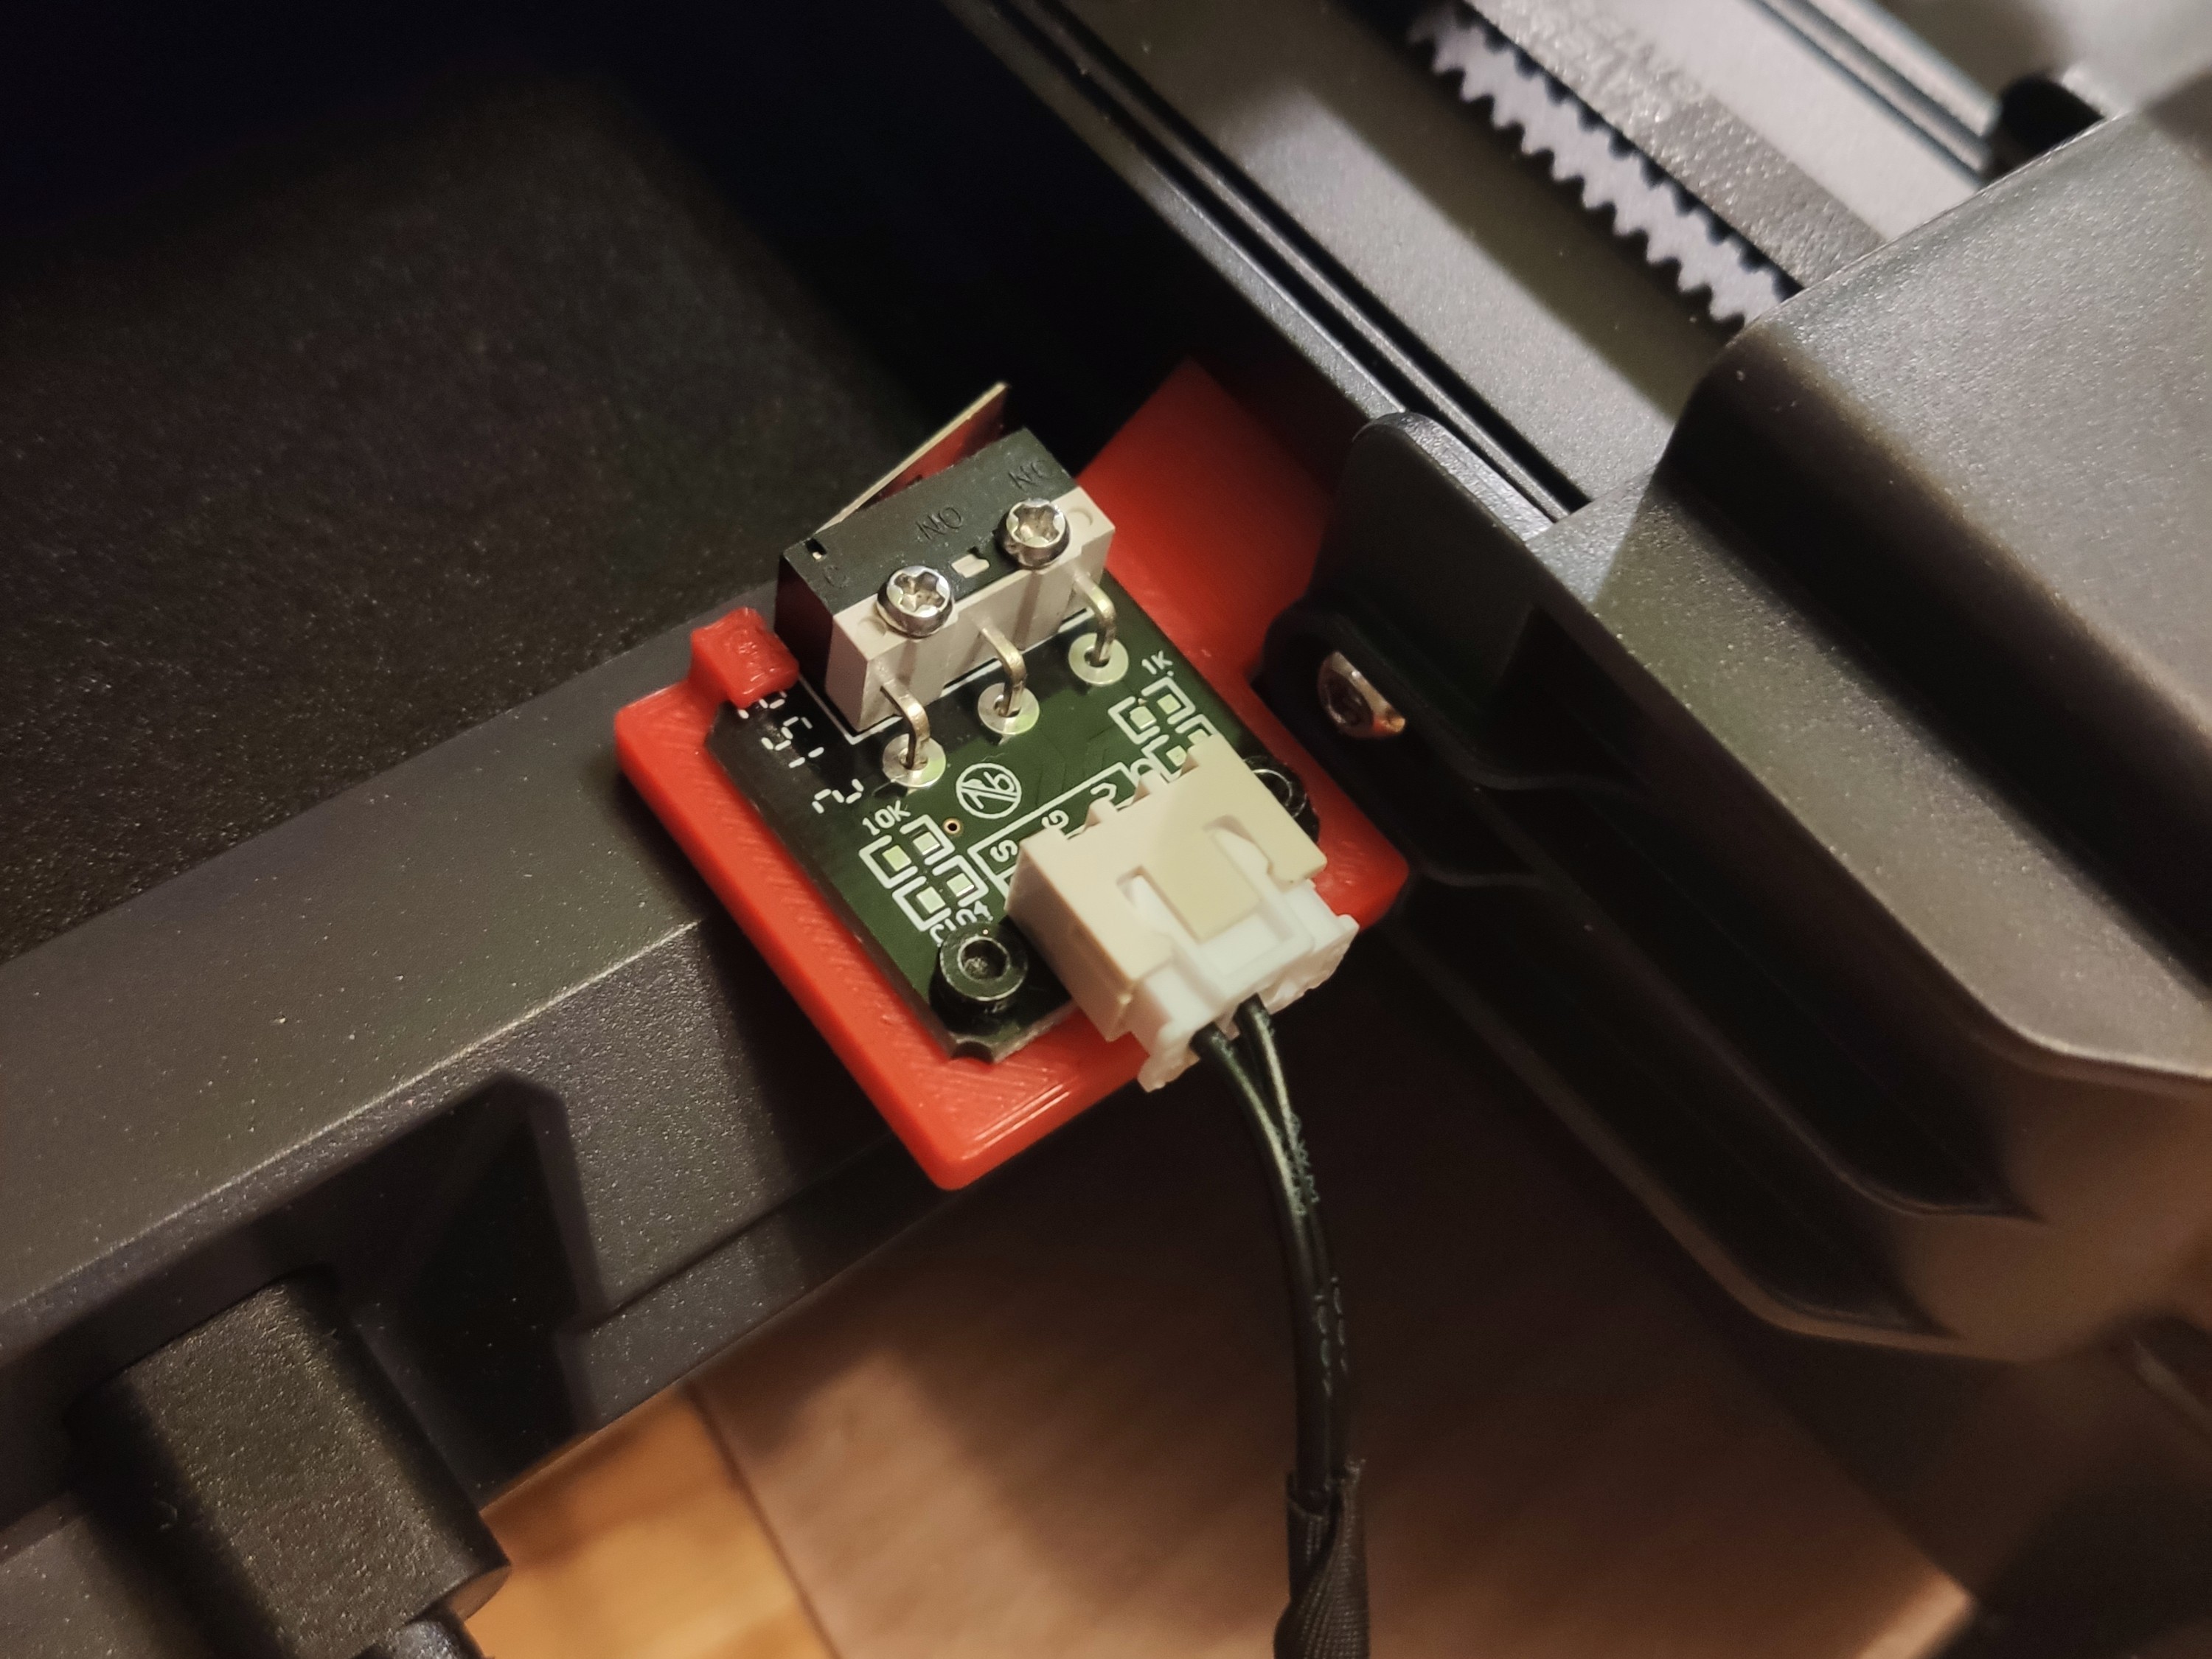
<p>With this minor upgrade, you can mount the most likely unused Z-axis limit switch kit, which is included in the package content of the S1, to the front on the Y-axis.<br>Just unscrew the left side of the belt tensioner and slot the print in, there is some wiggle room for fine adjustment. Reuse the included M2 screws to mount the switch and on the switch-side you can also use the cable it came with if you change the cable in the plug (C&NC → C&NO).<br>There will be a brand-specific way to connect a wired remote on the camera side. In my case, Sony - I ordered an inexpensive “S2” cable and used a soldering iron.<br>Software-wise you need to make sure the printer goes to Y=220mm after every layer, either through Octolapse (no need for a delay anymore) or your slicer.</p><p>Enjoy your timelapse in your camera's maximum resolution for optional reframing.</p><p><strong>I printed mine in PLA with 15% infill, 0,2mm resolution and 0,4mm line width - supports required.</strong></p><p> </p><p><i>Of course, this mount is not exclusive to this application. let your imagination run wild.</i><br> </p>
With this file you will be able to print Ender 3 S1 - Z-Stop Mount for Camera Trigger with your 3D printer. Click on the button and save the file on your computer to work, edit or customize your design. You can also find more 3D designs for printers on Ender 3 S1 - Z-Stop Mount for Camera Trigger.