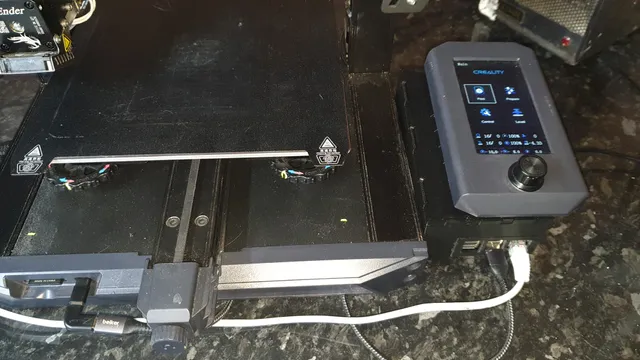
Ender 3 S1 / Ender 3 V2 – LCD Bracket with modular Raspberry Pi (3/4) case
prusaprinters
This bracket has been designed to replace the stock bracket that comes with the Ender 3 S1, it comprises of three prints. The main bracket that screws in to the same holes as the stock bracket with the stock screws. There is also the lid which is for the LCD to slot into. Then the draw, currently there are two draws that fit either the Raspberry Pi 3 or 4. The draws and bracket have been designed so that it is possible to put the draw in four different orientations, this allows for flexibility on where the ports and cables are positioned. In addition the bracket and draws have been designed to allow for Neodymium Magnets (6mm wide, 2mm thickness) to be glued in to opposing faces to reduce the chance of the draw being knocked out. The bracket also has a camera mount at the rear.InstallationTo install the bracket, first remove the existing bracket, fit the new bracket starting with the bottom screws but only for a couple of turns just so they are able to positing the bracket. Then insert the top screw, it may be easier if the bracket is at a slight angle so that the top screw can be tightened fully. Once the top is tightened then finish screwing the bottom two. With the LCD ribbon cable feed it up through the hole in the bottom of the bracket and up to the top triangle slot. With the lid slot the LCD into the locating holes and down till the port on the back is accessible, then connect the cable to the LCD. Then you can put the lid down onto the bracket.To mount the Raspberry Pi it is recommended to screw it to the case, as you don’t want the Pi falling out if you decide to have it upside down.There is a limitation with the current design, is that there is no easy way of removing the sd card without unscrewing the Pi from the drawFor some orientations it might be necessary to have a right angle adapter, this can fit in the gap in the bracket and can allow for the cables to run out the back.PrintingInitially I had tried to print the draw and bracket in the one go, but after a number of failed attempts (mainly due to the filament getting tangled on the spool. I opted to just print each part separately.Printer: Ender 3 S1Nozzle: 0.4mmLine height: 0.2mmSupports: YesSupport Overhang Angle : 59*Additional support: Bracket cross brace, as I found standard supports was just a single line that easily moved during print.Support Blockers: Rear camera hole, and areas for the magnets on both the bracket and draw as depending on the support these can be a pain to clean up after.Infill: 20%
With this file you will be able to print Ender 3 S1 / Ender 3 V2 – LCD Bracket with modular Raspberry Pi (3/4) case with your 3D printer. Click on the button and save the file on your computer to work, edit or customize your design. You can also find more 3D designs for printers on Ender 3 S1 / Ender 3 V2 – LCD Bracket with modular Raspberry Pi (3/4) case.
