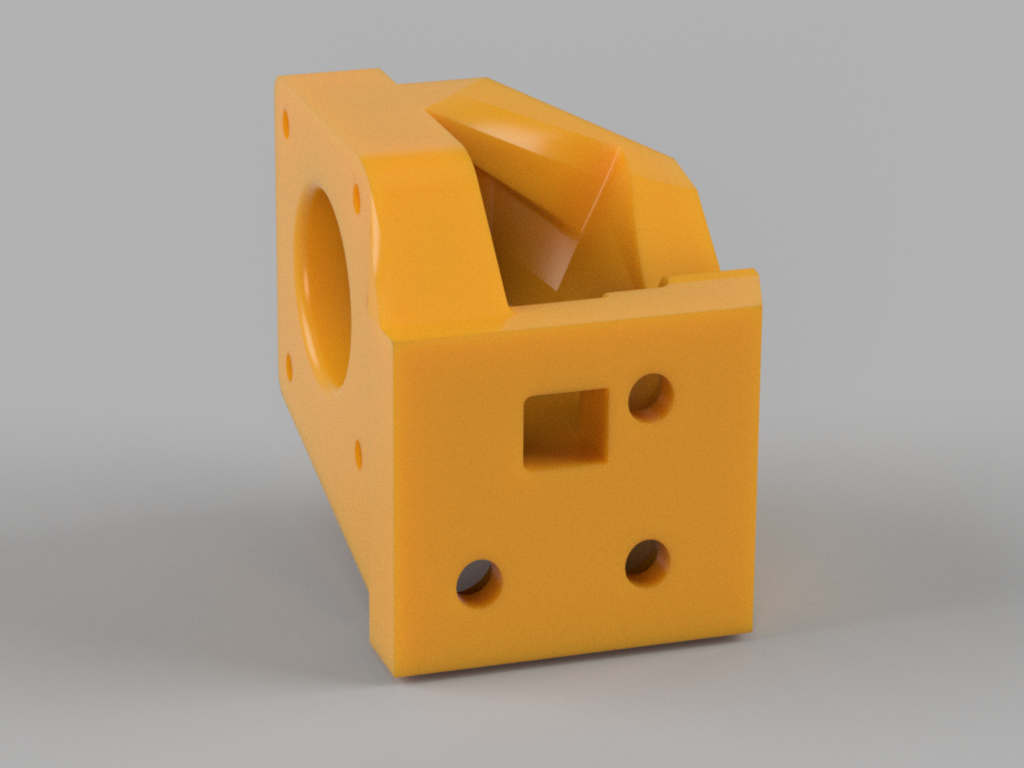
Ender 3 Pro Y Axis Motor Mount
prusaprinters
<p>This Y-axis motor mount has been developed through several cycles to ensure maximum stability possible while still allowing access to screws etc. (Uses 100% stock screws)</p> <p>It is designed to be used without dampeners - a direct replacement for the original mount (using original screws). Though it is recommended to use spacers for the screws facing the motor since the head is very small.</p> <p>Advantages over the stock mount:</p> <ol> <li>It is more stable than the stock mount - this is tested with PLA, where ringing effects were severely reduced during printing due to the motor being mounted more firmly.</li> <li><p>It dampens the vibrations better, due to the vibrations travelling through plastic vs metal. Disadvantages:</p> </li> <li><p>Stock mount acted as a heat sink, therefore the motor will get a bit hotter - I am only noticing a small increase. It is possible to attach heatsink to the motor if worried, or if you have attached the All In One case on the back side of your Ender 3 Pro, you can direct the air up towards the motor instead of down towards the floor. The mount is assembled in the following order:<br/> Precondition: Ensure the existing metal L shaped bracket is removed and you have clean access to the Y axis rail. To do this you will have to remove one end of the belt from the bed-sled.<br/> Notes: Holes for the motor are made very large to allow washers as the small screws holding the motor in place has a very small head and might damage the plastic if stressed enough.The screws going into the Y-rail have very large heads and do not require washers.</p> </li> <li><p>Direct the belt through the square hole and connect it to the bed-sled.</p> </li> <li>Mount bracket on the Y-axis rail by the 3 screw holes on the mount.</li> <li>Mount the motor - when inserting the motor, ensure the belt are placed on the toothed belt pulley, as it is easier to do this now than later. </li> <li><p>Mount the ball bearings that distances the belt from the y-rail - it goes into the hole beside the motor pulley (same placement as the original mount). To ensure the mount is mounted correctly, you tighten the belt and roll the bed forward/backward to see if the belt hits the sides of the toothed belt pulley on the motor shaft. If it does, try to adjust the placement of the belt on the bed-sled. If it does not work and the belt still hits the sides of the belt pulley, you can print one of the files called "Motor Slope X_Xdeg" as these can be inserted between the mount and the motor giving it an incline in the wanted direction.</p> <h3>Print Settings</h3> </li> </ol> <p><strong>Printer Brand:</strong></p> <p>Creality</p> <p><p class="detail-setting printer"><strong>Printer: </strong> <div><p>Ender 3 Pro</p></div><strong>Rafts:</strong></p> <p>No</p> <p><p class="detail-setting supports"><strong>Supports: </strong> <div><p>Yes</p></div><strong>Resolution:</strong></p> <p>0,12</p> <p><p class="detail-setting infill"><strong>Infill: </strong> <div><p>30</p></div><br/> <strong>Filament:</strong><br/> Spectrum PLA Shiny Black <br/> <p class="detail-setting notes"><strong>Notes: </strong> </p><div><p>Use infill that withstands pressure in the direction the belt will pull the motor. My recommendation is "Gyroid" if using Cura as a slicer.</p> Orientate the model as shown on the 3d model pictures.</div></p> <p>Use supports as the overhangs are steep. I prefer tree supports.<br/> In my printing I only needed supports for the lower parts overhangs. None of the screw holes or any other hole needed supports (I have made the holes a bit egg-shaped to account for a bit of downwards overhang in the screw holes).</p> </p></p></p> Category: 3D Printer Parts
With this file you will be able to print Ender 3 Pro Y Axis Motor Mount with your 3D printer. Click on the button and save the file on your computer to work, edit or customize your design. You can also find more 3D designs for printers on Ender 3 Pro Y Axis Motor Mount.
