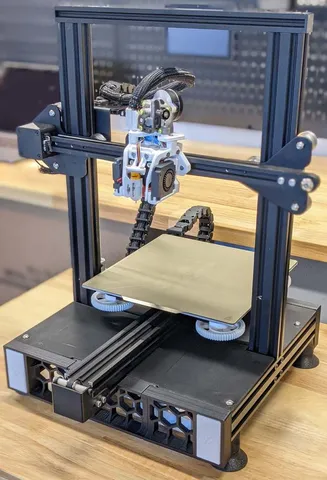
Ender 3 Pro Voron Themed Electronics Enclosure
prusaprinters
After trying various electronics enclosures for my Ender 3 Pro, I was not happy with many of them due to various issues with eachFit was tight and not very forgiving for running cablesAirflow/cable management were usually afterthoughtsPSU was not always a consideration for relocation in some designsI really liked the style and functionality of the excellent E3 Pro Switchwire mods by walttriano and boubounokefalos. This Voron themed electronics enclosure combines elements from both with my own modifications. I wanted to mainly achieve the following goalsCompletely bottom relocated electronics (PSU, Mainboard and Raspberry Pi) without changing the kinematics (kind of a semi voron conversion :P)Ample room for airflow and cable management options built inSeparate Power for the Pi and Printer (power controlled by a smart plug) for a simpler designRemove as much unnecessary mass as possible from the gantry and frame to allow for better resonant frequencies and faster accelerations using KlipperI am uploading all STL files required for the build for convenience. This involves files from the original sources as well as modifications made for this design specifically. I am also including the Fusion 360 file for any remixes! :)Parts to print1x cover_4040_extrusion_cut (for covering the extrusion hole in the bottom of the printer when routing cables. It can be a tight fit so might have to sand it if needed)1x each of the 4 deck pieces4x foot_extension (for allowing more room under the printer for airflow/cable management/components)4x foot_tpu (Recommended to print with TPU (15% infill) to reduce vibrations. PLA could also work in a pinch (40% infill or higher) )1x each of the 6 grill pieces for the front and back4x grill_endcap (to snap into the grill once assembled. Might want to print in a different color for contrast)1x each of the psu_clamp and psu_hanger (I had to mix components here from the two original builds to allow not having to extend the base and still mount the PSU underneath)1x rpi mount (if using)1x skr_mini_e3_mount (should work for the stock creality boards as well as the mounting holes are the same)Optionally, 1x of the y_frame_cc_connector and z_frame_cc_connector for attaching the cable chains (if using)(Optional) 2x 40_mm_fan_mount (one for Raspberry Pi and one for the mainboard)(Optional) Buck converter mount(Optional) 1x usb_c_adapter_mount for attaching a usb c extension cable to power the PI. It is a tight fit in the rear grill holes so you might need to sand it down a bit. I did not integrate this into the grill itself as you might want to swap the location of the pi to either side based on your preference.I appreciate any tips to support my work!Print SettingsPrinter Brand:CrealityPrinter:Ender 3 ProRafts:NoSupports:NoResolution:0.2Infill:15%Filament: Duramic 3D PLA PlusBlack Post-Printing =============Assembly InstructionsAdditional parts needed(affiliate links below)Assorted T nutsAssorted M3 boltsAssorted M5 boltsPanel Mount Plug Adapter (the stock plug and switch may not work depending on your model. Cut off one/both of the fins and super glue it in the rear panel after test fitting)12 AWG cable for extending PSU wire to the rear mounted switch. The stock wire is most likely not long enoughSpade connectors and crimping tool for the connections between PSU to the panel mount plug and buck converter for fans (if using)(Optional) Buck converter for the fans(Optional) Usb-c extension cable for powering the pi externally (if using)(Optional) Zipties and mounts for tidying up cablesAssembly GuideThe original source repositories have decent guides on how to attach the components to the frame using various sized bolts. In terms of order of putting everything together, the order I would recommend is (see attached pictures for better idea)Remove all electronic components off the printer. Remove all cables from the motors and put them aside. Flip the frame to the side to make it easier to work withMount the 4040 extrusion cut coverRemove the stock plastic housing from the PSU, relocate PSU to the bottom front and mount using the clamp and holderMount the mainboard and Raspberry Pi (I mounted my mainboard to the back left and Pi to the back right). Run any serial cables between Pi and mainboard/plug in SD card with desired firmware at this pointAttach the front and back grills. You may want to insert the usb c slot cover into the rear grill prior to attaching them (if using)Make any minor adjustments to the location of the Pi and mainboard now as neededAttach the panel mount plug and switch to the rear grill and run wires from PSU to switch terminalsMount buck converter and run wires from PSU to buck converter (if using cooling fans)Run wires from buck converter to Cooling fans. Screw the fans into the mounts and attach over the mainboard and Pi to get good coverage over the driver heatsinks and cpu.Attach the foot extension and TPU feet to the frame using T nuts and boltsMount the 4 deck panels using T nuts and boltsMake sure to attach the cable chain adapters (if using) to the back left panelPerform cable management at the bottom as neededBundle up wires from the mainboard and run through the hole in the back left panel and out via the cable chains (if using)There are also smaller holes for running motor wire connectors (Z and Y)Perform a sanity test before flipping for basic wiring issuesFlip and adjust cables if drooping using zip ties as neededYou might want to re-level your bed at this point before you start printingHappy Printing!NotesThe SD card slot can be a bit hard to reach depending on how you orient and mount the mainboard. I only had to access it once to flash the firmware using Klipper and then use the sd card flash method for future firmware upgrades. If you tend to use the SD card more often, you might want to consider an extension cable.If using an adxl345 sensor for resonance measurements, I would recommend making an extension cable that can stay attached to the Pi's GPIO pins so that you may mount/remove it as needed. I built a small cable like this for mine (you can see it at the back of the printer on the left in the pictures)I removed the stock LCD display as I don't use it with Klipper. You could potentially install it instead of one of the front right end caps or move it to an external enclosure.The attached pictures might have some older components on the hotend not listed in the printer upgrades section. Print quality is not the best either as there was not much tuning done before the enclosure was built :DFrontBackOverviewGrillPrinter UpgradesList of Printer UpgradesIf anyone is curious about the various upgrades I did to my Ender 3 Pro, here they are (in no particular order)SKR Mini E3 V2.0Silicone Springs for BedUpgraded lead screw couplerRaspberry Pi 4 running Klipper . Connected via serial/GPIO to mainboardBltouchZ axis anti wobble nutBed level knobsManta MK2 Duct & Tool Head System with dual 5015 BlowersSherpa Mini Direct Drive ExtruderTriangle Labs Dragon HotendRigid Mounting Adapter for dragon hotendBondtech CHT nozzles (0.6mm and 1.0 mm)Gates belts for X and Y axes12 AWG shielded wires from PSU to mainboardVoron themed electronics enclosureRemoved the stock LCD screen in favor of Fluidd/KlipperscreenKlipperScreen running on a wall mounted Kindle Fire HD via VNCPolycarbonate V slot wheels from openbuildsNoctua 40x20 fans for cooling the Pi and mainboardNoctua 80x20 mm fan and cover for PSUPurple Loctite on the Frame joints only for better rigidity (Not recommended for screws you tend to tighten as part of maintenance often)Printer is placed on a Concrete paver which is placed on a rubber paver for reducing vibrations and noiseWrapped cables inside cable chains. Did not add chains for X axis to reduce moving massUniversal Filament Drybox with Tush++Removed the spool holder from the printer to reduce vibrations. Built printer and filament shelves instead in the garageAsk in the comments if you are curious about anything I may have forgotten to mention :)Category: 3D Printer Accessories
With this file you will be able to print Ender 3 Pro Voron Themed Electronics Enclosure with your 3D printer. Click on the button and save the file on your computer to work, edit or customize your design. You can also find more 3D designs for printers on Ender 3 Pro Voron Themed Electronics Enclosure.