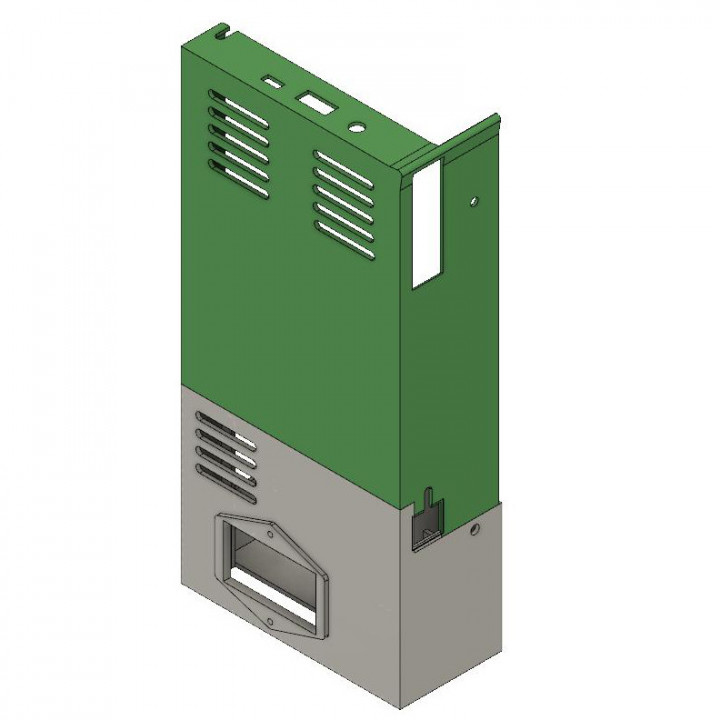
Ender 3 Pro, RasPi v1-3, Step Down and PSU Case
myminifactory
This is a project for the RasPi v1-3, a dual USB step-down module that incorporates the Ender 3 Pro PSU. It comes in two halves to simplify printing and assembly, while also making it easier to access the RasPi if needed. This design includes cable management features so you can hide the power cord for the RasPi inside the case. You won't need an external cooling fan for the RasPi because the internal PSU fan is directly behind the RasPi and will cool it down when operating. I've successfully run 30+ hour prints without any overheating issues at all. I designed this to have minimal extras. Here are the requirements: * RasPi: Use a model 2 or 3. * Step-down module: A Dual USB 9V/12V/24V/36V to 5V Converter DC-DC 3A step-down power module that you can purchase on Amazon - HERE * Screws: x4 1/4inch self-tappers to secure the RasPi, similar to those used in a different project - HERE * Wire: x2 150mm (6 inches) 16-14awg electrical wire for cable management. I used some blue and brown cable from an extension cord that was spare. * Optional: x1 M4 x 8 screw - HERE To assemble the case: Remove the power supply and PSU from the printer. Original Cover: 1. Remove the original PSU cover from the PSU, keeping the x3 M4x8 bolts safe for later. 2. ***IMPORTANT*** Take note of which cable from the power supply goes to which connection on the PSU. Disconnect the power connector from the PSU. 3. Remove the power connector from the cover and keep the 2 screws safe for later. Lower Section: 1. Insert the Dual USB Step Down into the clips and press in. 2. Connect the Dual USB Step Down to the PSU. ***IMPORTANT*** Make sure you connect the correct terminals on the Step Down to the PSU, marked on both boards. 3. Fit the power supply switch to the case using the original screws. Connect the power supply to the PSU. ***IMPORTANT*** Reconnect the cables to the correct terminals on the PSU. 4. Slide the lower case onto the PSU and secure it with x2 M4x8 bolts that you removed from the original case. Top Section: 1. Insert the RasPi USB connection into the slot at a 45-degree angle, then rotate the RasPi so the USB and Ethernet connections fit into the slot. 2. Push the RasPi up to the top of the case for the power HDMI and audio connections to be flush with the case and the 4 securing holes to line up. 3. Screw down the RasPi using x4 1/4inch self-tapping screws. 4. Connect the USB power cable to the power connector of the RasPi and run it through the slot at the top, through the inner wall, and coil it up if necessary. Place the top section onto the bottom section using the 3 lugs. Secure the top half with the remaining original M4x8 bolt. Refit the PSU to the printer and connect the RasPi USB cable to the Step Down USB. Connect the main power supply and turn on. Both the printer and RasPi should power up successfully.
With this file you will be able to print Ender 3 Pro, RasPi v1-3, Step Down and PSU Case with your 3D printer. Click on the button and save the file on your computer to work, edit or customize your design. You can also find more 3D designs for printers on Ender 3 Pro, RasPi v1-3, Step Down and PSU Case.
