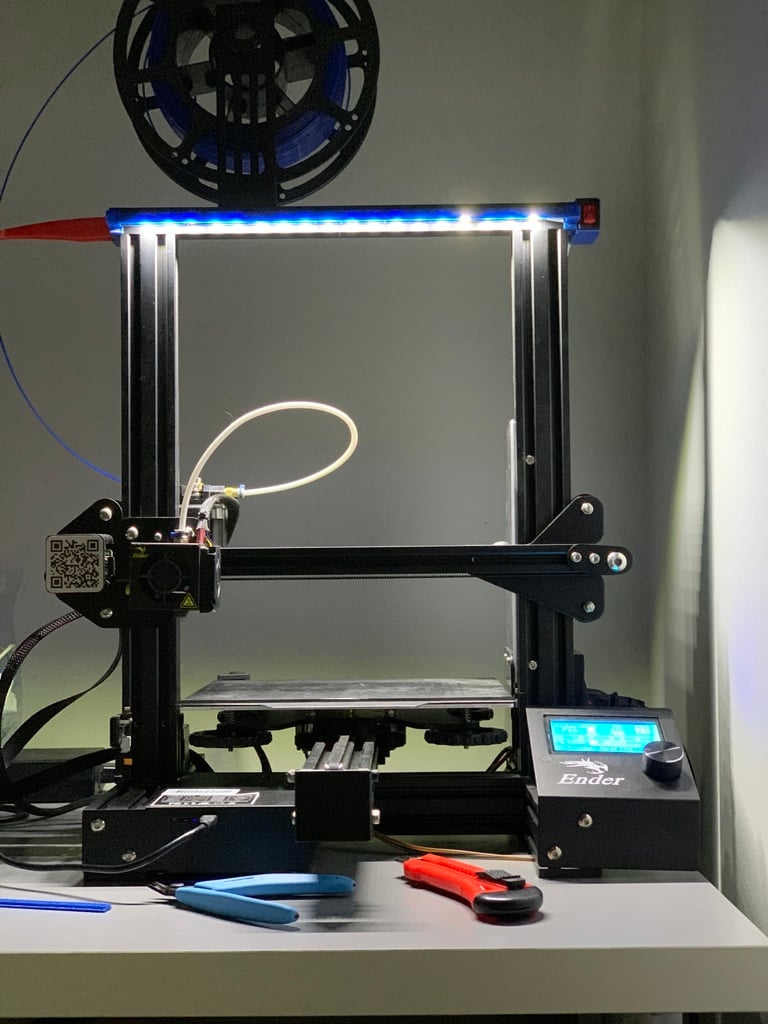
Ender 3 Pro LED profile & filament guide
thingiverse
Hi guys, When I bought an Ender 3 Pro, I sought out some high-tech modifications to boost the experience of using my printer. One of them was the filament guide that I've been using so far. It was printed without any adjustments and worked flawlessly. (https://www.thingiverse.com/thing:2917932) After a month, I realized that my workroom was seriously lacking in lighting, so I found an awesome option for adding an LED lamp to my Ender. (https://www.thingiverse.com/thing:2981368) But I didn't want to lose the filament guide feature, so I slightly modified the lamp files. The result is: - The left side clip now holds both the lamp and the guide. - The right side clip has been modified to accommodate the switch for the LED lamp, so it's not always on. NOTE: Print LED profile V1 twice! To complete this project, you'll also need: - Wires - 2 x 50 cm in length - A switch - I used KCD1-101N - An LED light rated at 24V (connected directly to the power supply output) - Wire terminals to connect the LED, switch, and power source Here's a step-by-step guide to follow once everything is printed: 1. Connect the two LED profiles together using glue. 2. Attach the LED tape to the LED profiles. 3. Fit the wires with terminals. 4. Insert the switch into its socket in the right side clip. 5. Connect the LED light directly to the power supply output with one wire, and connect it via the switch to the power supply output with another wire. My switch had three legs, but I only used two of the silver-colored ones. No soldering is required.
With this file you will be able to print Ender 3 Pro LED profile & filament guide with your 3D printer. Click on the button and save the file on your computer to work, edit or customize your design. You can also find more 3D designs for printers on Ender 3 Pro LED profile & filament guide.
