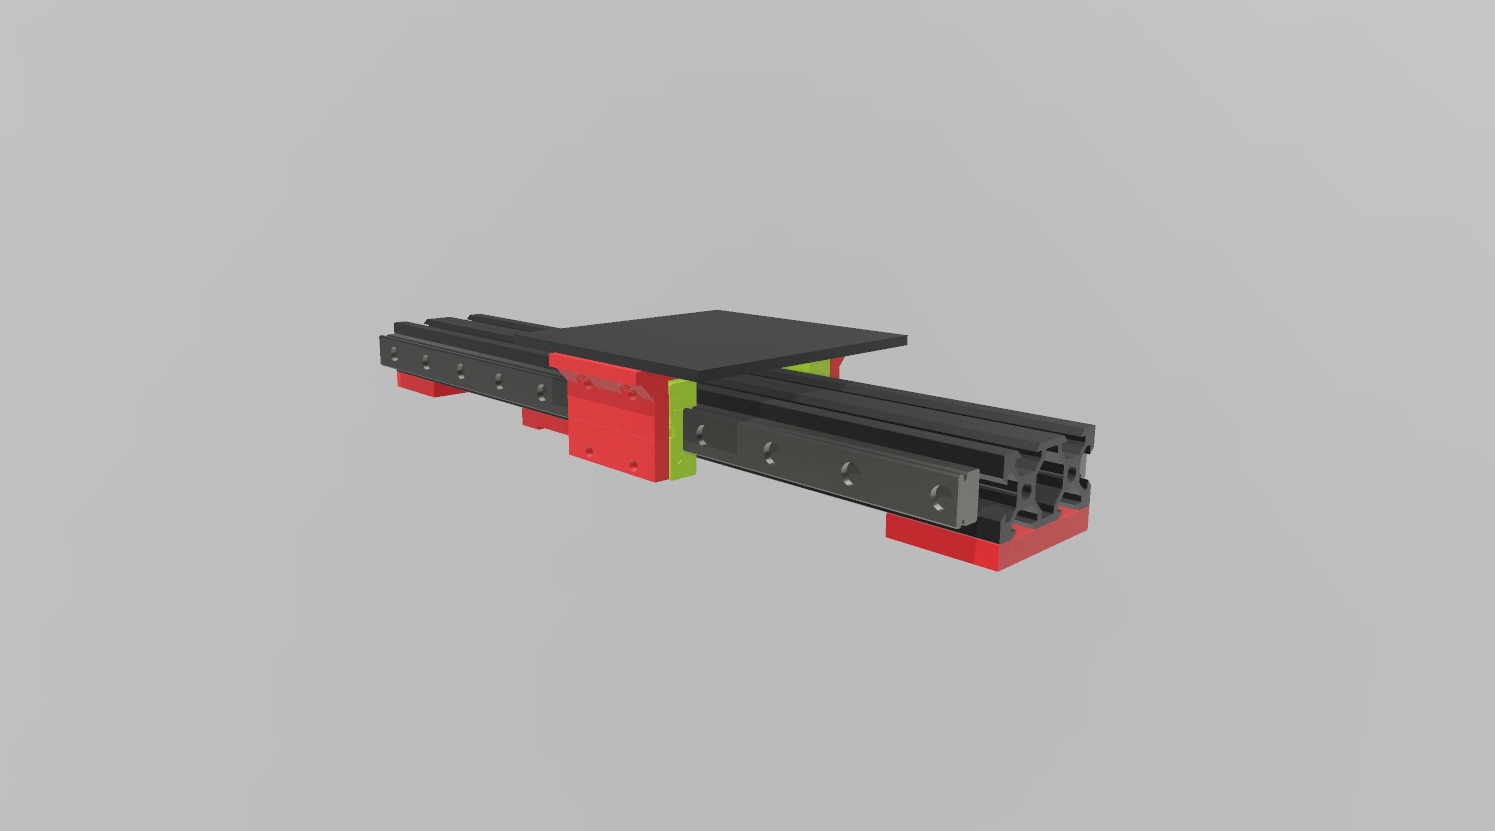
Ender 2 Pro - Y Axis Linear Rail Upgrade v1.0 (OUTDATED)
prusaprinters
<p><strong>USE THE VERSION 2 LINK:</strong></p><p><a href="https://www.printables.com/model/324899-ender-2-pro-y-axis-linear-rail-upgrade-v20"><strong>https://www.printables.com/model/324899-ender-2-pro-y-axis-linear-rail-upgrade-v20</strong></a></p><p><strong>THE v1.0 VERSION IS NOW OUTDATED.</strong></p><p>This idea came to me when I had to change the wheels on my <strong>Y-Axis </strong>carriage. It was a total pain in the butt! </p><p>So, I came up with a way to slightly raise the Y-Axis on the Ender 2 Pro. Hence, the Spacers. Then I sat down and modeled this out in CAD, and I came up with just five (5) pieces that would be 3D Printed. ABS, or PETG would be the most likely candidates for material used, you could even do them in Polycarbonate, if you have that ability to print in that material.</p><p>Parts list:</p><p>1 - Y Axis Linear Rail - Left MGN12H Mount</p><p>1 - Y Axis Linear Rail - Right MGN12H Mount </p><p>1 - Y Axis Linear Rail Upgrade - Rear 2040 Spacer (Holes towards the Rear)</p><p>1 - Y Axis Linear Rail Upgrade - Middle 2040 Spacer (Mounted Notch Side Down)</p><p>1 - Y Axis Linear Rail Upgrade - Front 2040 Spacer (Holes towards the front)</p><p>2 - MGN12 Linear Rails with MGN12H Block </p><p>LINK: <a href="https://www.amazon.com/Twotrees-Sliding-Guideway-Bearing-Printer/dp/B08B1DDSN2">https://www.amazon.com/Twotrees-Sliding-Guideway-Bearing-Printer/dp/B08B1DDSN2</a> (NOT A PAID LINK!)</p><p>(275mm Rail Length, you WILL have to cut it down from a 300mm rail)</p><p>50 Pack - M3x10mm Cap Head Screws</p><p>50 Pack - M3 Drop In T-Nuts</p><p>6 - M5x8 Button Head Screws (Holes in the mounts are 4.5mm, screws will cut own threads) Or you can drill them out to 5.5mm and use button head screws and lock nuts with washers.</p><p>5.5mm Drill Bit to drill the 6 mounting holes in the Y Axis Sled</p><p>1 - CR10 Y Axis Motor Mount with Idler Bearing (Link: <a href="https://www.amazon.com/Stepper-Mounting-Bracket-Replacement-Accessories/dp/B08CDWVHRW">https://www.amazon.com/Stepper-Mounting-Bracket-Replacement-Accessories/dp/B08CDWVHRW</a> )</p><p>1 - 2040 Aluminum Y Axis Belt Tensioner (Link: <a href="https://www.amazon.com/UniTak3D-Tensioner-Creality-Flashforge-Aquila-AURORA-A5X/dp/B097ZB6SFX">https://www.amazon.com/UniTak3D-Tensioner-Creality-Flashforge-Aquila-AURORA-A5X/dp/B097ZB6SFX</a> ) I would mount this with a slight upward angle, maybe 15 degrees. This allows for the higher belt angle.</p><p>1 - section of non-slip GT2x6mm timing belt piece with 2 crimps.</p><p>1 - Y Axis Limit Switch Stop Plate (Temporary Fix/Design)</p><p>Now here is the hard part, I have <strong>NOT </strong>come up with a design for a <strong>NEW Y Axis Limit Switch.</strong> If you come up with a good idea, please share it with me. I was thinking of extending the Y Axis Limit Switch Cable and mounting it under the Y Axis Sled at the back left corner, and mounting a vertical plate tp the back end of the machine near the 2040 beam, straight up, but low enough so it catches the switch when the sled homes. Since the old limit switch mounts the switch pretty much even with the back of the machine, I believe this will work.</p><p>If you should move forward with this upgrade, please send me a message and let me know how you did, and if my y limit switch idea worked for you, so far, I have had no issues with it, and I just glued the plate in place to catch the limit switch when it homes.</p><p>You will loose about 15mm of vertical print height, <strong>BUT</strong> if you use the design I did and installed for the NEW TOP HANDLE AND SPACERS, you will not only fix this, but still gain 15mm of printing height, topping out at 195mm. You may have to do some loosening of the cables and maxing out their length, but it is do able. You will need to change the MAX Z height in Configuration.h to 195 if you want the height back you lost by raising the y sled and 2040 extrusion with the spacers.</p><p>I do not need to go into details on how to mount a linear rail properly, if you work on 3D Printers, and you have worked with linear rails, you know the steps. However, if you run into trouble, feel free to come over to my “All Things Ender 2 Pro” Group, and drop a question there. We have 40+ members who use and modify Ender 2 Pros, so if I can't help, most likely there will be someone in the group who can. </p><p>Link to group: <a href="https://www.printables.com/group/all-things-ender-2-pro-KQBnpjQ/comments">https://www.printables.com/group/all-things-ender-2-pro-KQBnpjQ/comments</a> </p><p>Good Luck!</p><p>Print all parts with 100% infill for full strength, 50% will not handle the stress and will crack.</p><p>Then again, I used PLA, so you may be able to print in something stronger.</p><p> </p><p> </p>
With this file you will be able to print Ender 2 Pro - Y Axis Linear Rail Upgrade v1.0 (OUTDATED) with your 3D printer. Click on the button and save the file on your computer to work, edit or customize your design. You can also find more 3D designs for printers on Ender 2 Pro - Y Axis Linear Rail Upgrade v1.0 (OUTDATED).
