Ender 2 Control Box with SD converter and light switch
thingiverse
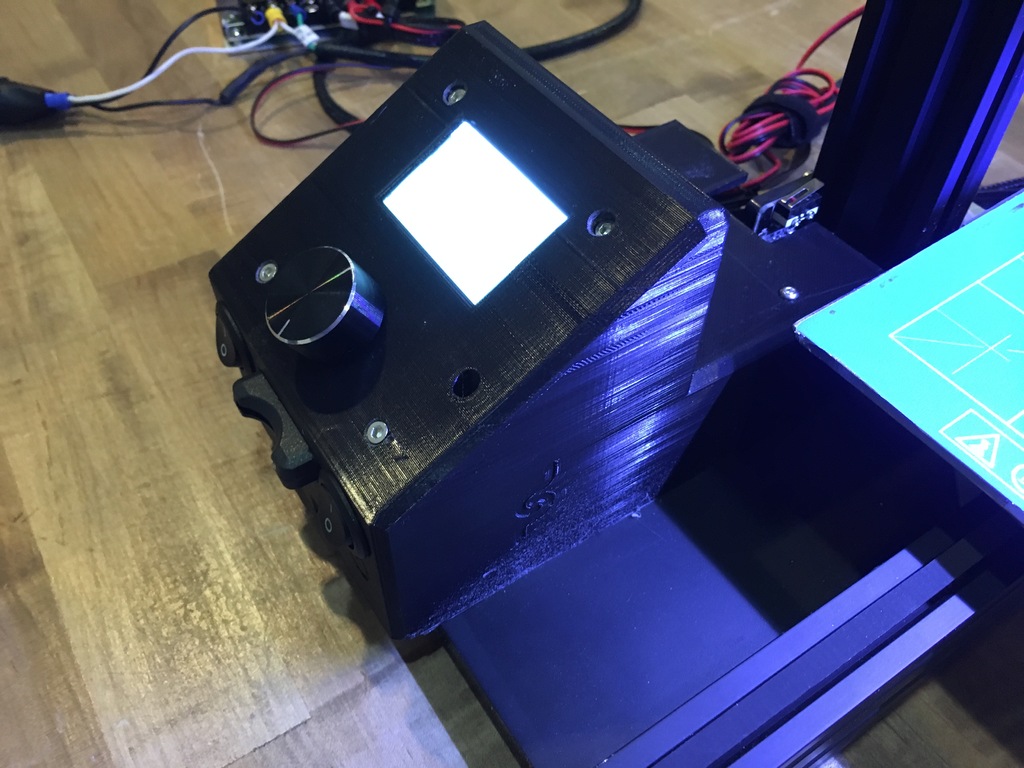
Finished and Working! This has been printed, tested, refined ten times, and is ready for use! This control box cover is designed for the Ender 2, which elevates the display to a comfortable angle while adding a micro SD card reader that converts to full-sized SD compatibility. A light switch is also integrated. There are two versions: End2Contr8.stl features 52mm clearance between the X gantry and the rear of the raised control box. End2Contr10.stl boasts an updated design with 65+ mm clearance for larger blower fans and EZABL passage. An optional face plate has been added for version 10, perfect for printing with the LCD screen facing down. This cover protects the print finish from the bed and conceals screws with temporary adhesive. Spray mount was used initially, but glue sticks or other adhesives can also be employed. Version 8 provides a comfortable viewing angle, but fan and instrument installation is limited due to excessive protrusion beyond the original print head assembly. Printing version 10 with the display screen facing up requires minimal supports. Mounting Steps: 1. Install the display within the housing, ensuring the cable harness remains in place (a crucial step). 2. Add light and on/off switches. 3. Incorporate the SD card reader. 4. Secure the SD card reader using a small amount of hot glue from inside, as it fits snugly. 5. Apply additional hot glue to keep the ribbon flat atop the housing, positioning it correctly for entry into the lower right micro SD slot. 6. Attach all connectors, starting with longer ones and then shorter ones. Ensure wires are directed outwards between raised brass stand-offs, before screwing the cover in place. Purchase materials: Switch: https://www.amazon.com/gp/product/B071DNCFW1/ref=oh_aui_detailpage_o04_s00?ie=UTF8&psc=1 SD converter: http://a.co/4kNZiRn I integrated a light switch that powers my LED bar (https://www.thingiverse.com/thing:2700450). To connect the LEDs, attach the power wires to the Main PSU, linking red to V+ and black to COM. Split one wire and insert the switch in its middle section. A red and black wire has been added to the k-fan outlet for easy bed fan installation later. Watch a work-in-progress video: https://youtu.be/WvB6cS54RYQ If you create this project, please capture photographs and post them on this page!
With this file you will be able to print Ender 2 Control Box with SD converter and light switch with your 3D printer. Click on the button and save the file on your computer to work, edit or customize your design. You can also find more 3D designs for printers on Ender 2 Control Box with SD converter and light switch.