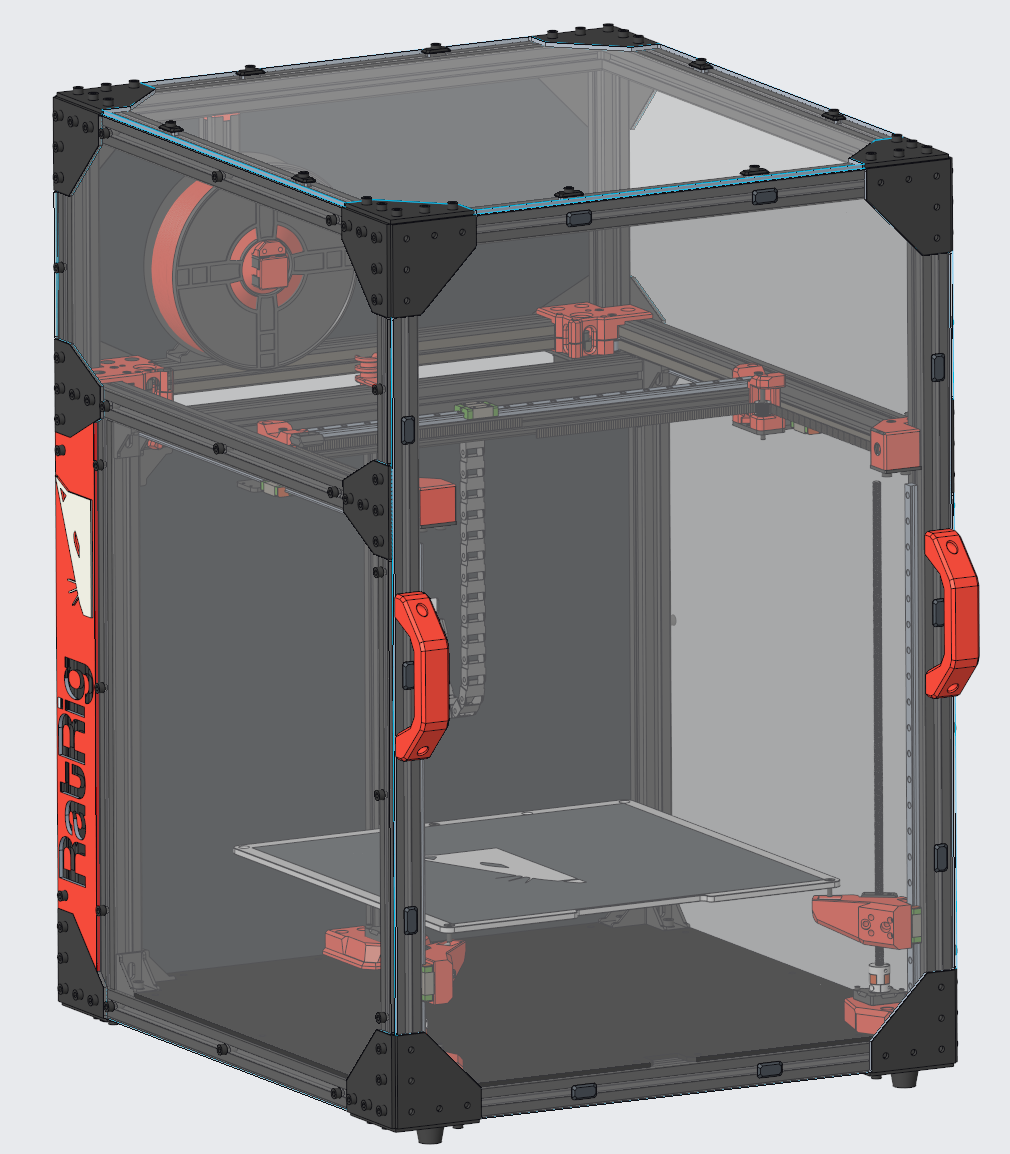
Enclosure for my RatRig V-Core3 400mm OpenFront
prusaprinters
<p>Some time ago I started thinking how I can properly enclose my V-Core3 400mm printer. The problematic part was that I decided to build a modified version (OpenFront), which is 265mm taller than the original RatRig printer. Therefore, a new solution was needed…</p><p>The result you can see here. Please use it extremely carefully since<strong> it will probably only fit on my frame, and not on yours</strong> (even if you have the same dimensions) - read below why!</p><p>I started with these main design requirements:</p><ol><li>full enclosure, temperature resistent, minimal gaps to be as “air-tight” as possible</li><li>allow for later adjusting of the gantry</li><li>possibility to open the top to print materials that do not like the higher temps inside a closed enclosure (eg. PLA)</li><li>Possibility to adjust later on the location/size etc. of an IEC switch</li></ol><p>I made the following design decisions:</p><ul><li><strong>Panels:</strong><ul><li>4mm polycarbonate panels (PC) for sides, front and top</li><li>black Dibond (aluminium composite) panel for the back</li><li>all panels were cut 0.5mm shorter on their complete contours, to tolerate cutting/frame imprecision</li></ul></li><li><strong>Front door:</strong><ul><li>full, removable panel held magnetically in place inspired by MFBS work: <a href="https://www.thingiverse.com/thing:5176411">https://www.thingiverse.com/thing:5176411</a></li><li>featuring my own magnetic holders: <a href="https://www.printables.com/model/229334-magnetic-holder-for-pcacrylic-panels)">https://www.printables.com/model/229334-magnetic-holder-for-pcacrylic-panels</a></li><li>featuring M3 handles: <a href="https://www.printables.com/model/270839-handle-for-3030-extrusion-with-m3-holes">https://www.printables.com/model/270839-handle-for-3030-extrusion-with-m3-holes</a></li></ul></li><li><strong>Side panel:</strong><ul><li>the three bolt holes along the extrusion that holds the Y-rail are <i>oval</i>, to allow for later up/down adjusting of the the Y-rails</li><li>they are custom for my printer do to 1mm front vs. back height difference of my frame - <strong>check yours!</strong></li></ul></li><li><strong>Top panel:</strong><ul><li>I wanted for the top panel the option to easily open it when needed (PLA printing)</li><li><i>Screws</i>: good because they add extra stiffness, but bad because require tools</li><li><i>Magnets</i>: good because easy to remove, but lack stiffness and panel might vibrate</li><li>so the solution was to put the same rectangle holes in the top panel that are required for fitting the magnets, but with an screw hole, in case I decide for the screws in a long term ;) - I designed a screw holder: <a href="https://www.printables.com/model/270850-hybrid-holder-for-pcacrylic-panels">https://www.printables.com/model/270850-hybrid-holder-for-pcacrylic-panels</a></li></ul></li><li><strong>Back side panels:</strong><ul><li>allow to either full cover on both sides the electronics bay or place a user-designed IEC switch</li><li><i>models will be added later</i></li></ul></li></ul><p>The full enclosure (and other related stuff) is constantly updated on my GitHub repo: <a href="https://github.com/Contrasens/VCore3-400-OpenFront">https://github.com/Contrasens/VCore3-400-OpenFront</a></p>
With this file you will be able to print Enclosure for my RatRig V-Core3 400mm OpenFront with your 3D printer. Click on the button and save the file on your computer to work, edit or customize your design. You can also find more 3D designs for printers on Enclosure for my RatRig V-Core3 400mm OpenFront.
