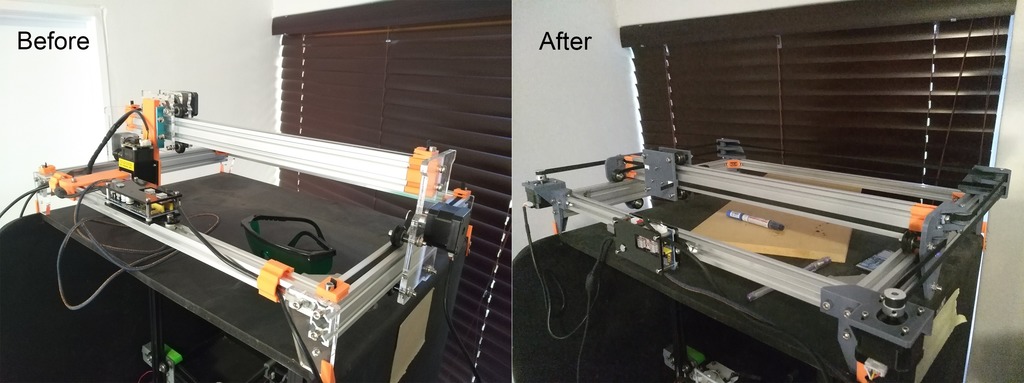
EleksMaker A3 Core XY rework
thingiverse
This is a DIY project using all electronic components from the EleksMaker A3. Was this necessary? Nope. So why then? 1) Planning on building a Core XY 3D printer, but not familiar with how Core XY works mechanically. Needed a project and had an EleksMaker A3, which leads to point 2. 2) Have an EleksMaker A3 and not too happy about the quality I was getting in the Y direction. Getting some strange wobble effect as if the two motors in the Y axis were out of step. You will need to print 2x X Gantry plates and 4x X Gantry GT2 clips. Extra parts needed: - 8x GT2 20T 3mm bore pulleys - 6x M3 nuts - 4x M3 bolt 30mm - 2x M3 bolt 50mm - 6m GT2 timing belt (more than you need, but I messed up the first time, so more is better). Got the GT2 locking mechanism from here: https://www.thingiverse.com/thing:1438795. To get the electronics working, connect your machine to a PC. Start EleksCAM. Go to Settings. Click Select Machine. There will be four machines; select the EleksDraw (Top, second machine from left). Select Config. Make sure X-Rev and Y-Rev are selected. Pulse = 80 (XY), Accel = 200 (XY). Hit Save. And you are done. Enjoy. Machine in action: https://youtu.be/cNiUUzp_8KU. Update: August 13, 2019 - Made a few changes. Fixed a few manifold issues. Added Square Y Gantry for added stability. Big thanks to thehans (https://www.thingiverse.com/thehans/about) for bringing the issues to light. Go and check the fixes he implemented on his side (https://www.thingiverse.com/thing:3804715).
With this file you will be able to print EleksMaker A3 Core XY rework with your 3D printer. Click on the button and save the file on your computer to work, edit or customize your design. You can also find more 3D designs for printers on EleksMaker A3 Core XY rework.
