Electronics Third Hand Soldering Stand
thingiverse
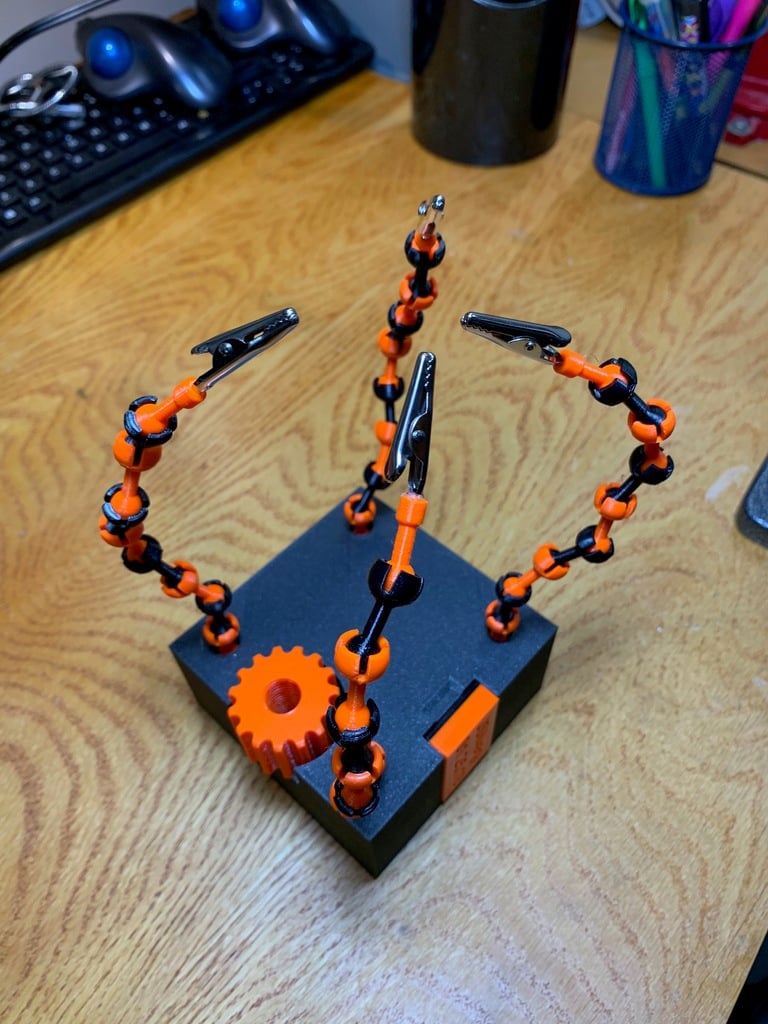
I based this design off a simple tool my dad had, which he still uses today. Growing up, I wondered how I could make it using 3D printing instead. It's an excellent tool for holding small electronic parts while soldering or doing fine work that requires a third hand. This design is fully 3D printed, minus the alligator clips and lead weights (optional). When working with heavier items or where I didn't want the stand to move around, I integrated a screw clamp. The threaded bar and clamp face clip inside the unit; when needed, you pull it out and screw it in from the bottom. This jaw can clamp up to 65mm. Build instructions - All STLs are set for printing orientation. No supports are necessary. Base The base is straightforward and can be made from PLA, PETG, or any material since it's not structural. I printed it with Prusament Galaxy Black at a .2 layer, 10% infill, and 3 perimeter walls. Lock Block This block holds the screw wheel in place; no material preference is necessary here. Wheel & Clamp These are the two parts for the clamping mechanism. I only tested them in PETG since I usually do all threaded parts in that plastic type. You could probably get away with PLA, but go at least 50% on the infill with 3 perimeter layers. Note that I multicolored mine by doing a filament change during the print. End Post & Post You need four end posts for the alligator clips and 32 regular posts (or more or less, as you prefer). I highly recommend PETG or something similar here; PLA was too inflexible and brittle. I found that at least 80% infill with 3 perimeter walls is the best. I had to use brims when testing with PLA, but stuck with it for PETG; you could probably do without them. Make sure to clear the brim material at the base before assembling. UPDATE 02.07.19 - Brim it with PETG too, much more reliable. Additional parts Alligator Clips - https://www.amazon.com/gp/product/B01C50TIXC/ref=oh_aui_search_asin_title?ie=UTF8&psc=1 Lead Weights - There are six holes on the bottom, .45" in diameter. Don't laugh; I had some .45 caliber lead bullets for reloading laying around. Dropped those right in and capped the holes with epoxy. Worked great, so anything you can find to drop into those holes is optional. Assembly Place the wheel into the base, slide the lock block under it. This is designed to be an extremely tight fit that will most likely require a small flat blade screwdriver to push in. The way it's set up, you can put the gear up with a screwdriver from underneath to pop it if you ever need to get it out. On the alligator clips linked, use pliers to close the ends. Place glue on the end and install into the end post. Place glue on the bottom of one of the normal posts, install that into each hole on the top of the base. Once glue is set, snap together the posts in the configuration and length of your choice. Note on glues - I tested both epoxy and hot glue in the assembly and went with hot glue for both installing the alligator clips and posts to the base. This way if I need to replace a broken post, it's easy to remove. The hot glue is more than supportive enough for both applications. Install clamp into base or screw into bottom. If you have questions, let me know! Enjoy! EDIT - 04.30.19 - I have added the Fusion 360 file for the arms for people with S3D who are having issues with the bodies. Feel free to modify however you wish.
With this file you will be able to print Electronics Third Hand Soldering Stand with your 3D printer. Click on the button and save the file on your computer to work, edit or customize your design. You can also find more 3D designs for printers on Electronics Third Hand Soldering Stand.