Electric cooking whisk
myminifactory
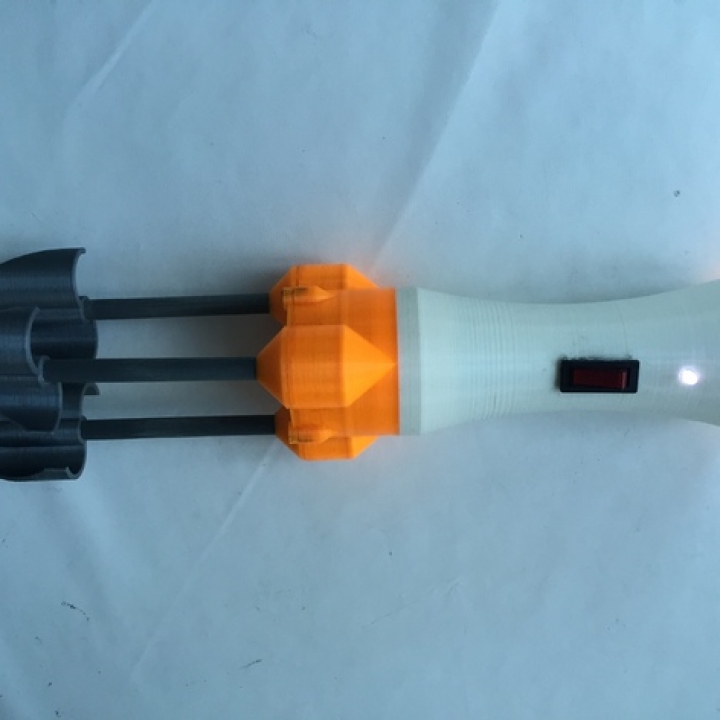
I chose to redesign the traditional cooking whisk because I saw many potential improvements that could be made to take the concept of an electric whisk to the next level. My goal was to create a more user-friendly product that makes using the whisk a pleasure rather than a chore, so I set out to design a device that is comfortable for the user. One major improvement I aimed to make was increasing the power on the electric whisk. To achieve this, I decided to use three blades instead of the traditional two, which would significantly reduce the time spent mixing food. This change would also allow for more efficient and effective mixing, making it easier to prepare a variety of dishes. I incorporated a cordless drill (Mac Allister 3.6 v) into the electronics of the whisk, which includes a motor, lithium battery, charging port, switch, and LED lights. The LEDs serve as indicators to show when the switch is on or off, providing added functionality and ease of use. I found that a shell thickness of 1.6 mm strikes the perfect balance between structural soundness and light weight. When printing the whisk using a 3D printer, it's essential to set the speed to 50 mm per second for optimal results. Additionally, I made sure to include a hex drive in the middle gear, allowing the motor to turn the gears freely. To prevent friction buildup, I applied general-purpose grease to the gears and added ball race bearings to reduce any potential friction, ensuring smooth operation and extending the lifespan of the device.
With this file you will be able to print Electric cooking whisk with your 3D printer. Click on the button and save the file on your computer to work, edit or customize your design. You can also find more 3D designs for printers on Electric cooking whisk.