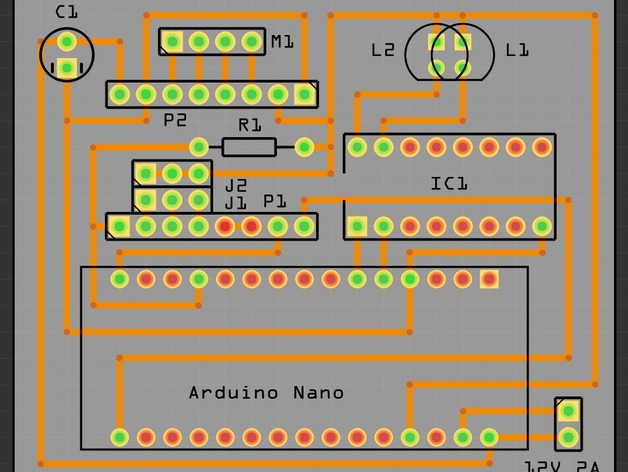
Ekobots - Ciclop 3D Scanner shield for Arduino.
thingiverse
Human: Ciclop 3D Scanner Shield For Arduino. Two Versions, Choose The Best For You: Arduino Uno; Arduino Nano; For Use With Objects: The Cliclop 3D Scanner By BqLabs:http://www.thingiverse.com/thing:740357 Ekobots - Beholder 3D Scanner.http://www.thingiverse.com/thing:1161366 Information And Manuals:http://www.bq.com/gb/support/ciclop Firmware:http://github.com/bqlabs/horus-fw Software:http://github.com/bqlabs/horus Observations: The Arduino Uno Version Is A Simple Derivation Of:http://www.thingiverse.com/thing:771552 I Just Removed The Bridge, All On Board, No Wires. The Arduino Nano Version Is The Same Schematic. Just Use Sockets For The Arduino Nano And The Pololu Drive. Thanks Jesse_Blue. Attention: Print The Arduino Uno Shield At 33% Of .PDF Original Size. It Is 68.6mm X 53.3mm And The Pins Distance Is 2.54mm. Print The Arduino Nano Shield At 28% Of The .PDF Original Size. It Is Just, 43.18mm X 15.24 And The Pins Distance Is 2.54mm. Print A Scratch In Normal Paper And Put The Arduino Board Over It To Verify The Pins Alignment. I Do Not Know Why The Fritzing Create The .PDF With Different Aspect Ratio. All You Need: 1x 10K Ohms Resistor; 1x 100uF 50V Capacitor; 1x ULN2003 CI; 1x Breadboard; Lots Of Male Pines For Breadboard; Lots Of Female Headers For Breadboard; 1x Arduino Board (Uno Or Nano); 1x Pololu Motor Driver; 3x Jumper For Pololu Driver Microstep Setup. If You Are Making The Arduino Nano Version: 1x Female Connector For Power Supply 12v 2a; If Your Arduino Use The Chip CH340/CH341 For Serial Communication, See The Last Images To Configure The Horus 3D Scanner Software.File: "C:\Program Files\Horus\src\horus\gui\main.py" That Is All.
With this file you will be able to print Ekobots - Ciclop 3D Scanner shield for Arduino. with your 3D printer. Click on the button and save the file on your computer to work, edit or customize your design. You can also find more 3D designs for printers on Ekobots - Ciclop 3D Scanner shield for Arduino..
