Egg Bot - Ostrich Bot
prusaprinters
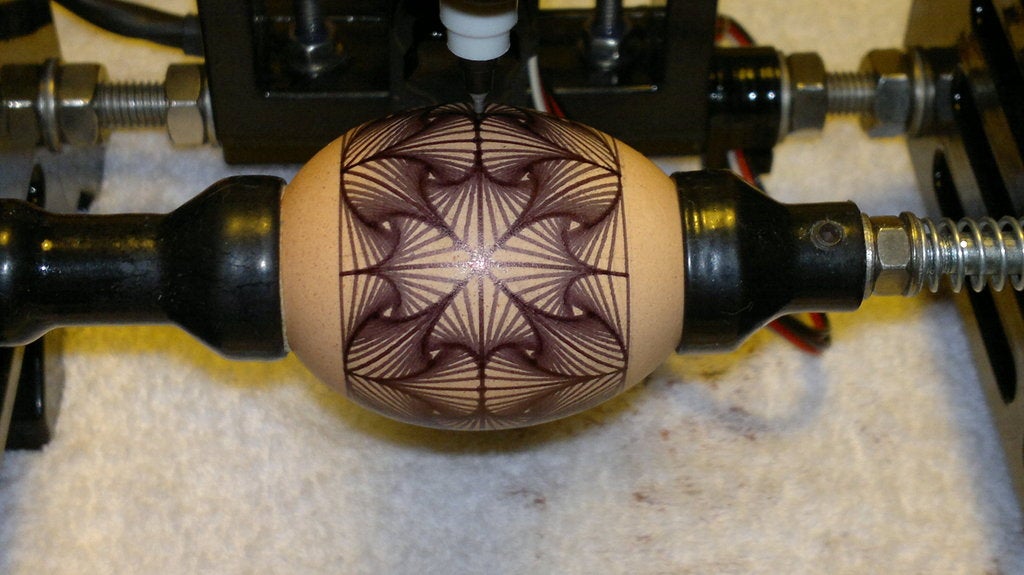
<p>This' my version of Egg Bot, printable 3D printers that accept large. The working range is 160 mm diameter x 200 mm long.<br/> The electronics used to control motors and Engraver is Eggbot original.</p> <p>The design is printed, visible in the photos, is Eggbot Op Art dnewman; Thing: 7099.<br/> Thanks to Dan</p> <p>Video: <a href="http://youtu.be/OCDYA9aj9co">http://youtu.be/OCDYA9aj9co</a></p> <p>Video Engraver: <a href="http://youtu.be/-Eit430iPqc">http://youtu.be/-Eit430iPqc</a></p> <p>Added new Engraver support, wire support, conical support.</p> <h3>Print instructions</h3><h3>Category: DIY Summary</h3> <p>This' my version of Egg Bot, printable 3D printers that accept large. The working range is 160 mm diameter x 200 mm long.<br/> The electronics used to control motors and Engraver is Eggbot original.</p> <p>The design is printed, visible in the photos, is Eggbot Op Art dnewman; Thing: 7099.<br/> Thanks to Dan</p> <p>Video: <a href="http://youtu.be/OCDYA9aj9co">http://youtu.be/OCDYA9aj9co</a></p> <p>Video Engraver: <a href="http://youtu.be/-Eit430iPqc">http://youtu.be/-Eit430iPqc</a></p> <p>Added new Engraver support, wire support, conical support.</p> <h3> Instructions</h3> <p>Glue the two domes to the external slider, the one with the holes goes in the part where there is an ellipse.<br/> I made the external slider into 3 parts to get a better print in the round parts.<br/> The box is screwed connectors on the back below the cursor.<br/> The connectors used are 4-pin (available at electronics stores).<br/> A connector for the engine pasted into the hole in the lid and two pasted into the box, one for the servant (used 3-pin) and one for the motor dell'engraver (used only 2 poles).<br/> The wires coming out from the connector dell'engravewr, go to the two screws on top of the pen arm, where, with the two victims, the wires connecting the arm dell'engraver.<br/> The slider slides on internal threaded rod 6 mm. while the main structure must be fitted with threaded rods 10 mm. 430 mm long.<br/> The coupon of 'engraver should be amended to find accommodation on the left side.<br/> Cut off the part with the existing hole and redo the hole in the center (see photo).<br/> In place of the trimmer 100 kohm to solder two wires that connect a potentiometer, of equal value, which is screwed onto the lid that covers the electronics. In STL there is also the knob to the potentiometer.<br/> Into the hole above the potentiometer is placed the power LED, powered by a servo output free, v. 5. Remember to put in series with a resistance of 620 ohms.<br/> The holes on the left, the cover must be inserted the two plastic buttons that will press the two buttons located on the micro card EIBoard (reset and programming).<br/> Turning the knurled support spearhead the original to make it fit in the arm provided.<br/> The holes media egg from the engine, are glued the brass threaded bushings for 3 But readily available in hardware, while the media are right-handed threaded 6 But to engage the allen that acts as a pivot ..<br/> In support arm, the bushing is 4 Ma<br/> The wires of the motor 2 must be fed into the hole below it.<br/> Look at the structure of the side Left; under the card I planned space for the connecting wires and the hidden passage to the wires of the motor 2.<br/> Servo used Power HD -- HD-1900A<br/> I put a lot of photos that I hope will help to assembly.<br/> Hello...</p>
With this file you will be able to print Egg Bot - Ostrich Bot with your 3D printer. Click on the button and save the file on your computer to work, edit or customize your design. You can also find more 3D designs for printers on Egg Bot - Ostrich Bot.
