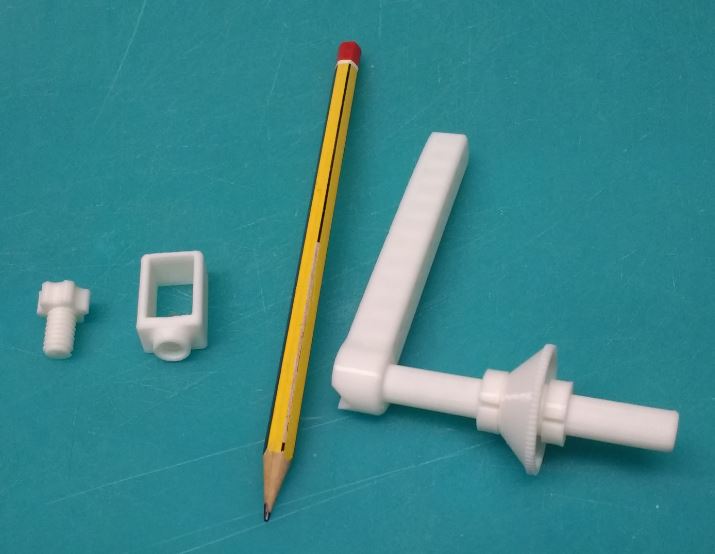
Edge tracing wheel
myminifactory
This was one of my initial designs that I've recently refined a bit. I made some essential adjustments, swapping out rubber bands for a more reliable pen clamp. Additionally, I upgraded the wheel size to ensure smoother operation in case it doesn't glide freely as expected. This device is specifically designed for tracing the edges of various materials such as paper or wood to either expand or shrink their dimensions. The wheel precisely follows the edge while the pen leaves behind a new line marking the desired dimension. To assemble this project, simply print all the required parts and follow the provided assembly instructions (pay close attention to aligning the V-groove in the axle with the pen holder). The parts should fit together nicely, but if needed, apply some glue for added security. To secure the wheel onto the axle, use split rings – the more you use, the better the grip will be. One of the key features of this device is its adjustable wheel positioning, made possible by the sliding nature of the split rings. If required, the wheel can even be reversed for added flexibility. In terms of securing the pen to the pen holder, I opted for Loom bands but rubber bands also work well as an alternative. Printing settings for optimal performance include a 0.2mm layer height and 0.8mm walls with two shells for added strength. To achieve the best results, set your infill percentage to 15%.
With this file you will be able to print Edge tracing wheel with your 3D printer. Click on the button and save the file on your computer to work, edit or customize your design. You can also find more 3D designs for printers on Edge tracing wheel.
