Edge / Corner Marking guide
prusaprinters
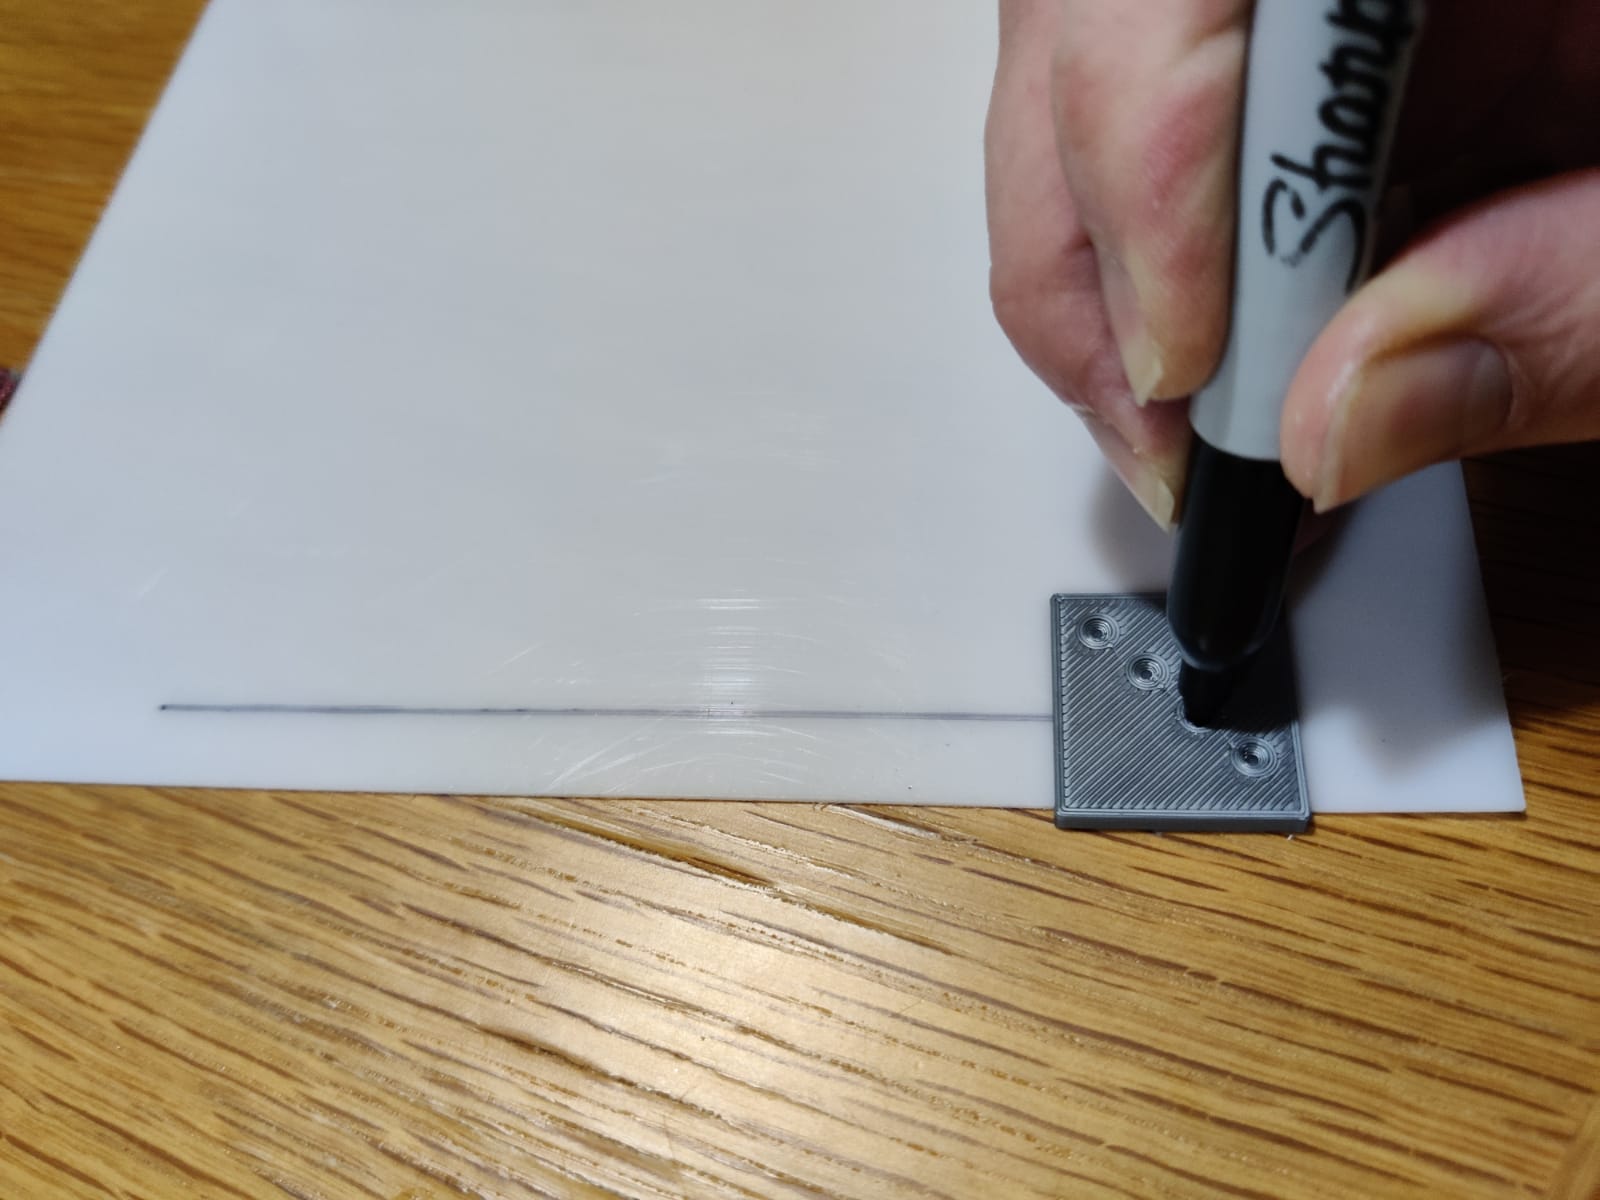
<p><strong>Edge / Corner marking guide</strong></p><p>Measuring up and marking out edges for drilling or cutting requires patience and focus … measure twice, cut once.</p><p><strong>OR</strong> you can just print a jig to put the marks exactly where you want them with zero faff, and perfect accuracy! I got tired of marking up Perspex sheets for aluminium extrusion slots with a ruler and made these jigs to do it super quickly.</p><p>Marking holes are 1 mm diameter, with a 45 degree chamfer to allow a sharpie tip in, but you can also use an engineers scribe, pencil, biro, or whatever else works with the surface you want to mark.</p><p>Both guides have holes at 5, 10, 15 and 20 mm from the edge / corner. Simply put the guide lip over the edge of the material that you want to mark, hold it snug and use the holes to pop a dot where you need it!</p><p>:) Psyense</p><p> </p>
With this file you will be able to print Edge / Corner Marking guide with your 3D printer. Click on the button and save the file on your computer to work, edit or customize your design. You can also find more 3D designs for printers on Edge / Corner Marking guide.