EDF RC Boat
thingiverse
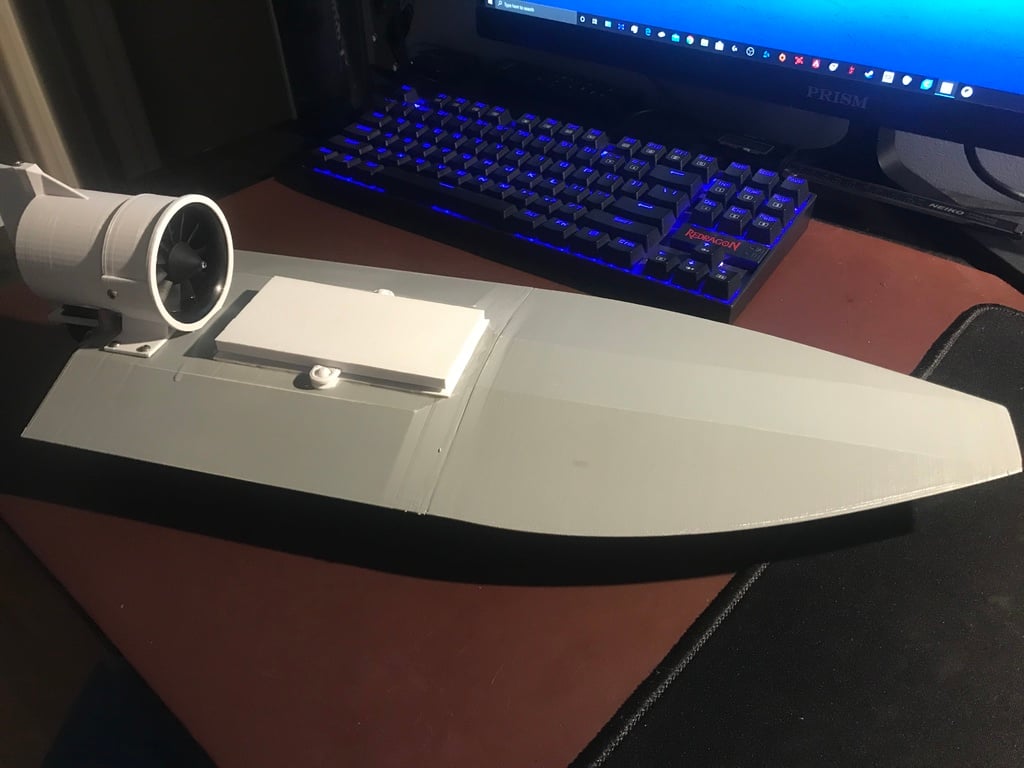
I designed this EDF boat after watching RCLifeOn's video on his custom EDF RC boat. It prints in two parts and requires a minimum print height of 240mm and dimensions of 190mm or so. There are two models: Mk. 1 and Mk. 2. I've printed Mk. 1, which is a joy to drive but may be too small for ponds with waves, as seen in the video. Mk. 2 was designed to handle waves better and is more suitable for the 64mm EDF. I haven't printed this version yet, but it should work flawlessly like Mk. 1 did. The main difference is that Mk. 1 is meant for driving on land while Mk. 2 isn't, but still could. The servo sits at the back and attaches directly to the rudder. The top of the rudder is secured to the EDF. Use a waterproof 9 Gram servo as the servo is submerged during normal operation. Glue the bow and stern together with epoxy, preferably classic JB Weld steel-reinforced epoxy. Most screw holes are set for M3 and M2. Create a watertight seal around the lip of the Cover Bottom using a rubber band. Seal the open portion where motor/servo cables route using double-sided adhesive tape. The two EDF models I used are below: 50mm Powerfun 4300KV (https://amzn.to/2NwNNlu) and 64mm QX-Motor 3500kv (I should have gotten 4300kv, https://amzn.to/2Z878yR). The video showing the 50mm model is at the end of this gallery: https://youtu.be/V42A0phzvP4.
With this file you will be able to print EDF RC Boat with your 3D printer. Click on the button and save the file on your computer to work, edit or customize your design. You can also find more 3D designs for printers on EDF RC Boat.