EC 135 T3
prusaprinters
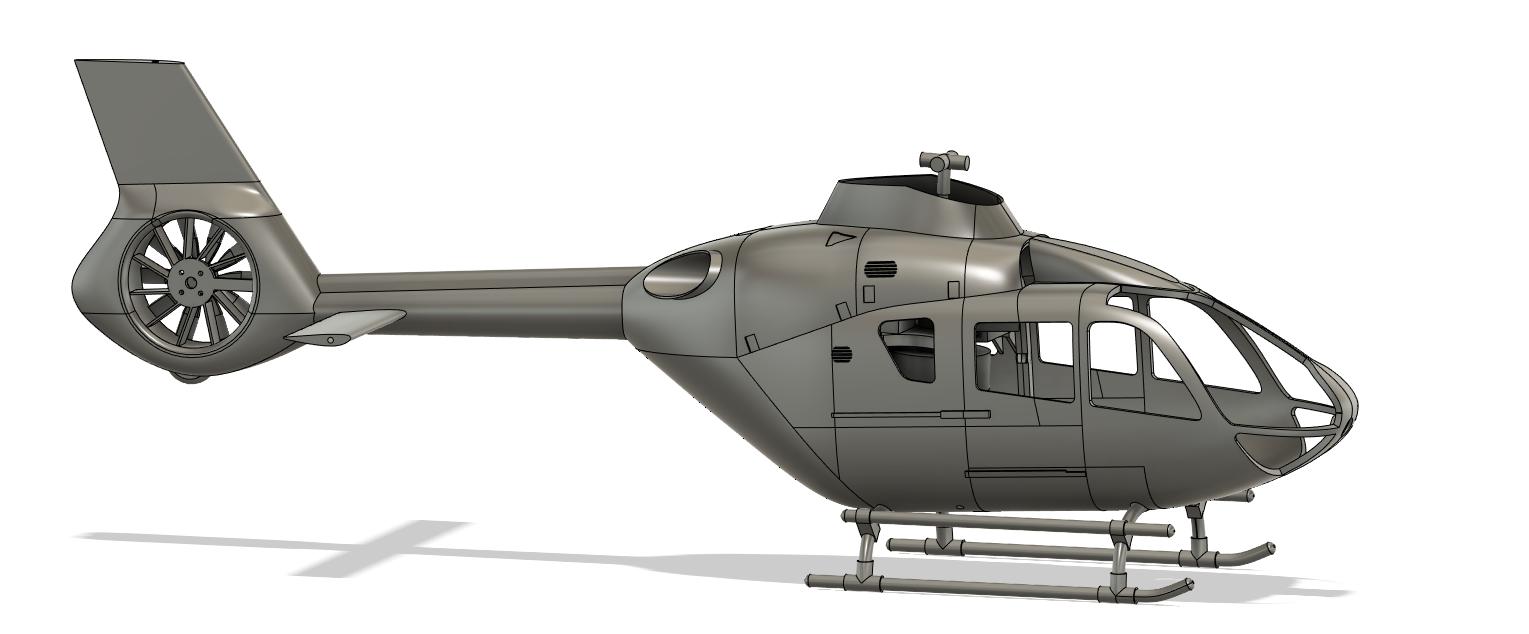
<p>1:18 scale EC 135 electric r/c helicopter</p><p>Build thread on RC Groups </p><p><a href="https://www.rcgroups.com/forums/showthread.php?3835813-EC135-Scratch-Build">https://www.rcgroups.com/forums/showthread.php?3835813-EC135-Scratch-Build</a></p><p><br>Note that this is a work in progress - comments welcome!</p><p>Modified on 31/07/21 to update stl files for horizontal stab and tail, added gcode files.</p><p>Modified on 22/05/21 to update stl files for the tail boom, added gcode files.</p><p>Modified on 15/05/2021 to include 3 directories for window stl files. I have printed the 1.1mm windows with a 0.6mm nozzle and the 1.5mm windows with a 0.8mm nozzle in PVB. The third directory has 5mm thick plugs for anyone who wants to try vacuum forming windows as another method.</p><p>All parts except the windows were printed in Polymaker Polymax or Prusament PC Blend.</p><p>A standard 0.4mm nozzle could probably be used for most things.<br>0.6mm nozzle was used for all windows, fuselage parts, tail boom, FC and motor mounts<br>0.4mm nozzle was used for the tail, fan, horizontal stab, landing skids<br>0.25mm nozzle was used for the ARB, dfc link, and inner swash ring</p><p>All holes are present in the STLs, but it is a good idea to use a drill bit on them before tapping.</p><p><strong>Items required</strong><br>Drill bits: 1.2mm for 1.6mm bolts and 1.6mm for 2mm bolts pre tap, 2mm for untapped, 3mm for main motor bolt holes.<br>1.6 and 2mm taps<br>1.6 x 6mm bolts are used for the ARB and servos (8)<br>2 x 10mm for skid/frame attachment (4)<br>2 x 6mm for the motor mount (4)<br>2 x 5mm for the tail motor (4)<br>6mm dia magnets (4)<br>684ZZ bearing (1)<br>Tail motor: BetaFPV 1404 3800kV<br>Main motor: T-Motor 4006 380kV<br>Rotor head: Microheli 4 blade head for Blade 230s<br>Swash: modified OMP M2<br>The main shaft, collar, servo linkage rods, servos all come from an OMP M2<br>I used a Heliflight3D flight controller, described here:<br>https://www.rcgroups.com/forums/showthread.php?3804877-Putting-a-HF3D-FBL-on-the-OMP-M2<br>Note that the front right servo direction is reversed compared to that installed on an OMP M2, so a FC will be required where this can be done.</p>
With this file you will be able to print EC 135 T3 with your 3D printer. Click on the button and save the file on your computer to work, edit or customize your design. You can also find more 3D designs for printers on EC 135 T3.