EasyCut
prusaprinters
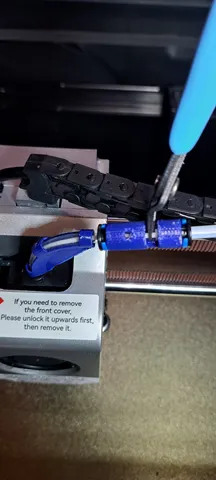
Alternative methods to the one presented here. Just Skip to the 3rd and 4th Bullet!Simon Prevett at the QIDI Tech 3d Printer Owner forum described: If you cut a very small piece of ptfe tube and insert it into the head and leave it their then the next section of tube just butts up too it, it won’t go anywhere as it’s being pulled forward. And when it’s time to cut, just pull on the main tube and you expose the filament right at the head. Hope this makes sense. I just cut my original tube at the head, about 5mm up from the black collar. Simple, works, a little awkward when loading new filament. Simple: The similar to above, but allows re-connection immediately after cutting the filament, so when filament is reloaded you just load it . https://www.printables.com/model/781797-slip-inout-bowden-tube-holder-clip-to-facilitate-q Was my fist release, still stresses print head when pulling ptfe tube. Coolest Design: https://www.printables.com/model/848262-qidi-cutter-v20-for-x-max-3x-plus-3-uses-9mm-snap Fantastic design, I have not tried this yet. Have read that it fits the X Max 3 without any conflict! Presented below, Provides a gap to cut the filament without any ptfe tube handling. Works well, light weight, no stress to the print head when cutting, and no conflict with the print head movement. The X-Max-3 QIDI's ‘Release Filament’ procedure for removing filament involves disconnecting the ptfe tube at the extruder, cutting the filament, then extruding 80mm filament through the extruder out the nozzle. The filament left in the ptfe tube can then be pulled back to the spool. Finally the ptfe tube is re-attached to the extruder, ready for next filament to be loaded.This EasyCut model eliminates the need to disconnect the ptfe tube at the extruder by providing a small gap of filament exposed, enough to cut the filament with small cutters. This way the filament can simply be cut during the ‘Release Filament’ procedure, eliminating the need to disconnect, then re-attaching the ptfe tube at the extruder. Parts Needed: Download and print one of each: EasyCut and curved PTFE30R90 models. Two Bowden Tube 1.75 Coupling Collet Clamp Clip Bowden Collet and Clip pairs. I ordered 20 pairs from Amazon: https://www.amazon.com/dp/B0CP6XRR8D?psc=1&ref=ppx_yo2ov_dt_b_product_details for ~$7.00. 75mm length of PTFE Tubing Hose High Temperature Tube Pipe Insulating 3D Printer Hose 3mm ID x 4mm OD. Must be 3mm ID to reduce resistance of the 30 degree tight bend involved. Suggest transparent tubing. I ordered over a meter from Amazon: https://www.amazon.com/dp/B091578CLX?ref=ppx_yo2ov_dt_b_product_details&th=1 for ~$5.50. Not physical parts, but a step that must not be skipped. In the Klipper printer.cfg file, change the amount of filament forced during loading, from 80mm to 119mm. Also, in your slicer, you will want to change your slicer End G-code to center the extruder over the bed at the end of each print so that the slot for cutting the filament can be accessed without manually moving the extruder. Details are listed below. These changes may need to be re-applied after updates to the printer or slicer firmware/software. Bonus: May want to also print the ‘X-Max-3 Lid Slider Frame’, allows the top lid to simply be slid open for access to cut the filament. Available in Printables: https://www.printables.com/model/781275-qidi-x-max-3-lid-slider-frame .Installation:Disconnect the ptfe tube at the extruder, pull about 75mm of the tube out of the back of the printer to allow the new pieces to be inserted at the extruder. Install the collet clamps and and retainer clips to each end of the printed EasyCut. Straight and cleanly cut, 75mm of the 3mm ID 4mm OD ptfe tube, then push through the bend of the curved PTFE30R90 model so that there are equal lengths at each end. Push one end of the curved tube into the Long barrow side of the EasyCut. Now, connect this assembly between the extruder and original ptfe tube. The short barrow end of the EasyCut connects to the original ptfe tube. Push together snuggly, check that all ptfe ends are well seated. On the EasyCut, ptfe tubing will cover the bottom of the small inspection hole. On the filament side, the ptfe tube extends 1mm into the cutting gap. Modify the Klipper printer.cfg as described in the details below to lengthen the extruded filament length. Also Modify your slicer 'End G-Code' to center the extruder at the end of the print to facilitate the cutting of the filament. See Key Details section. Ready. Just use the ‘Release Filament’ procedure as you would, but don't remove the tube from the extruder, just cut the filament through the EasyCut gap. Warnings: This feature is offered with the best intentions, but has had limited testing. This is implemented so the machine can be returned to it's original configuration to avoid warrantee issues, but… You are using at your own risk. I strongly suggest mounting the EasyCut at the same location along the filament path as pictured because there is very little clearance between the wire chain, top and sides of the printer when the print head is at extremes. Once installed verify the clearance between the EasyCut and top of the printer enclosure. Also watch that the ptfe tubing is not pulled too tight or loose. Check this in all the positions of the extruder. Key Details:Print Settings: I've been using 30% infill and brim to print. No Supports. Orientate EasyCut with the cutting gap up. Orientate the PTFE3090 with long flat edge on the bed. The enclosed printer environment is often too hot for PLA parts. I've been using PETG which should be fine, but ASA or ABS with their higher melting temperature would be even better. Printer.cfg: You must modify the printer's Klipper printer.cfg file to move about 40mm of additional filament because the cut is now cut further away from the extruder. The change increases the extraction from 80mm to 119mm during the Load and Release functions. BTW, somewhere, the code limits the extruder to a maximum to 120mm extrusion, so do not mount the EasyCut further away from the extruder than pictured.In the printer.cfg file, the 'gcode_macro M604' macro is used with the Releases Filament and Load procedures to force filament through the extruder. Below shows the Before and After line with the necessary changes.Before→ G1 E80 F400 # Original. Extrude 80mm. After→ G1 E119 F400 # Changed from E80 to E119 to support EasyCut. Quick Change Notes for the Release Filament update in Klipper/Fluidd:When printer is idle. Carefully:In Fluidd/Klipper, select {...} icon in column near left side of main page.Find and Click on printer.cfg file to edit. Then single click anywhere in file top comments, then press Control and F keys together which opens the Find prompt near top of screen. Enter into the find box: m604 .Should now be at the M604 macro in the file. Look for the Before line and change it to look like the After line (The change is E80 to E119 ).Last, click on Save & Restart at top of file. Slicer End G-code: To make the Release Filament process easier, should change the code to move the printhead out from the edge of the printer at completion of a print. Adding these commands to the End G-code in your slicer will leave the extruder centered over the bed at the end of each print, so you can simply lift the lid and cut the filament. The change below moves the print head to the center of the bed. Example ‘End_G-code’ from QIDI Slicer showing the Before line and After line update. Before→ G0 X0 Y0 F12000 After→ G0 X150 Y150 F12000 ; move to of bed center. Quick Change Notes for the QIDISlicer End G-code :Open the QIDISlicer, Click Expert mode in upper right corner, (Remember old mode, to set back later). Select Print Settings tab, Select Custom G-code along the left. Scroll down to End G-code section, find the Before line in the text box and edit to look like the After line.Save Slicer Settings.
With this file you will be able to print EasyCut with your 3D printer. Click on the button and save the file on your computer to work, edit or customize your design. You can also find more 3D designs for printers on EasyCut.