Easy Removal of PLA from printer bed (UPDATED!)
thingiverse
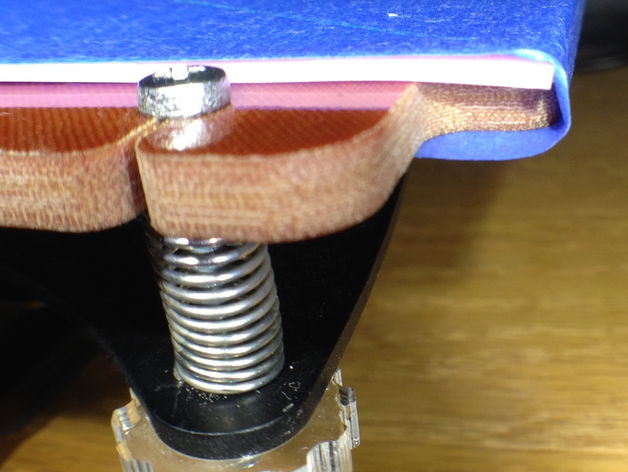
A thick plastic sheet covers the printing area, providing some flexibility for easy removal of PLA parts from the print bed. I came up with an alternative approach that minimizes the bowing effect on the bottom surface of the prints. This technique works great for anyone using a Bukito, but it can be adapted to other 3D printers as well. Using Silicone for Easy Print Removal Materials needed: * Blue Painter's tape * Silicone pastry mat - You can purchase one like this: http://www.amazon.com/gp/product/B00HS3VHO0/ref=oh_aui_detailpage_o03_s00?ie=UTF8&psc=1 + This type of silicone sheet can handle high temperatures, up to 250 degrees Celsius. * Double-sided tape (3M 300LSE) - Get one like this: http://www.amazon.com/s/ref=nb_sb_noss?url=search-alias%3Daps&field-keywords=300lse%20double%20sided%20tape + I find that using a good double-sided tape like 3M's makes it easy to avoid damage during the printing process. Setup Instructions: 1. Place a layer of blue Painter's tape on the print bed. It won't stick very well to the print bed. 2. Put down another layer of double-sided tape over the first layer, sticking well onto the print bed. 3. Cut a silicone mat into a size that will fit your build platform perfectly. 4. Carefully place it on top of the exposed double-sided tape. 5. Once it's in position and flat, apply some gentle pressure so it won't move around when printing. 6. Finish off with another piece of blue tape for support and smooth finishing. 7. You'll have to re-level your bed because the silicone pad adds some extra thickness - around 1.2 mm should do the trick. Using Your Spatula to Remove Parts To remove a part from the build plate, you just slide your spatula gently underneath it since the mat is quite pliable and offers a little bit of 'give.' The removal will go smoothly as you apply some gentle pressure. I've noticed a slight curvature at the bottom surface (less than 0.1 mm), but it might be more significant if absolute flatness matters to you. Adhesive-Free Plate Method For this method, I recommend using something that's hard but still slightly pliable in case you need to bend it. You can use acrylic for example. For mine, the acrylic sheet was only 2 mm thick. The key to making a workable and durable adhesive-free print bed solution is ensuring that any rigid elements used won't flex under stress - a crucial thing to keep in mind when planning your DIY mods! Using Removable Acrylic Plate for Easy Part Removal 1. Find an object to be your removable plate; ideally something slightly flexible but sturdy, like 2 mm thick acrylic. The surface of this plate must fit perfectly around the heads and clips on your printer. 2. Next step is adding blue tape and using Bulldog clips for holding the remplate in place (you may want more info about it.) The rest remains pretty straightforward; the main point here is to secure things tightly, ensure there isn't movement that would affect prints in progress and level according to how much thickness was added by this new setup. Once the piece comes out cleanly after flexing it gently downward at its surface it can pop off nicely without leaving marks. This will probably never warp if applied carefully and doesn't leave a weird uneven surface. Since we used something more sturdy as support the build plate stays pretty level.
With this file you will be able to print Easy Removal of PLA from printer bed (UPDATED!) with your 3D printer. Click on the button and save the file on your computer to work, edit or customize your design. You can also find more 3D designs for printers on Easy Removal of PLA from printer bed (UPDATED!).
