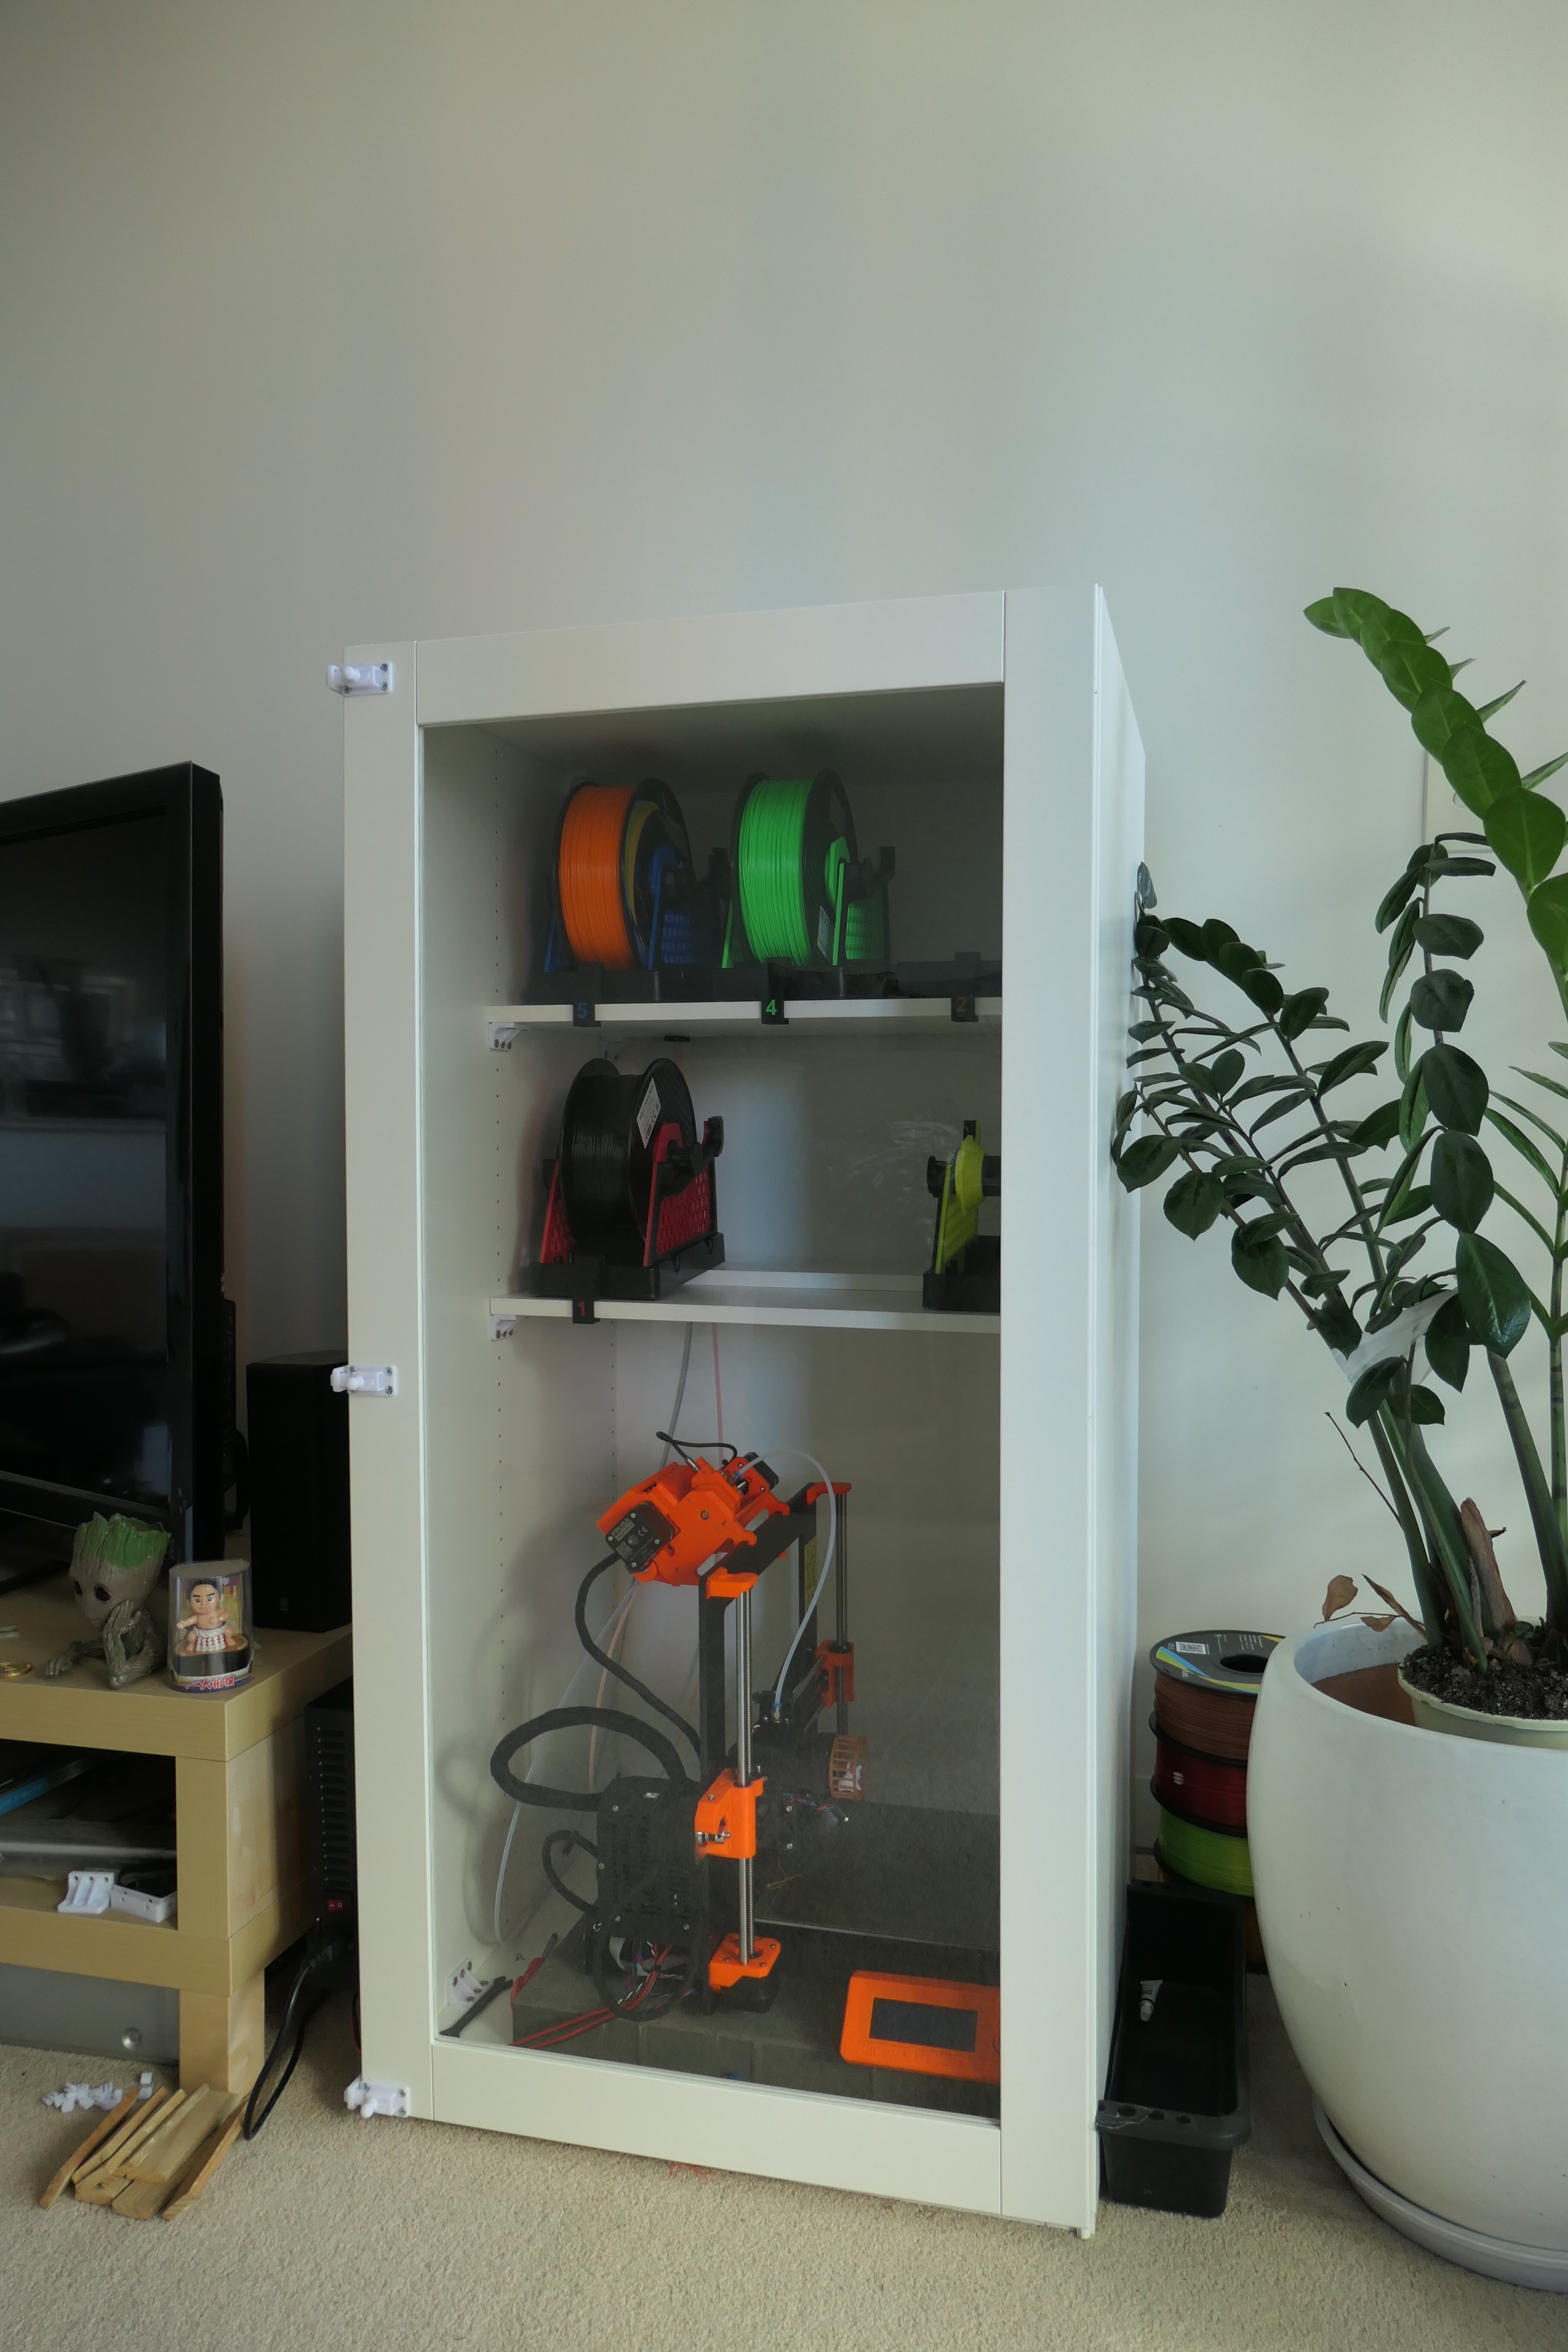
Easy Prusa 3D Printer Enclosure
prusaprinters
<p>This is a simple printer enclosure setup. You can pick and choose which part you want to install.<br>I use the Ikea Platsa 600x1200x550 frame and Vard 600x1200 glass door. For the shelves, I used 295mm melamine boards. You can use pretty much use any cabinet that will fit the printer; or even build your own.</p><p>There is the popular enclosue build from the Ikea Lack side table. But I need something more air tight and sturdy. Also, the Lack enclosure doesn't allow for the concrete and foam bed underneath the printer.</p><p>If you find this useful, please click the Like button. The more Like this page gets, the easier it is for others to find this page on their search result.</p><p><strong>First Thing</strong><br>Most cabinets are not deep enough for the Prusa printer. So the first thing is to rotate the printer sideway. By mounting the LCD on the side we can operate the printer sideway. The printing file for the tray and sideway mount can be found at <a href="https://www.thingiverse.com/thing:3670137">https://www.thingiverse.com/thing:3670137</a>.<br>Because the Electronic Assembly is now at the front, we can also detach the PSU and have the PSU sitting outside the front opening. All the other side mount curently on the web have the LCD on the right side; these ones won't allow you to extend the PSU outside the enclosure.<br>If you have detached the PSU, please remember to add the brace in place of the PSU (<a href="https://www.thingiverse.com/thing:3512441">https://www.thingiverse.com/thing:3512441</a>).</p><p>It is important to have the power switch outside the enclosure that is easy to get to, in the unfortunately event of an emergency.</p><p><strong>PSU Holder</strong><br>Most PSU holder on the web mount the PSU sideway or upside down like the ones for the Lack enclosure. The PSU vents are designed to keep the dust out when operate in the correct orientation. Any other orientation will cause the vent to collect dust instead.<br>The PSU holder I end up using is at <a href="https://www.thingiverse.com/thing:4174600">https://www.thingiverse.com/thing:4174600</a>. This have the added bonus that you can detach PSU from the holder.<br>Now you are able to easily take the printer out of the enclosure for maintenance.</p><p><strong>Extruder/MMU2 Indicator for sideway printer</strong><br>Most Extruder Indicators are designed in 2D for front viewing only. I had to let go of the classic orange Windmill. And I replaced it with the Hamster Wheel Indicator at <a href="https://www.thingiverse.com/thing:3142344">https://www.thingiverse.com/thing:3142344</a>.<br>For the MMU, I enlarged the original Circle indicator, so it doesn't get block by the MMU2 unit.</p><p><strong>Brace, Brace, Brace</strong><br>The Ikea Platsa didn't feel very solid. So I added brackets around the joints and the shelves to stiffen the frame. There are lots of brackets on the web. Because the Ikea boards don't hold screws very well, I choose brackets with lots of screw attachments. The ones I ended up using are <a href="https://www.thingiverse.com/thing:2743637">https://www.thingiverse.com/thing:2743637</a> and <a href="https://www.thingiverse.com/thing:3448859">https://www.thingiverse.com/thing:3448859</a>.</p><p><strong>Sealing Strips</strong><br>I put weather sealing strip along the opening to keep the fumes and heat inside. I also cut out a notch in the sealing strips for the wires.</p><p><strong>Latches to keep the door tightly shut</strong><br>I needed a strong latch that will press the door hard against the sealing strips. I use the latch at <a href="https://www.thingiverse.com/thing:2756425">https://www.thingiverse.com/thing:2756425</a>.<br>It's difficult to align the bolt to the eye; and also allow for movement of the door over time. I enlarged the eye to give it a bit more play. You can find the design in the "Files" section.<br>I also shorten the bolt, so the unit can be mounter closer to the edge of the door. This is to reduce the force on the latch attachment points. The files for the shorter latches can also be found under the "Files" section.<br>The latch also work as a door handle.</p><p>After the sealing strips and the latch. The unit can already contain the plastic fume very well. I had a long print running. I closed all the windows and left my apartment. When I return 2 hrs later. I don't smell any plastic fumes.<br>Given it's an Ikea cabinet, I plan to apply silicon seal to all the joint just incase.</p><p>I setup the printer next to balcony door to dissipate the funes when I access the printer. And have an indoor plant next to it to help take up some of the VOCs.</p><p><strong>Spool Setup</strong><br>I use my NoClunk adaption of the Gravity Spool at <a href="https://www.prusaprinters.org/prints/35527-noclunk-gravity-spoolholder-for-mmu2s">https://www.prusaprinters.org/prints/35527-noclunk-gravity-spoolholder-for-mmu2s</a>.<br>I had a gap behind the shelf and the back of the cabinet that the PTFE tubs feed through. This keeps the PTFE tube at the back and out of the way. I had the PTFE tube attaching to the back of the shelves with clips., you can find the clip at the "Files" section.</p><p>The original Gravity Spool lifts the spool along the linear rail and sometimes cause the spool to stop before it should. I raised the higher end of the spool holder with an extra bit of board. And now the spools work perfectly.</p><p>I also had numbered clips at the front to stop the spool holder lifting if the nut is too tight against the spool. You can find the spool holder clip at the "Files" section.</p><p> </p><p>You can check out my other prints at <a href="https://www.prusaprinters.org/social/76585-highrise-workshop/prints">https://www.prusaprinters.org/social/76585-highrise-workshop/prints</a>. And don't forget to click the “Like” button.</p>
With this file you will be able to print Easy Prusa 3D Printer Enclosure with your 3D printer. Click on the button and save the file on your computer to work, edit or customize your design. You can also find more 3D designs for printers on Easy Prusa 3D Printer Enclosure.
