Easy printing Electric Violin.
thingiverse
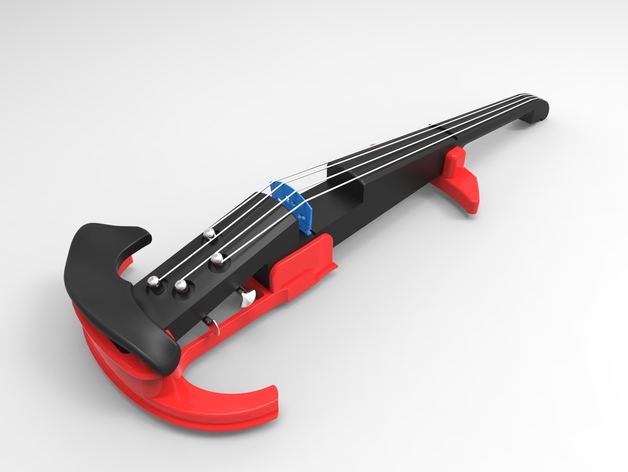
Thanks to Stepan83 for the Elviolin. I'd like to extend my gratitude to Stepan83, who designed the original Elviolin available on Thingiverse, identified by ID #745940. This ingenious creation has been a constant source of inspiration for me. The revised design you'll find below represents my attempt to refine certain components in order to make it feasible for 3D printing without relying on support materials. I've aimed to give the design a contemporary and modern appearance, and also integrated an additional chinrest feature that simplifies usage. All printable parts have been crafted with the capability to be printed sans supports, except for the chinrest section, which might require a few extra print runs to fully materialize without complications. Here are some recommendations to consider when bringing this project to life: Print Settings: 5 shell thickness 4 solid top-down layer thickness 20-30% infill ratio 0.20mm layer height When it comes to filament materials, using ABS, you'll be able to join the pieces with either acetone or PVC pipe glue for optimal bonding results. However, when using PLA filament, an epoxy-based adhesive is your best option. Should you wish to add a fine finish for painting, employing automotive sanding paper and paste could lead to an incredibly smooth surface upon which you can apply the color of your choice. Before diving into paintwork, remember that primer coat is crucial in setting the tone for vibrant results. You can source the required electronics components on Ebay by looking up electric violin pickup items. To fortify the structure of the violin body itself, we highly recommend employing a threaded steel rod (9.5mm). This modification offers stability and durability that surpasses traditional plastic constructions alone. **Instructions:** To ensure clarity and comprehension in assembling the project at hand, please navigate to our main webpage located on http://www.thingiverse.com/thing:745940/#instructions. Here's a complete listing of all materials needed for successful assembly: Components Needed: 6 - 1 piece Sound Pickup Component - 1 unit Electronic Preamp - 1 unit Bridge Element - 1pc Peg Assembly Units (4 pieces) Steel Rod M8x370mm 1 Small Threaded Screw Components: - m4 x 25 mm. screws(9 pc) - m4 x 50mm.screw 1 m3 X8 screw(4 pc ) used for peg component screws(m2 x10).( used to join preamp unit together ) nuts and bushing elements : small sized metal pieces: M 4( 12 piece. assembly) - small nuts m 4 in lengths of about long m3 . used with preamp assembly components.)
With this file you will be able to print Easy printing Electric Violin. with your 3D printer. Click on the button and save the file on your computer to work, edit or customize your design. You can also find more 3D designs for printers on Easy printing Electric Violin..