Easy printable adjustable parts box
prusaprinters
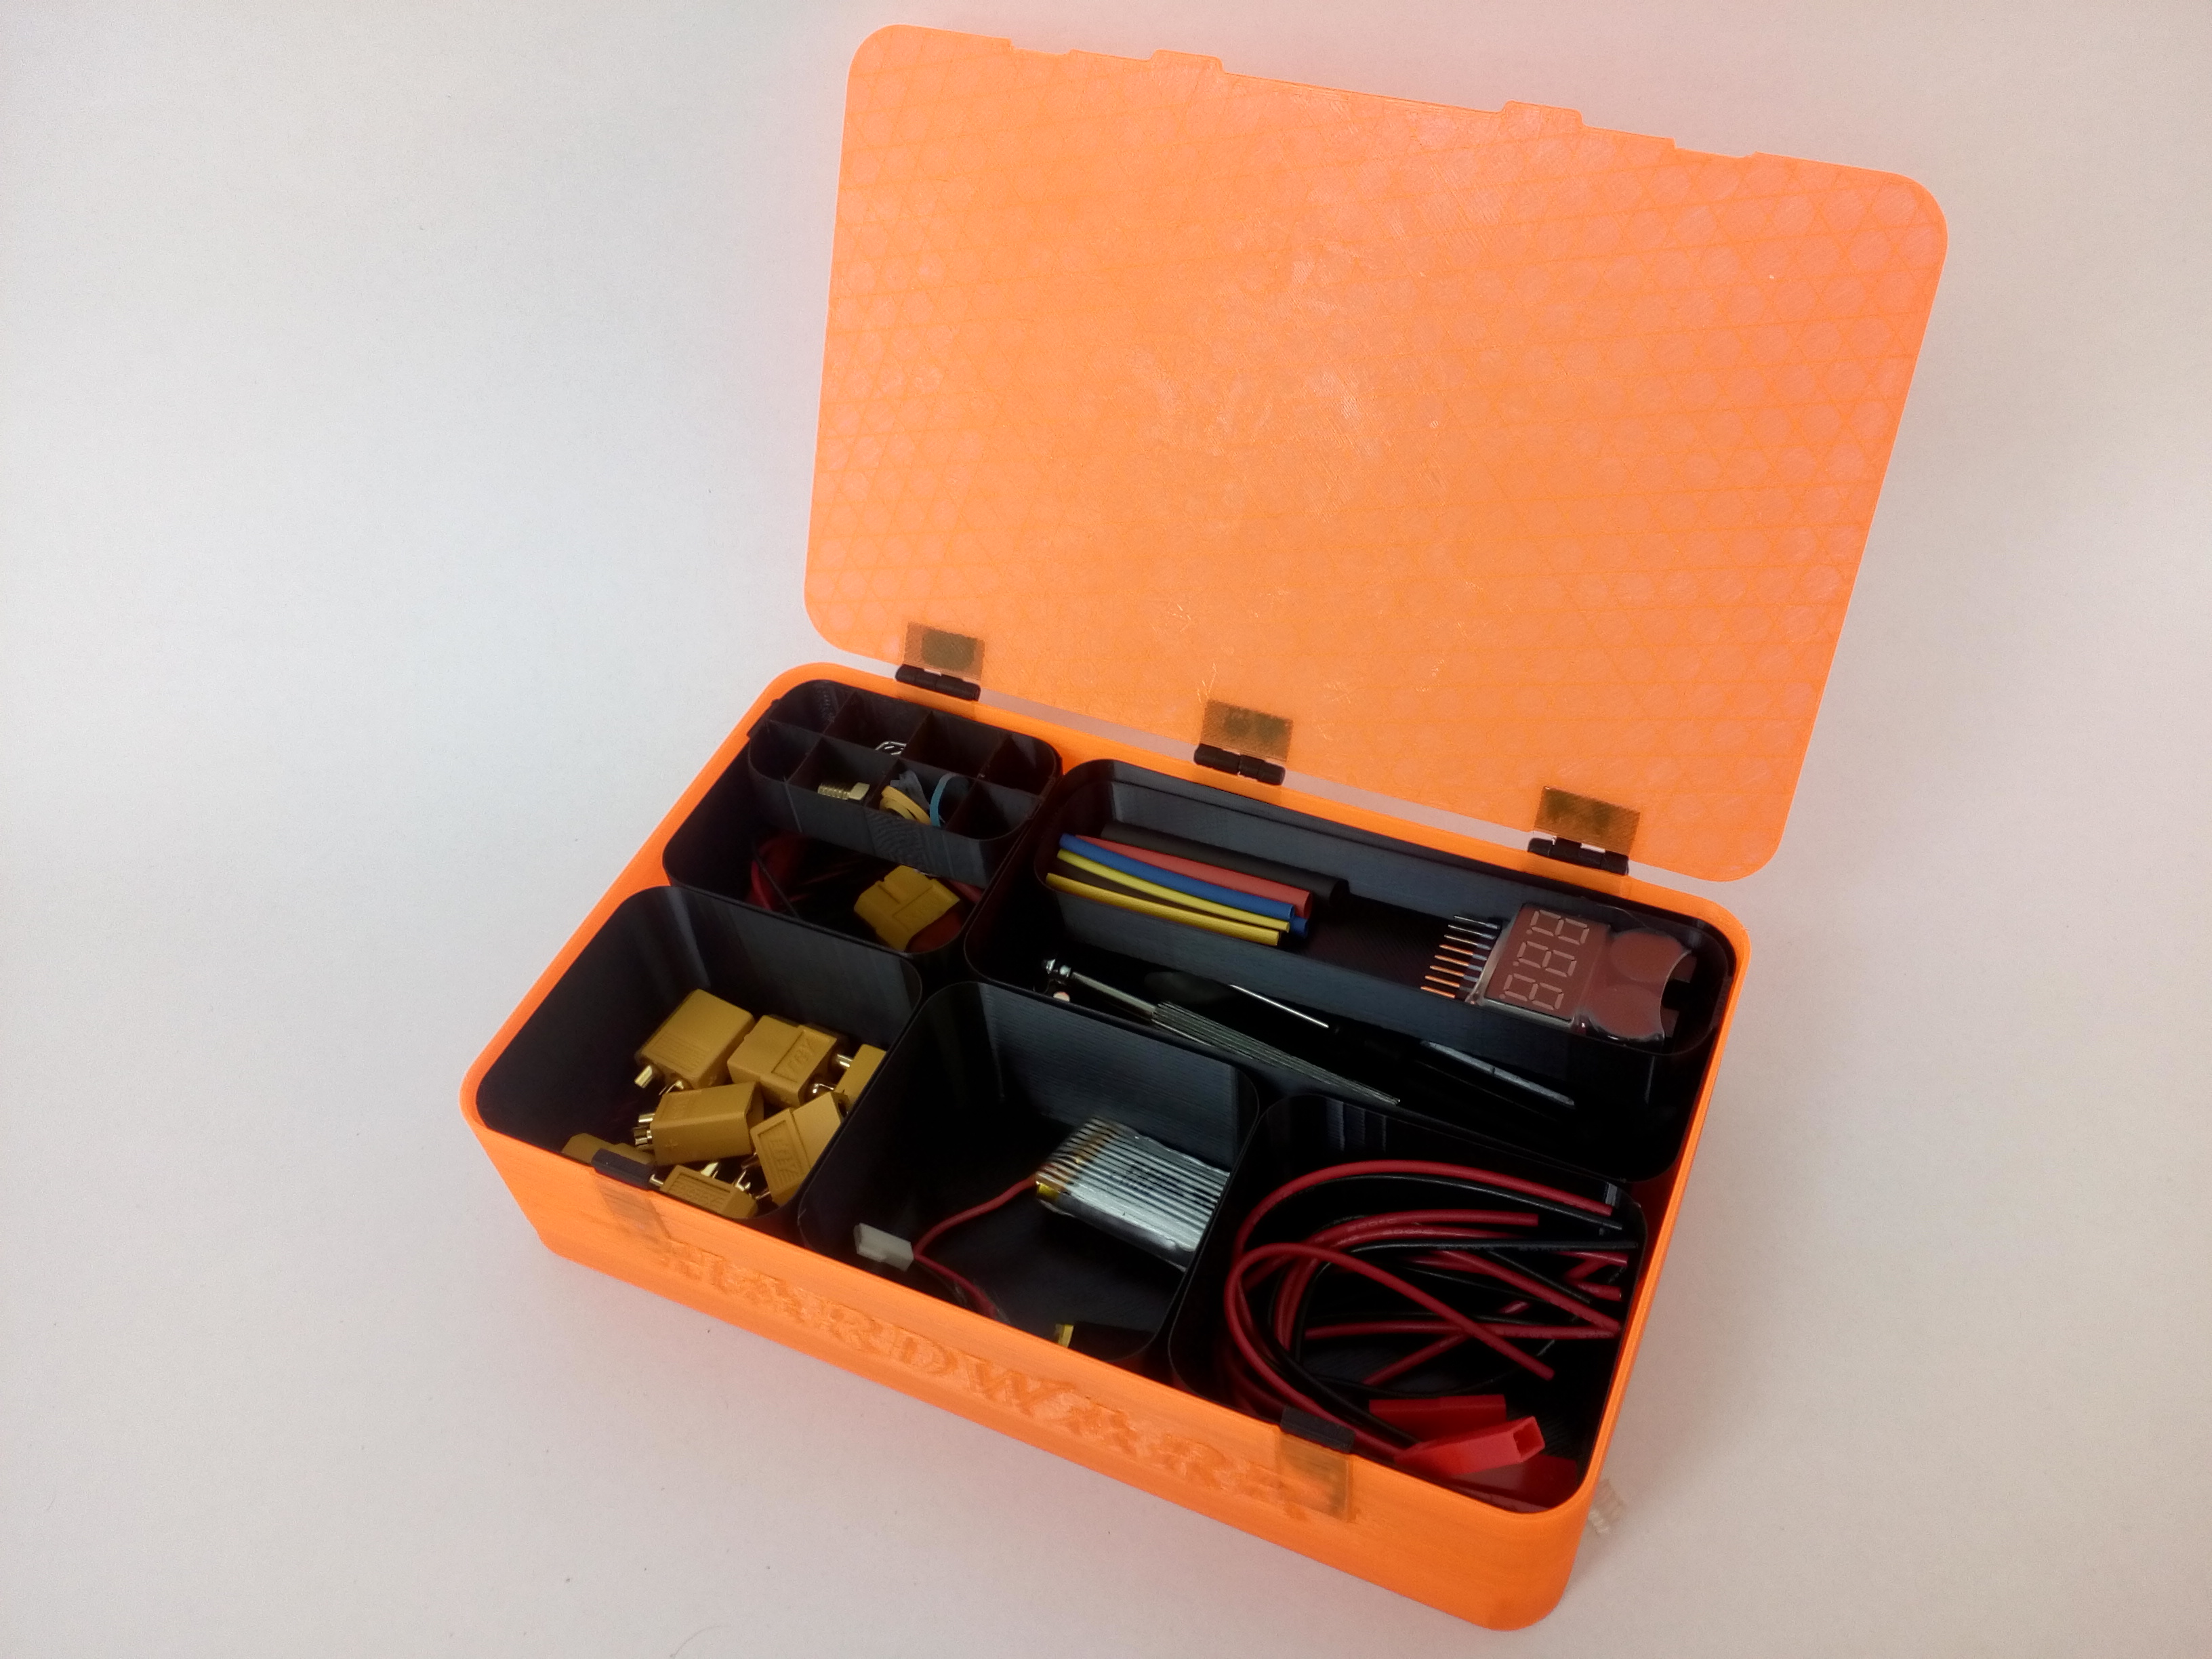
<p>I didn't find a 3d printable storage box I liked so i decided to make my own. This storage box does not require a lot of filament or support(only for the hinges. Further down on this page you can see my print settings for all the parts and how to make even smaller compartments inside the existing ones.</p> <p>You need to print:<br/> 2x lid clip.stl<br/> 3x hinge1.stl<br/> 3x hinge2.stl<br/> 1x lid.stl<br/> as well as one of the three box shells and your choice of inserts that you can see below.</p> <p>In one box you can have either 6 1x1 inserts, 2 2x1 inserts and 2 1x1 inserts, 1 2x1 insert and 4 1x1 inserts or 1 2x2 insert and 2 1x1 inserts. The 2x1 top insert fits in the 2x1 insert and the 1x1 top insert fitts (yes you probably already now but just to be clear) the 1x1 insert.</p> <p>To assemble the box, first you need to put together the hinges. Remove the support with a pair of side cutters then insert a piece of 1.75mm filament and cut the rest of. Then glue the hinges in the cavities on the lid with superglue. Then glue the lid clips with the smooth side towards the front of the box. Hold the lid in place in the clips and then glue the hinges to the box to ensure that it sits in the right place. After that you are done and can place in the inserts you want.</p> <p>Happy printing!</p> <p>And don't be afraid to ask me if you have any questions.</p> <p>I've made a video about the model and slicer settings for it.<br/> Link:<br/> <figure class="media"> <oembed url="https://www.youtube.com/watch?v=11OS6-1YtM8"></oembed> </figure> </p> <h3>Print instructions</h3><p>Printer brand:<br/> Creality</p> <p>Printer:<br/> Ender 3</p> <p>Rafts:<br/> Doesn't Matter</p> <p>Supports:<br/> Yes for some parts</p> <p>Resolution:<br/> 0.3</p> <p>Infill:<br/> 20</p> <p>Filament_brand:<br/> any</p> <h3>Filament_color:</h3> <p>Filament_material:<br/> PLA</p> <p>Notes:<br/> Print the box with 2 perimeters and a bit hotter then normal to get better layer bonding. For the hinges i recommend a raft or skirt to make sure it sticks down as well as z-hop enabled. The only part that needs support are the hinges. All of the normal inserts can be printed with vase mode and one bottom layer. For the top inserts you need to print with one perimeter and zero top layers. If you want even smaller compartments you can turn on 3-5% infill and set the coordinates to (0,90)</p>
With this file you will be able to print Easy printable adjustable parts box with your 3D printer. Click on the button and save the file on your computer to work, edit or customize your design. You can also find more 3D designs for printers on Easy printable adjustable parts box.