Easy assembled Geodesic Dome
thingiverse
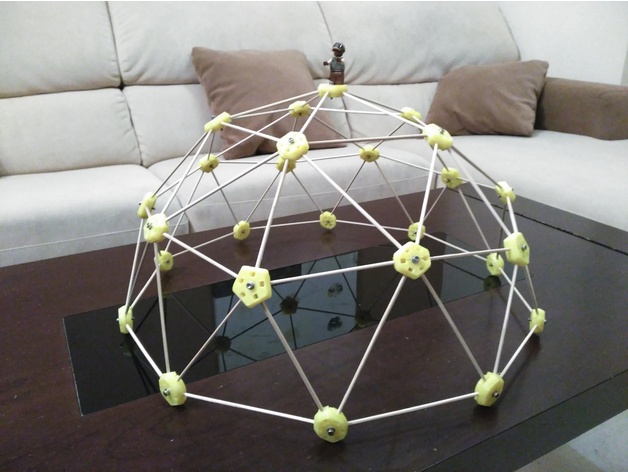
500 mm diameter Geodesic Dome Design considerations: The pieces are designed for a 3 mm diameter bar. Each piece has a M3 screw that tightens the upside and downside part of each node. The distance between the theoretical vertex and the end of the bar is 7 mm, this distance is called Lhole in the fantastic dome calculator by SimplyDifferently.org https://simplydifferently.org/Geodesic_Dome_Notes?page=3#2V/L2 You can change the diameter of the dome by varying the length of the bars. Feel free to play with this calculator. If you need different bar diameters, you can scale the piece for a factor, keeping in mind that the diameter of the screw and the Lhole will be affected by the same factor. Bill of materials: 20 hexagonal nodes 6 pentagonal nodes 30 cut wood bars made from skewers, 123 mm long 35 cut wood bars made from skewers, 141 mm long Screws: 26 bolts M3x16 DIN912, nuts and washers How to assemble: 1. Assemble all the pentagonal nodes with the shorter bars. 2. Join the 5-point stars with hexagonal nodes. The hexagonal nodes have a notch pointing to the shorter bars. 3. Now we can take longer bars and assemble them with hexagonal nodes. See attached photos and floor plan. Thanks Based on the work of Effalo http://www.thingiverse.com/thing:3215 But more specifically, I'd like to thank Obijuan for his great labor of divulgation (In Spanish) https://github.com/TecnoLab/domocraft/wiki Print Settings: Printer: PowerCode Rafts: No Supports: No Resolution: 0.2 mm Infill: 20 % Post-Printing: You need to drill the center hole of each node before assembling the two pieces.
With this file you will be able to print Easy assembled Geodesic Dome with your 3D printer. Click on the button and save the file on your computer to work, edit or customize your design. You can also find more 3D designs for printers on Easy assembled Geodesic Dome.