Easter egg painting tool - Shorter and improved instructions
prusaprinters
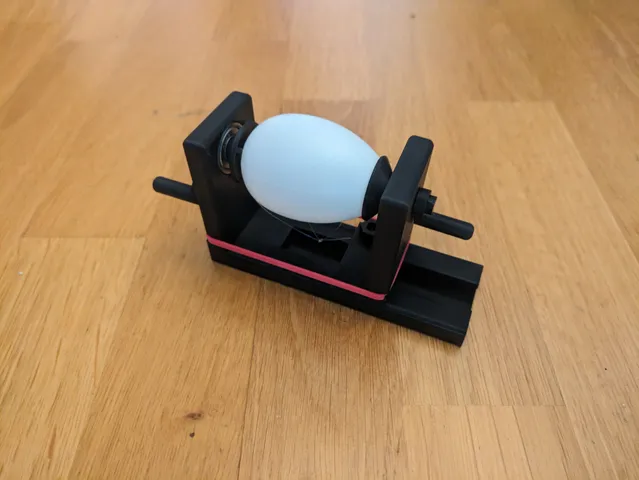
A little tool to make it easier for you to paint the Easter eggs.An egg can be clamped between the two holders using the rubber band. The distance can then be optionally fixed with the screw. By turning the handle, the egg can be painted from all sides without getting dirty fingers. Additionally you need: 1x Rubber band 2x 608Z bearing (3D printed ones should work as well)(optional) 1x M5x15 Screw(optional) 1x M5 Nut To print:1x mainmount_new1x moveablemount2x handle2x eggholder Instructions:Put bearings into the mainmount_new and moveablemountInsert eggholder and secure other side with handle. Should be a friction fit, otherwise use glueInsert moveablemount into mainmount_newSpan rubber into groves
With this file you will be able to print Easter egg painting tool - Shorter and improved instructions with your 3D printer. Click on the button and save the file on your computer to work, edit or customize your design. You can also find more 3D designs for printers on Easter egg painting tool - Shorter and improved instructions.