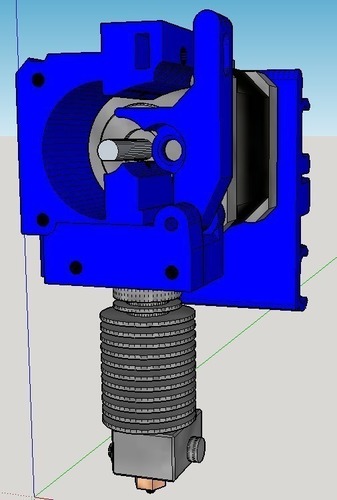
E3D V6 Single Direct Drive System
pinshape
EDIT 6/6/16 Added new version of the idler. This new idler has support for bearings on both sides, so it can't bend over and lose clamping pressure on the filament. There's a 0.4mm thick support material built in that you must cut out. No support needed from your slicer. Use a washer on BOTH sides of the roller bearing. Low profile nut of course. Don't let the long parts list intimidate you on this build!! In reality, all you need is a bunch of long M3 screws, and a Dremel tool to cut them to the proper length. Below is a bill of materials with links to each non-printable part. These are bags/lots of each item. Most are like, 25, or 50 of each. You only need a few of each one though. I used these links for two reasons. 1. I did order these packs because I do a lot of work with these parts and knew I would use them, and 2. McMaster gives the measurement technical diagrams of each so you know exactly what you need to find in 2's and 3's. In reality, all you need is a bunch of long M3 screws, and a Dremel tool to cut them to the proper length. The most confusing part of the build are the three holes that mount the motor to the Xcarriage and the three holes that mount the face piece to the motor. In order to attach these, you have to remove three of the screws from your stepper motor. The threads that used to hold these screws in is near the front face of the motor. This threaded area is SHARED by the long screws that mount the motor to the Xcarriage, and the short screws that hold the face piece to the motor. Getting each screw to use about half of the threads is the tricky part. The threads are about 13mm deep from the back of the motor, and start immediately on the front. So each screw gets about 6mm of the threading inside the motor to secure itself. If this doesn't make sense comment below and I'll see if I can illustrate it or explain it better for you. Parts List: 1 qty M5X10mm Socket Head Cap Screw http://www.mcmaster.com/#93070a121/=wnovg7 1 qty Low Profile M5 nut http://www.mcmaster.com/#90695a037/=wnndyn 2 qty M3 nuts http://www.mcmaster.com/#90695a033/=wnneq0 http://www.mcmaster.com/#93070a121/=wnn5bc 3 qty 30mm (to be trimmed to 26mm) M3 screws http://www.mcmaster.com/#92095a187/=wnn62v 2 qty 25mm M3 screws http://www.mcmaster.com/#92095a186/=wnn6oy 2 qty 60mm (to be trimmed to 59mm) M3 screws http://www.mcmaster.com/#91290a181/=wnn7h8 1 qty 50mm M3 screw http://www.mcmaster.com/#92095a475/=wnn7x2 3 qty 25mm (to be trimmed to 23mm) screws http://www.mcmaster.com/#92095a186/=wnn8dm 1 qty 25mm M4 screw http://www.mcmaster.com/#93070a109/=wnnqj3 1 qty M4 nut http://www.mcmaster.com/#90725a010/=wnosvm 1 qty Compression Spring for the idler http://www.mcmaster.com/#94125k631/=wnnu0i 1 qty MK8 toothed drive gear http://reprap.me/extruder/mk8.html 3 qty LM8UU bearings http://www.kitprinter3d.com/en/mechanical/60-rodamientos-lmu88.html 1 qty 5x10x4 ball bearing http://www.amazon.com/Bearing-5x10x4-Shielded-Miniature-Bearings/dp/B002BBGE56 1 qty 9mm O.D. 4.3mm I.D. (to be opened up to 5mm I.D.) washer. This washer just keeps the idler bearing from dragging on the idler as it rotates. It has to be smaller than the lip around the idler bearing, and fit an M5 screw. Mcmaster does not carry an M5 washer that's less than 9mm outer diameter so I had to widen the inside diameter of the washer with a dremel. http://www.mcmaster.com/#93475a230/=wnnbco
With this file you will be able to print E3D V6 Single Direct Drive System with your 3D printer. Click on the button and save the file on your computer to work, edit or customize your design. You can also find more 3D designs for printers on E3D V6 Single Direct Drive System.
