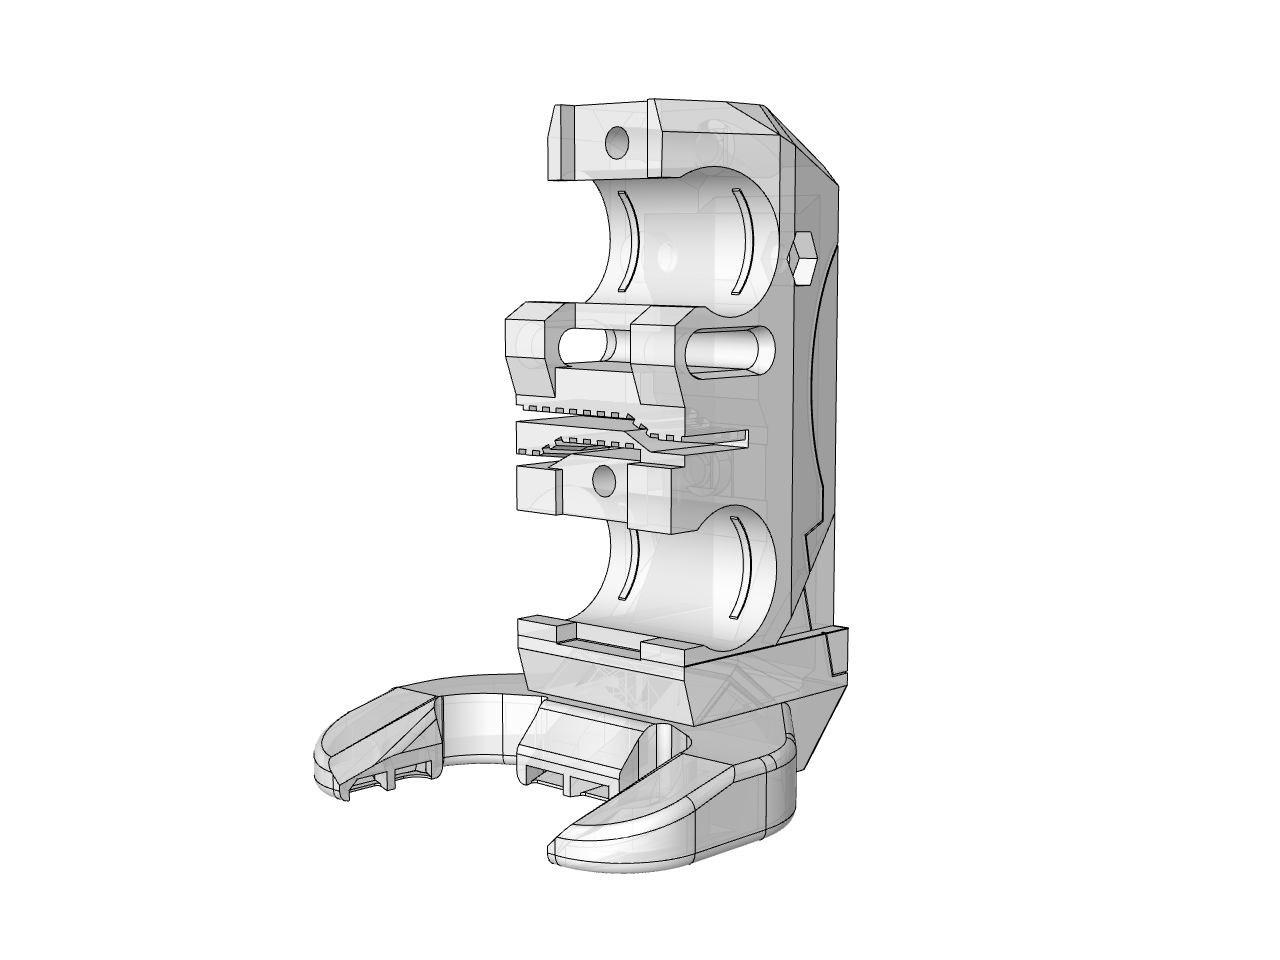
E3D V6 Hotend Fan Duct | Prusa MINI X-Carriage Replacement
prusaprinters
<h3>E3D Fan Duct Replacement</h3><p><strong>Rear-mounted x-carriage replacement fan duct for Prusa Mini/Mini+. Designed to improve part cooling with E3D hotend and heatblock, but will also work with stock hotend assembly.</strong></p><p>Duct geometry is based on the <a href="https://www.prusaprinters.org/prints/37368-prusa-mini-mosquito-fan-shroud">Mosquito Fan Shroud</a> by 4nthonylin. Please refer to his model for information regarding air flow analysis.</p><p> </p><h3><i><strong>More info coming…</strong></i></h3><h5><i>V6 Mount model will be uploaded and linked shortly. Until that time, please consider this part to be a work in progress.</i></h5><p> </p><p>Print in ABS, ASA, PC, or resin</p><p>For installation, simply reverse the <a href="https://prusamini.dozuki.com/Guide/X+Axis+Assembly/8">X Axis Assembly Instructions</a> or follow this <a href="https://youtu.be/9GJ5I-APoKo?t=7789">V3D Teardown</a></p><h4><i><strong>Notes:</strong></i></h4><ul><li><i>Duct design eliminates the mounting hole for the PINDA holder. The stock PINDA mount will have to be replaced with a fan cover-integrated PINDA holder that is included in the V6 hotend mount assembly.</i></li><li><i>If using duct with stock hotend, it's possible that you may need to raise the heatbreak several millimeters for proper clearance. Keep in mind that the tip of the nozzle should extend only ~1.5mm - 3mm below the bottom of the duct when fully assembled. </i><ul><li><i>To do this, you'll need to remove the brass PTFE fitting, remove the short length of PTFE tube located inside the heatsink, and loosen the three grub screws on the side of the heatsink before raising to the proper height. Simply reverse these steps to reassemble.</i></li></ul></li></ul><h5><i>08.30.2021</i></h5><p>Super PINDA mount replacement for stock hotend added. This replaces the stock SPINDA mount for the Mini and doubles as a fan cover. It threads directly into the existing threaded holes in the aluminum heatsink.</p><p>Fan Cover SPINDA Mount Hardware:</p><ul><li>(2) M3 x 25mm bolts</li><li>(1) M3 x 12mm bolt</li><li>(1) M3 threaded insert<ul><li>Insert from the back side of the fan cover for securing SPINDA bolt</li><li>4.0mm max depth</li><li>Suggest purchasing <a href="https://www.ebay.com/itm/292174792941"><strong>from here</strong></a></li></ul></li></ul><h5><i>09.13.2021</i></h5><p>STL and STEP files for duct updated to reflect fan insert issue identified by @Ondřej H.</p><p> </p><h4><a href="https://www.paypal.com/paypalme/my/profile"><strong>Tip Jar!</strong></a></h4>
With this file you will be able to print E3D V6 Hotend Fan Duct | Prusa MINI X-Carriage Replacement with your 3D printer. Click on the button and save the file on your computer to work, edit or customize your design. You can also find more 3D designs for printers on E3D V6 Hotend Fan Duct | Prusa MINI X-Carriage Replacement.
