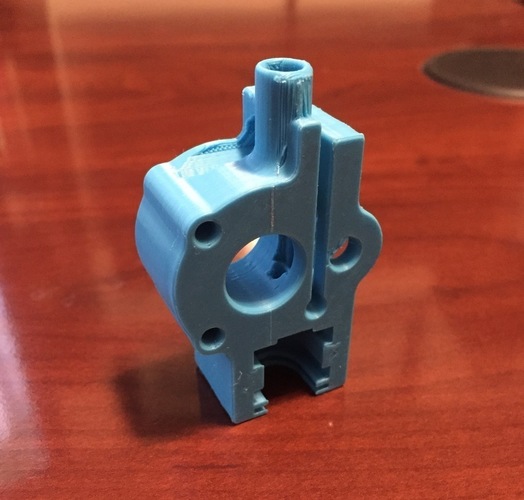
E3D v6 Extruder for MakerGear M2
pinshape
UPDATE: I posted the STEP version of this object for easy remixing / modification. UPDATE: Recently, I updated my E3D v5 extruder and fan duct (http://www.thingiverse.com/thing:533029) to significantly improve the fit of the hotend into the extruder. These improvements have been translated to my E3D v6 extruder, making it easier to insert the hotend without excessive force and resulting in a tighter hold on the hotend. This update has led to improved print qualities compared to the previous extruder version, as the hotend nozzle now has less play. I've also renamed the part with the 2.0 mm ID PTFE upper opening to accurately reflect its inner diameter. Here is my extruder design for version 6 of the E3D hotend, specifically tailored for the MakerGear M2 printer. To create this design, I referenced my model for the E3D v6 (http://www.thingiverse.com/thing:433258). Although this design is intended for use with my E3D v6 hotend duct (http://www.thingiverse.com/thing:494430), a plain version has been included for those using other cooling ducts. My design was inspired by rsilvers' M2 extruder (http://www.thingiverse.com/thing:267137) and cmenard's adaptation for the E3D v6 (http://www.thingiverse.com/thing:349859). I've created two versions of the extruder, one to fit 2.0 mm I.D. PTFE at the top and another for 3.0 mm I.D. PTFE. The latter is preferred by me as it allows room for filament with kinks in it. Each version has been uploaded with and without supports/pads, which can be easily removed or crushed off with needle-nose pliers. To ensure a smooth print experience, I recommend passing a 2.0 mm diameter circular file down the length of the filament shaft of the extruder to prevent minor blockages that may cause filament jams. The heat sink has been moved higher up in the body, resulting in a tighter junction between the hotend and the extruder as it holds onto more of the hotend. This has significantly reduced wobble in the system, except for the tightness of the rail carriage that the extruder motor and extruder ride on. To ensure proper installation of the E3D heatsink, I recommend pressing it firmly into place using a rubberized handle or small block of wood, as removing it may require considerable force. If you have any design suggestions or requested fixes, please don't hesitate to comment.
With this file you will be able to print E3D v6 Extruder for MakerGear M2 with your 3D printer. Click on the button and save the file on your computer to work, edit or customize your design. You can also find more 3D designs for printers on E3D v6 Extruder for MakerGear M2.
