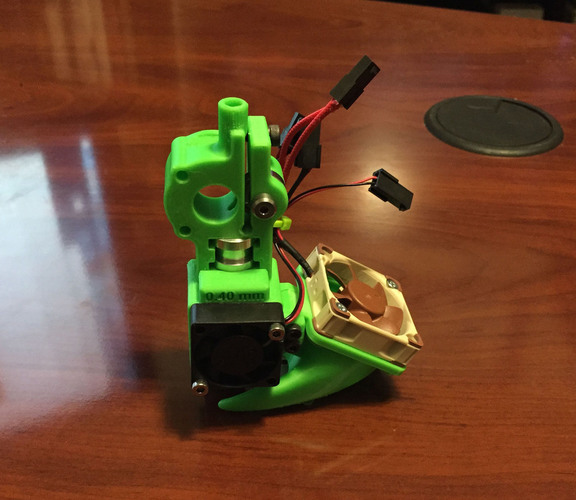
E3D v5 Dual Duct Assembly for Makergear M2 - UPDATED
pinshape
UPDATE: Several users requested a mirrored version of my 30 mm and 40 mm ducts, which I have now created and labeled as "Mirrored". These ducts mount the 40 mm duct on the left side of the E3D hot end. I've updated my E3D v5 hotend duct design to include improvements inspired by my previous work on the E3D v6. Although this design is specifically for the MakerGear M2, several users have successfully adapted it to other printers, including Robo 3D models. If you're using a different brand of printer and would like me to make modifications to this design, please let me know. I recently designed a duct for the E3D v6, incorporating several key improvements. For those who haven't upgraded to the E3D v6, I've applied these enhancements to my original v5 duct design. The extruder is designed for 1.75mm filament and comes in two versions: one for 2.0 mm I.D. PTFE tubing at the top, and another for 3.0 mm I.D. PTFE tubing. The latter allows kinked filament to pass through more easily. You can find both options with and without supports or pads. Most of the supports and pads are easy to remove by hand or with needle-nose pliers. To ensure smooth operation, pass a 2.0 mm diameter circular file down the length of the filament shaft in the extruder. This helps prevent minor blockages that can cause filament jams. This design was influenced by rsilvers' M2 extruder and cmenard's adaptation for the E3D v6. I've carefully aligned the extruder to fit precisely with the hot end, requiring minimal force but a specific angle of approach. It provides a firm hold on the hotend, surpassing the E3D v6 extruder in this regard. I've also reduced the size of the restraining block on top of the 30 mm fan duct, taking into account the geometry of my original E3D v5 extruder design. To help identify nozzle diameters, I've added labels to the top of some ducts. I hope you find this design as effective as I do. I noticed a significant improvement in shell smoothness and extrusion consistency immediately after implementing it. Please share your feedback or suggestions for improvements. Instructions: Print the extruder with supports to ensure a clean print. I've tested this approach multiple times, and it requires minimal pads and supports. The support elements should peel away easily, taking only a minute or two to clean up. The most time-consuming part of cleanup is passing a 2 mm diameter circular file down the filament path to remove any strings that could lead to filament jams. The 40 mm duct prints well without supports but may produce strings with smaller extrusion nozzle diameters. I've successfully printed it using 0.35mm nozzles, although 0.30mm and 0.25mm nozzles may exhibit some internal stringiness. The 30 mm duct includes built-in supports. I did not provide a version without support because this orientation produces the strongest form of the duct, which requires support during printing. The parts are finely fitted, so if your printer is off-calibrated, you may encounter difficulties getting the E3D hotend to fit the extruder. After printing this design over 100 times using various plastics and extruder diameters, I found that this configuration performed consistently in terms of fit and hold.
With this file you will be able to print E3D v5 Dual Duct Assembly for Makergear M2 - UPDATED with your 3D printer. Click on the button and save the file on your computer to work, edit or customize your design. You can also find more 3D designs for printers on E3D v5 Dual Duct Assembly for Makergear M2 - UPDATED.
