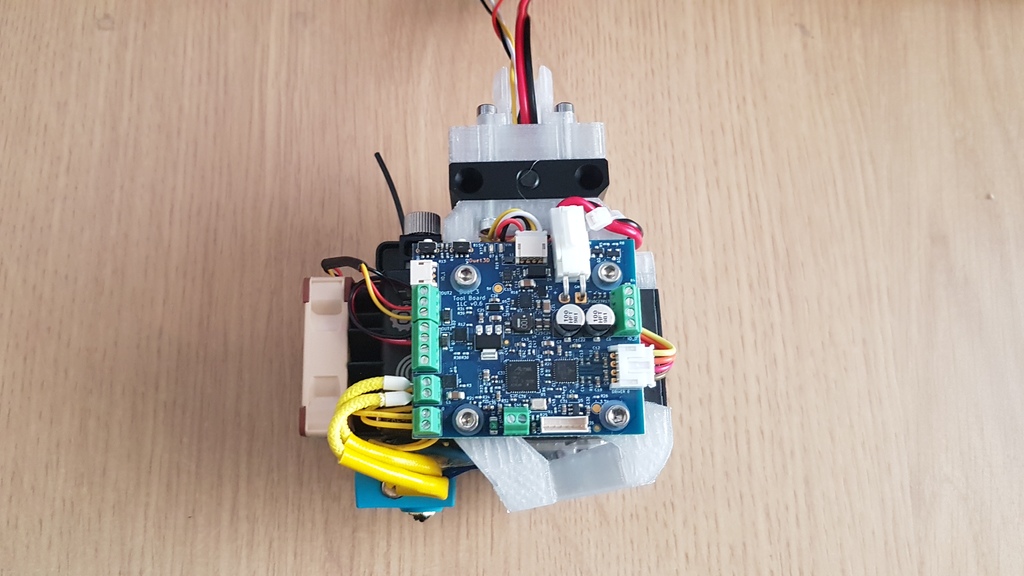
E3D'S ToolChanger - Hemera Tool using Duet 3 Tool Board
thingiverse
This kit includes several components: * Two modified parts, Hemera Dock Bracket and Hemera PCF Duct, from Thingiverse (https://www.thingiverse.com/thing:4008778), which accommodate a Duet 3 Tool Board on the Hemera tool. I would like to thank Greg Holloway for his original design. In addition to the components listed in Greg's design, you will need four M3x10mm cap-head screws (these replace four of the M3x6mm screws listed by Greg) and the four M3 nylon washers supplied with the Tool Board. * TCHemeraDock: This is a dock adapter that shifts the dock up 15mm and left 8mm, so that the tool in position 2 has a few mm gap for airflow to the fan. To secure it, you will need two M3x25mm cap-head screws, two M3x16mm cap-head screws, and two M3 nuts. It can be printed without support, although one of the nut traps may require some cleaning up. There is a deliberate single-layer bridge between the nut traps at the bottom and the 3mm holes at the top, which will need to be drilled out to 3mm. To assemble, first put screws through the top and use them to pull nuts into the nut traps. Then remove the screws and secure the part to the tool changer top plate (with the nut traps underneath) using the 16mm screws. Finally, use the 25mm screws to fasten the plastic cable holder and the metal dock part on the top. * TCDockSpacer: This is an earlier version of the TCHemeraDock that just shifts the dock up 15mm. It only works in dock positions 2 and 3, not 0 and 1. So you don't need it if you use the TCHemeraDock instead. If you do use it, you will need two M3x30mm screws to fasten it. * BowdenDockExtender: If you have a mixture of Hemera and Bowden tools then the Bowden tools docks will need to be moved forwards so that the Bowden tools can be picked up without the X axis fouling on the hemera tools. Fitting it requires two M3x18mm cap-head screws with plain nuts and washers, and two M3x25mm screws. The upper part deliberately has 1 layer of plastic between the screw holes at the bottom and the nut traps at the top, to avoid the need for support. This will need to be drilled out. * Double Dock Brace: Greg's design uses a single dock brace connecting one top corner of the tool plate to the dock receiver. I found this lacked rigidity, and originally I added a second one to connect the other top corner of the tool plate to the dock receiver. When I wanted to add filament monitors, the second dock brace got in the way. Now I use one double dock brace, which has a cutout to accommodate filament monitors. Note that fan outputs on the tool board are 12V. So you will need 12V fans on the Hemera tool, but a 24V heater cartridge. The fans can optionally have tacho outputs. I replaced the 24V Hemera heatsink cooling fan by a Noctua NF-A4x10 FLX 12V and the blower fan by this https://www.amazon.co.uk/WINSINN-Turbine-40x10mm-Brushless-Bearings/dp/B07RSV5LTH/ref=sr_1_4.
With this file you will be able to print E3D'S ToolChanger - Hemera Tool using Duet 3 Tool Board with your 3D printer. Click on the button and save the file on your computer to work, edit or customize your design. You can also find more 3D designs for printers on E3D'S ToolChanger - Hemera Tool using Duet 3 Tool Board.
