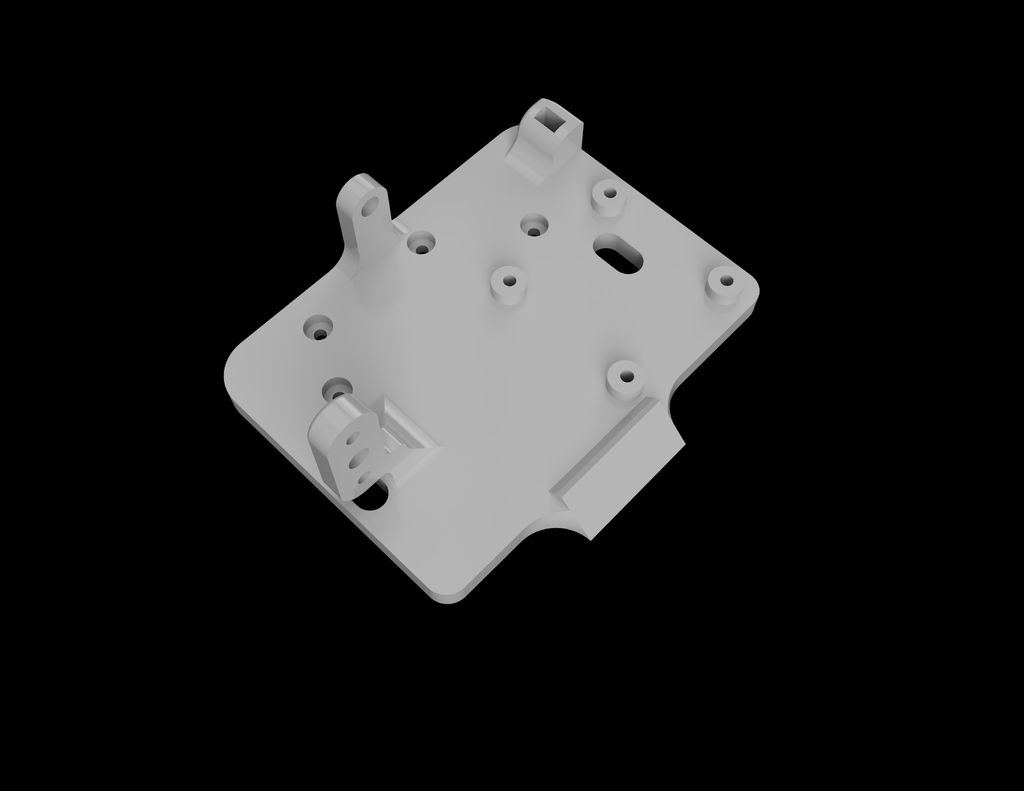
E3D Hemera mount for MDD 1.3 by Printermods + Linear Rail + Led Lights
prusaprinters
<p>I purchased an MDD 1.3 mod + linear rail adapter from printermods.com, btw highly recommend you checking them out. This made my whole setup wheels free on my Ender 5. Anyways I saw a couple of mounts here and even from printermods.com customers where the Hemera by E3D was positioned in a counter intuitive position, basically installed backwards which I didn't like. Having drawn inspiration from several designs available already on thingiverse I needed a mount with less holes and which fit my needs. Furthemore I had a small led light purchased as well from printermods.com and i needed it angled at my hotend for it to be most beneficial. So here is what I came up with. I will continue uploading versions of the mount, and feel free to make requests too in comments I am happy to modify this for you and create a special version if needed. There is even a zip tie for your cables.</p> <p>Special notes:</p> <ol> <li>Print with a heat resistant material. I did it from PETG, if you have anything stronger go for that, as long as it doesn't flex.</li> <li>Only compatible with PrinterMods MDD 1.3 mount. Reason is that between 1.2 and 2.3 they shifted the holes slightly.</li> <li>Only aimed at people with linear rails.</li> <li>Should work for most printers.</li> <li>BLTouch offset is 40mm to the left of the nozzle (-40).</li> <li>This mount is only compatible with the standard E3D Hemera kit, not Volcano version.</li> <li>When auto homing and BLTouch iis triggered still 1-2mm space remains before nozzle, so placement of BLTouch is spot on.</li> <li>Cooling duct can be found on thingiverse. But really anything that is Hemera compatible will work for you.</li> <li>Has a 45 degree angled led light space, it sits above nozzle so won't cause issues.</li> <li>Has only 4 screws tightening it to MDD mod, just for stability, but even 2 would probably be enough, i just was extra careful.</li> <li>Standard Hemera kit should have all you need except for the bolts.</li> <li>Your belt cables go through the Printer Mods mount and through this mounts hols with enough clearance for everything.</li> <li>Has bowden tube holder</li> <li><p>Has place for a zip tie. (Will upload photos in coming days on how this looks fully assembled) TIP: recommend routing the bltouch cables in such a way that it doesn't collide with fans. I secured one bolt on the side which is closer to the place, then turned BLTouch, connected wires, pot them under the arm and twisted BLTouch back and screwed it in place. Easiest way and no issues after.</p> <h3>Print Settings</h3> </li> </ol> <p><strong>Printer Brand:</strong></p> <p>Creality</p> <p><p class="detail-setting printer"><strong>Printer: </strong> <div><p>Ender 5</p></div><strong>Rafts:</strong></p> <p>No</p> <p><p class="detail-setting supports"><strong>Supports: </strong> <div><p>Yes</p></div><strong>Resolution:</strong></p> <p>0.2</p> <p><p class="detail-setting infill"><strong>Infill: </strong> <div><p>90</p></div><br/> <strong>Filament:</strong><br/> [</p> <h3> Gembird PETG ](http://www.amazon.com/s?url=search-alias&field-keywords=Gembird+PETG&tag=thingiverse09-20) Black <br/> <p class="detail-setting notes"><strong>Notes: </strong> </p><div><ol><li>Supports on build plate only. </li> Infill of your own choice but I went 90% to eliminate any possible bending of the mount during usage. Print mount on it's back with all of the sticking out pars pointing upwards Tip for removing supports from the back of the mount. You can do it by screwing in a bolt from the other side of the mount and cleaning up. You don't need to be gentle there, this part of the mount will be against the metal one from Printermods hiding any possible deformations you make away. Things you need</ol></div></h3> <p>Nuts:<br/> 2xM3 nuts for the BLtouch<br/> 2xM3 nuts for top holes of the mount, secured from other side of the mount</p> <p>Screws:<br/> 2xM3x8mm screws for the Bltouch<br/> 2xM3x10mm for top holes of the mount<br/> 2xM3x12mm screws for the middle of the mount, the one securing this mount to the linear rail adapter by printermods.<br/> 4xM3x6mm screws from the back of the mount to secure hemera in place. (Don't over tighten, check that Hemera is not moving and is secure and leave at that or you can break Hemera as per their own instructions)</p> <h3> Installation Instructions</h3> <ol> <li>Secure Hemera to mount from the back</li> <li>Secure BLTouch (can be done later)</li> <li>If you have a led light feel free to glue it in place or use double sided tape</li> <li>Put belt inside the hols and mount in place by securing with the remaining 4 bolts.</li> </ol> </p></p></p> Category: 3D Printer Parts
With this file you will be able to print E3D Hemera mount for MDD 1.3 by Printermods + Linear Rail + Led Lights with your 3D printer. Click on the button and save the file on your computer to work, edit or customize your design. You can also find more 3D designs for printers on E3D Hemera mount for MDD 1.3 by Printermods + Linear Rail + Led Lights.
