E180 skr1.3 mod - NOW HEATED BED
thingiverse
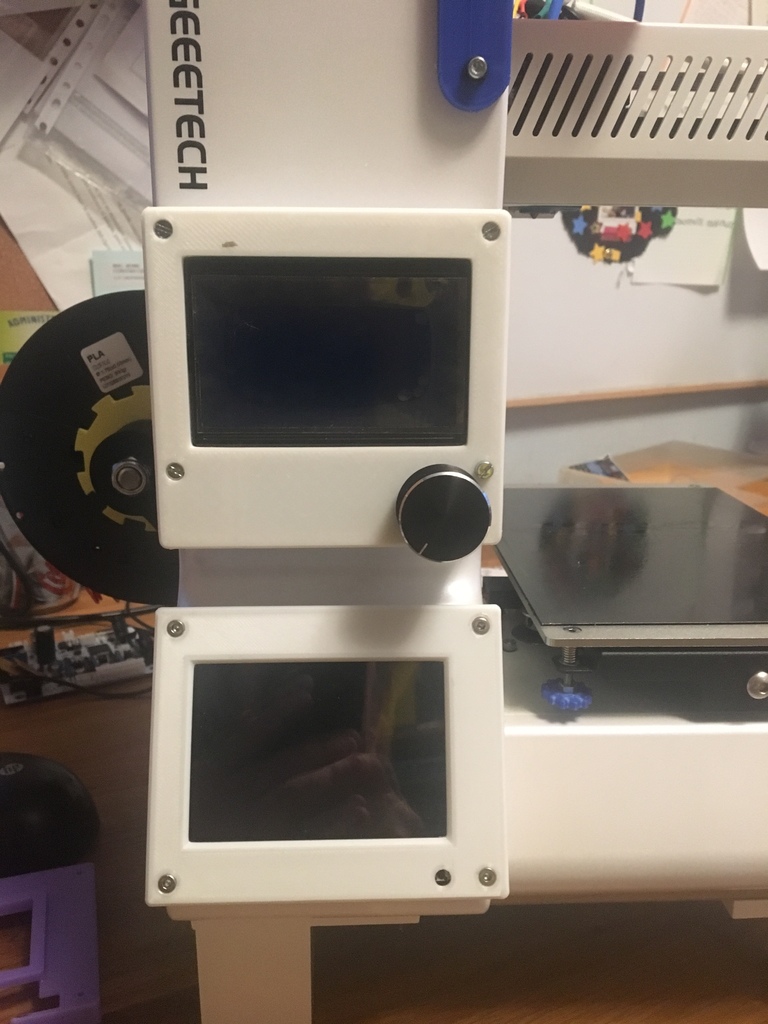
https://www.buymeacoffee.com/apak Geeetech E180 mod using Marlin 2.0 and TMC 2208 in UART mode. Upgraded with hotend E3D V6, extruder BMG, board SKR 1.3, and heated bed. Board: Bigtreetech SKR 1.3: https://bit.ly/2WTDNcl Display 1: Bigtreetech TFT35 Display 2: CR Ender 3 LCD Drivers: TMC 2208 (UART mode requires welding a jumper) Extruder: BMG clone: https://bit.ly/2X0En8a Hotend: V6 Threaded clone: https://bit.ly/2K8lzxJ Layer fan: 30x30x10 radial fan: https://bit.ly/2QXEUCB Heated Bed: http://bit.ly/2CBrEgn Hotend STL designed by Carlos Arruti, work in progress. I'm only a beta tester. Info sources: E180 http://www.geeetech.com/wiki/index.php/Geeetech_GTM32_Board https://github.com/Geeetech3D/Diagram/blob/master/3DPrinter_A30_E180/Hardware_GTM32_MINI_S.pdf Bigtreetech https://github.com/bigtreetech/BIGTREETECH-TFT35-V1.2 https://github.com/bigtreetech/BIGTREETECH-SKR-V1.3 NOTES: As you can see, you need 8 wires for the hotend (2 wires for each fan, 2 for thermistor, and 2 wires for heater). E180 extruder board only has 6 wires, so I had to figure out how to do it. It appears that the 2 fans and the heater share VCC. So, there's a VCC share on the heater + connector for the three of them. Bear in mind this: VCC is taken from HEATER0 + connector for cooling fan, part-cooling, and heater block. Be careful about polarity when connecting heater cables. See the handwriting picture, schematics labeled as "PLACA" with number 6 pins. Then, for the fans, only need to connect the negative (-) pins of the connector. For the heater, I preferred to cut the cables out of the stock connector and weld them with a proper cable to HE0 pins of the board. To get USB access, I just cut a USB cable and welded cables to the stock back USB board, so I can reuse the stock USB port at the back of the printer. Marlin 2: Babysteeping enabled Thermal runaway enabled Software endstop enable (size of 130x130x131) THANKS to Carlos Arruti for letting me share the V6 STL's. UPDATE: I noted that the TFT display is not very handy in advanced Marlin settings, so I opened the drawer and found an old CR Ender 3 LCD. So, I decided to mount it. There are two STLs as well for this LCD (front and back). If you decide to set it up just like me, you'll only print the front case STL. But if you'd like to set the LCD in the bottom position, you'll need the back STL too. UPDATE 2: Added a 40mm silent fan, enabled only when drivers are enabled and last 60 seconds after the last driver is disabled. UPDATE 3: Now case fan connected to always-on fan, and installed a heated bed. Upgrade to a 12V10A PSU. UPDATE 4: Tried and ESP3D module, didn't like it much. Cheap buy useless. So I went for a Raspberry Pi with Octoprint.
With this file you will be able to print E180 skr1.3 mod - NOW HEATED BED with your 3D printer. Click on the button and save the file on your computer to work, edit or customize your design. You can also find more 3D designs for printers on E180 skr1.3 mod - NOW HEATED BED.
