E-Gor
thingiverse
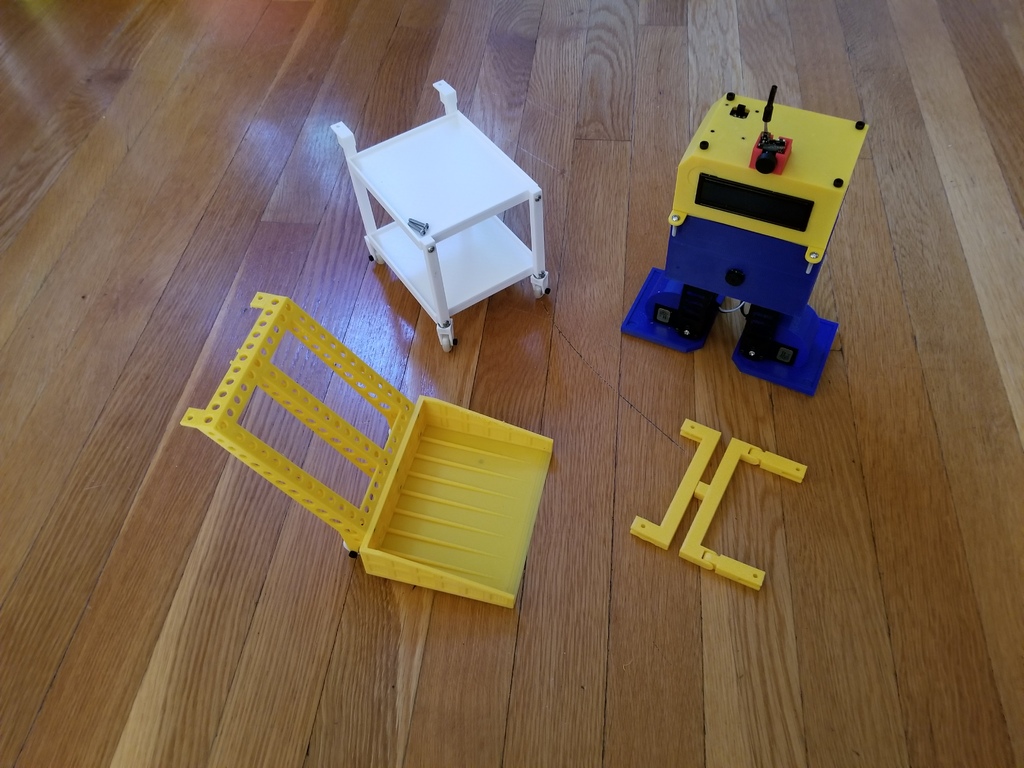
All Evil Genius wannabes need an assistant - introducing E-Gor! A remix of the Chip-E kit from Robotgeek. Having a lower back injury limits my sitting, standing, etc. It also limits other things like how long I can spend drawing designs or documenting them. E-Gor helps with that. He checks how well the Roomba is cleaning and looks for cat toys (of which there are many). He even recovers crashed drones (<100mm) and has a small cart to push my drink around. First, you'll need a fix to the build instructions. Step 6 in the Getting Started Guide (Tuning Chip-E) is basically a trial-and-error process. You start from a reasonable position. A good Evil Genius knows you don't begin building a nuke by taking a cube of plutonium and putting a stick of dynamite in it. I took the wonderful Otto Calibrate code that J. Lopez Verdejo wrote and adapted it to Chip-E, translating the menus to English. Just upload this code to any Chip-E and run it with the Serial Monitor open. Be sure to set the correct baud rate and carriage return. Type a ? for help at any menu. Use the edge of a metal ruler across the feet and along the back edge to get a good base line. Adjust until it seems fairly squared up. Then type info at the main menu to list the initial values to plug into the Chip-E Gamepad code as per step 6. If your primary surface is hardwood/tile floor like I have, you'll need an upgrade. The hard plastic tends to slip somewhat. That's what leftTrac and rightTrac are for. They're printed in ninjaflex and attached with double-sided tape. No Mad Scientist trusts his assistant and you shouldn't trust E-Gor either. He's outfitted with his own goPro-like camera. Of course, a goPro would be too large, so I used an FPV camera (wolfwhoop wt05). The connector will have to be cut off, fed through the holes of the cameraHolder and HeadFPV, then new wires with jumpers soldered on. Make sure to use shrink wrap to cover the wires. To attach the frontLegs to the wheelHolders, use two 10mm x 4mm bearings. Press the center of the bearing onto the 3mm peg at the bottom of the front leg. Then press the bearing into the hole in top of the wheelHolder. To summarize, to build E-Gor you'll need: * Chip-E kit from RobotGeek or equivalent mechanical and electronic components * All of the 3-D printed parts except the Head and the Top (to use Cart and Dozer) * HeadFPV * cameraHolder * newTop To reduce slippage, you'll also need: * leftTrac * rightTrac To use the Cart and/or Dozer, you'll need a Stabilizer. For the Cart, you'll need two Trays, two frontLegs, two rearLegs, and two wheelHolders (the backLegs have the wheelHolders already attached). Enjoy your E-Gor, but never trust him!
With this file you will be able to print E-Gor with your 3D printer. Click on the button and save the file on your computer to work, edit or customize your design. You can also find more 3D designs for printers on E-Gor.
