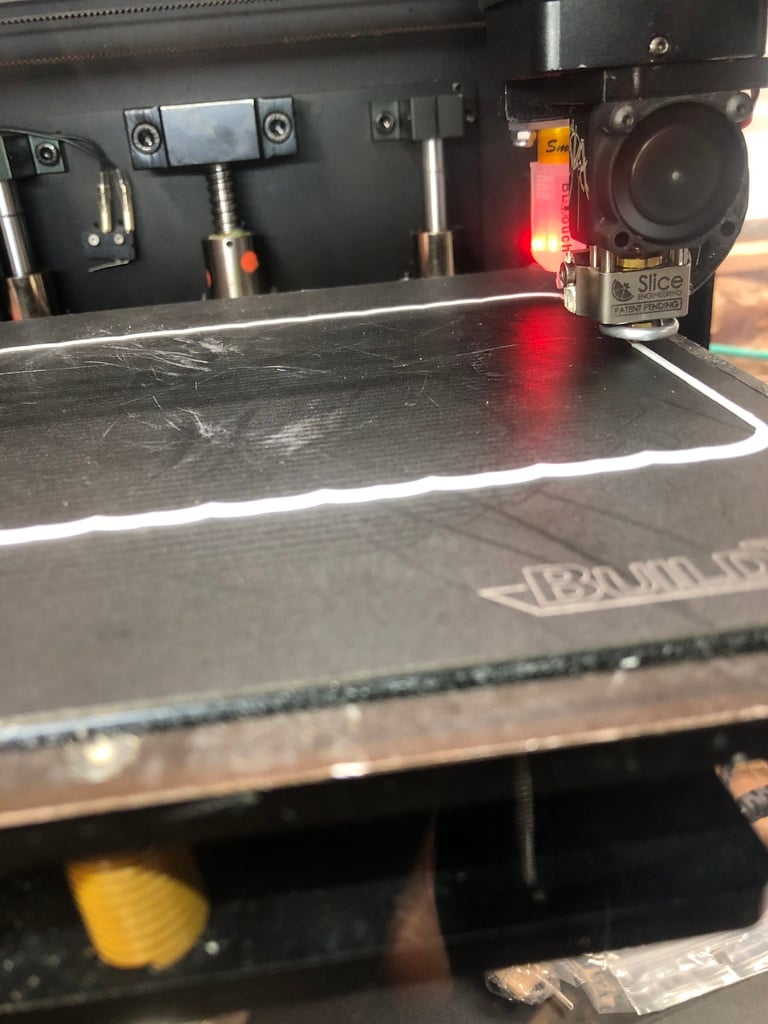
Duplicator 6 Monoprice Ultimate Mosquito Adapter
thingiverse
This adapter connects the mosquito hotend from Slice engineering (https://www.sliceengineering.com/shop/the-mosquito-hotend) to various 3D printers. It works on Duplicator 6 and Monoprice Ultimate models without needing to disassemble the gantry. This design ensures that no permanent changes are made, resulting in a loss of less than 1 inch of z-height. The adapter also includes a bl-touch mount, which adjusts the probe offset to zero when oriented correctly. A cooling fan is being added, but for now, a Berd air pump is used with a hole drilled into the corner of the adapter for the tube to pass through. The mosquito hotend allows for more detailed prints than the default hotend and can handle higher temperatures, even with an enclosure. It also enables one-tool nozzle changes. The 50W heater core and boron paste are recommended for this setup. The existing PT100 thermistor is sufficient in this hotend configuration. However, wiring modifications may be necessary to match the interface board's connection requirements. DuetWifi users will find that their wiring needs minimal adjustments since the DuetWifi supports most main boards by default. To order a metal and kit version of this mount, please visit 695main.com/metal-mounting-adapter and sign up for interest. If there is enough interest, it will be produced in aluminum. Parts needed: * 2 x M2.5 brass inserts (https://www.mcmaster.com/94180a321) * 2 x M2.5 screws (note: longer ones can also work to some extent) (https://www.mcmaster.com/#catalog/91290A100) * 4 x M3 8mm screws (https://www.mcmaster.com/91290a113) Instructions: 1. Print the adapter and check its fit by sliding it down the tube where the filament would go. 2. Using a soldering iron, melt the brass inserts into the holes next to the raised portion of the adapter from the side of the raised portion. Stop when the insert is almost through but not quite, allowing for additional support. 3. Attach the hotend by adding screws from inside the support on the hotend up into the adapter. 4. Remove all existing hardware from the printer's bottom gantry and remove the wiring. 5. Loosen or remove the locking bolt that holds the z-axis in place to prevent it from collapsing the filament hole. 6. Attach the assembly to the gantry using 4 screws, securing it to the bottom. 7. Wire the hotend up, re-level your printer, adjust your z screw (you may need a longer one to trigger the z-switch), or use the bl-touch adapter and adjust accordingly. Cable ties can be used to hold wires flush against the gantry. Note that the cooling fan can stick out in front or under the gantry; it doesn't make a difference, as the Y limit switch triggers before the fan hits anything.
With this file you will be able to print Duplicator 6 Monoprice Ultimate Mosquito Adapter with your 3D printer. Click on the button and save the file on your computer to work, edit or customize your design. You can also find more 3D designs for printers on Duplicator 6 Monoprice Ultimate Mosquito Adapter.
