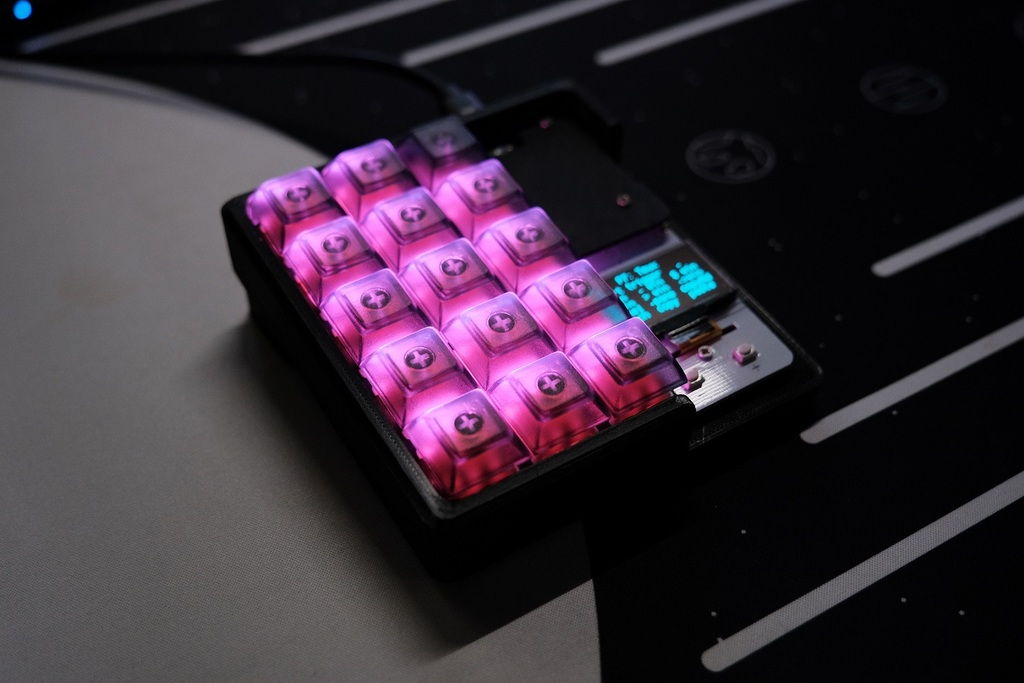
duckyPad Case v.1.1
prusaprinters
<p><strong>Parts:</strong></p> <p>Case: Self explanatory.</p> <p>Plate: Can replace the stock plate, must be used with the plate support.</p> <p>Plate support: Adds rigidity to the plate to prevent it from bending or cracking, optional if using the stock plate but recommended. Place between the PCB and the plate.</p> <p>Feet: Adjust the angle of duckypad. Direction is when the bottom of the case is facing up. (You will know they're at the wrong side if they don't sit flush against a flat surface)</p> <p><strong>Printing instructions:</strong></p> <p>Print with normal support at the bottom only, there's no need for support for the cable port.</p> <p>Make sure that the tolerance of your printer is calibrated so that the feet can be inserted smoothly and will still remain in place after inserted. Adjust the scale of the case feet in the slicer if needed.</p> <p><strong>Installation instructions:</strong></p> <p>Tools needed: everything in the kit + tweezers (to remove the support) + needle nose pliers (to adjust the fasteners).</p> <p>User the tweezers to remove the support in the mounting holes and make sure that it's clear of plastic.</p> <p>Follow the instructions in the main guide, instead of installing the 8mm screws on the back plate, install it directly into the case, do not install the back plate.</p> <p>Follow the rest of the install guide, use the pliers to hold the standoffs in place, and screwdriver to screw in the screw.</p> <p>Make sure the 8mm screws are straight and adjust accordingly, do not force the PCB into place.</p> <p>Stick the anti-slip pads at the bottom of the case and feet after installing.</p> <p><strong>Dissembling:</strong></p> <p>Should be pretty straight forward, loosen the screws at the bottom of the case before taking out the PCB.</p> <p><strong>Change log:</strong></p> <p>v.1.0: Initial design.</p> <p>v 1.1: Minor aesthetic changes, same functionally same as v1. Aligned one of the bottom round pcb support. Changed case extrude so that it's the same length as the plate at the bottom.</p> <h3>Print Settings</h3> <p><strong>Printer Brand:</strong></p> <p>Creality</p> <p class="detail-setting printer"><strong>Printer: </strong> <div><p>Ender 3 Pro</p></div> <p><strong>Rafts:</strong></p> <p>No</p> <p class="detail-setting supports"><strong>Supports: </strong> <div><p>Yes</p></div> <p><strong>Resolution:</strong></p> <p>0.2</p> <p class="detail-setting infill"><strong>Infill: </strong> <div><p>25%</p></div> <p><strong>Filament:</strong> Generic PLA Any</p> <p><br/> <p class="detail-setting notes"><strong>Notes: </strong></p> </p><div><p>~12 hours of printing time using the settings specified here, including time to print plate and support.</p></div> </p></p></p> Category: Electronics
With this file you will be able to print duckyPad Case v.1.1 with your 3D printer. Click on the button and save the file on your computer to work, edit or customize your design. You can also find more 3D designs for printers on duckyPad Case v.1.1.
