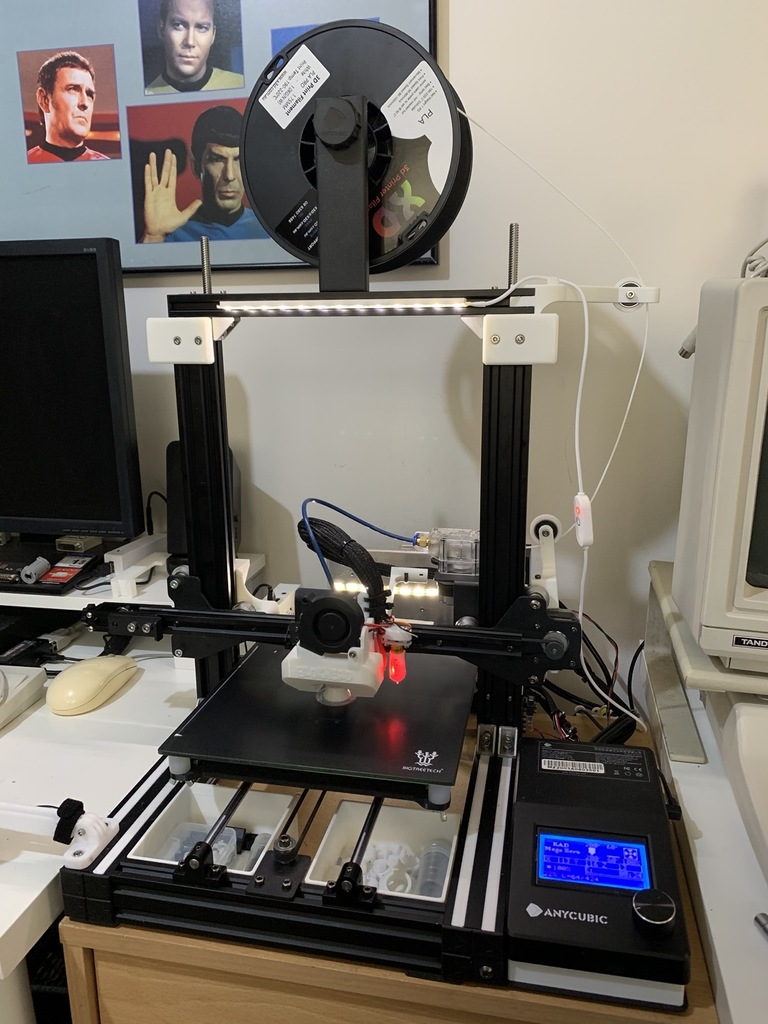
Dual Z Screw upgrade Guide for the Mega Zero v1.0
prusaprinters
<p>Ladies and Gents, This is my<strong>Dual Z Screw upgrade for the Mega Zero v1.0</strong>.</p> <p><strong>UPDATED</strong>: 29th March 2021</p> <p>I have replaced only some of the OEM parts and tried to make sure critical parts are identical - here are the parts I'm<em>currently</em> using:</p> <h3><strong>Printed Parts:</strong></h3> <p>Printed 2nd Z-screw mount and Spacers x1:<br/> <a href="https://www.thingiverse.com/thing:4804383">https://www.thingiverse.com/thing:4804383</a></p> <p>X-Gantry Crash leveler x2:<br/> <a href="https://www.thingiverse.com/thing:4808777">https://www.thingiverse.com/thing:4808777</a></p> <h3><strong>Purchased Parts:</strong></h3> <p>8mm pitch Lead Screw with Anti-backlash Nut x2:<br/> <a href="https://www.bilby3d.com.au/DispProd.asp?CatID=&SubCatID=106&ProdID=ptRodLead8x400">https://www.bilby3d.com.au/DispProd.asp?CatID=&SubCatID=106&ProdID=ptRodLead8x400</a></p> <p><strong>NOTE:</strong> 400mm tall Z-screws will hit your filament roll - I used T-nuts to move the holder to the center of the frame. 350mm is a better length if you can find good quality units with Anti-backlash Nuts. The units I used come with 4mm, non-threaded holes on the mount. You can either use M3 bolts + nuts or just tap them to use M4 bolts (which is what I did).<br/> <a href="https://cdn.thingiverse.com/assets/5b/86/24/a0/97/2021-03-29_14.04.45.jpg">https://cdn.thingiverse.com/assets/5b/86/24/a0/97/2021-03-29\_14.04.45.jpg</a></p> <p>Adjustable Metal Z-Axis T8 Lead Screw stabilizers x2:<br/> https://www.amazon.com/gp/product/B08T9PL29W/ref=ppx\_yo\_dt\_b\_asin\_title\_o00\_s00?ie=UTF8&psc=1</p> <p>NEMA 17 Stepper Motor x2:<br/> <a href="https://www.amazon.com.au/gp/product/B06XSYP24P/ref=ppx_yo_dt_b_asin_title_o02_s00?ie=UTF8&psc=1&tag=thingiverse09-20">https://www.amazon.com.au/gp/product/B06XSYP24P/ref=ppx\_yo\_dt\_b\_asin\_title\_o02\_s00?ie=UTF8&psc=1</a></p> <p>Aluminum NEMA 17 Stepper Mount x1:<br/> <a href="https://www.aliexpress.com/item/4001205490125.html?spm=a2g0s.9042311.0.0.51b34c4d6ySBzN">https://www.aliexpress.com/item/4001205490125.html?spm=a2g0s.9042311.0.0.51b34c4d6ySBzN</a></p> <p>5mm to 8mm Bore Flexible Couplers x2:<br/> <a href="https://www.amazon.com.au/gp/product/B083LD6Y5P/ref=ppx_yo_dt_b_asin_title_o02_s00?ie=UTF8&psc=1&tag=thingiverse09-20">https://www.amazon.com.au/gp/product/B083LD6Y5P/ref=ppx\_yo\_dt\_b\_asin\_title\_o02\_s00?ie=UTF8&psc=1</a></p> <p>Dual Z-Axis Stepper Wiring adapter x1 (only required for stock MZ1 Mainboard):<br/> I made my own using proto-board but you can buy a Y-cable for this.<br/> <a href="https://www.amazon.com.au/yotijar-Stepper-Motor-Cable-Duale/dp/B08D3XK4BR/ref=sr_1_1?dchild=1&keywords=stepper+motor+dual+cable&qid=1615243515&sr=8-1&tag=thingiverse09-20">https://www.amazon.com.au/yotijar-Stepper-Motor-Cable-Duale/dp/B08D3XK4BR/ref=sr\_1\_1?dchild=1&keywords=stepper+motor+dual+cable&qid=1615243515&sr=8-1</a></p> <h3><strong>Installation process for the second Z-screw:</strong></h3> <p>1/ Move the Z gantry up to about 180mm on the Z-axis<br/> 2/ Install the 2nd Z-Stepper motor - then attach the coupling to the stepper shaft and tighten it - leave a couple of mm between the top of the shaft and the landing for the Z-screw so they don't touch<br/> 3/ Install the z-screw into the coupling and tighten it<br/> 4/ install the screws mounting the z-screw Nut but leave them loose so it can move around<br/> 5/ Install your adjustable top z-screw shaft stabiliser onto the frame - ensure the shaft is straight (X-axis) before tightening the mounts. don't tighten Y-axis bolts yet.<br/> 6/ use the depth gauge on your digital calipers to measure the distance from the screw to the frame (Y-axis) just above the coupler.<br/> 7/ use that measurement to position the z-screw on the Y-axis in the top stabiliser and then tighten the bolts<br/> 8/ now that your z-screw is installed parallel to the frame, tighten the z-screw mount bolts attaching it to the X-gantry</p> <p>I'm using Nulon Extreme Performance Grease with PTFE to lubricate the Y-axis rails and the Z-screws:<br/> <a href="https://www.ebay.com.au/itm/Nulon-Extreme-Performance-Grease-with-PTFE-450g/313190833415?ssPageName=STRK%3AMEBIDX%3AIT&_trksid=p2057872.m2749.l2648">https://www.ebay.com.au/itm/Nulon-Extreme-Performance-Grease-with-PTFE-450g/313190833415?ssPageName=STRK%3AMEBIDX%3AIT&\_trksid=p2057872.m2749.l2648</a></p> <p>Now just enjoy results like this!<br/> <a href="https://cdn.thingiverse.com/assets/0d/1c/06/b3/ab/2021-03-29_15.37.08.jpg">https://cdn.thingiverse.com/assets/0d/1c/06/b3/ab/2021-03-29\_15.37.08.jpg</a></p> <h3> Print Settings</h3> <p><strong>Printer:</strong></p> <p>Anycubic Mega Zero</p> <p><strong>Rafts:</strong></p> <p>No</p> <p><strong>Supports:</strong></p> <p>No</p> <p><strong>Resolution:</strong></p> <p>0.2</p> <p><strong>Infill:</strong></p> <p>25% Cubic</p> <p><strong>Filament:</strong> X3D Pro PLA </p> Category: 3D Printers
With this file you will be able to print Dual Z Screw upgrade Guide for the Mega Zero v1.0 with your 3D printer. Click on the button and save the file on your computer to work, edit or customize your design. You can also find more 3D designs for printers on Dual Z Screw upgrade Guide for the Mega Zero v1.0.
